Linen Closet Organization
Proudly introducing…my first ever linen closet. Well, kinda. I had a mishmosh closet a few apartments ago that I used as a linen closet and as my coat closet so. There was that.
But this is a true linen closet that I stuffed the stuff I knew I wanted in there when I moved and didn’t touch it for awhile. It worked OK considering I don’t use much of the stuff on a daily basis anyway. But it was starting to get more and more disorganized so I bumped it up on my list of organizing projects.
And now I’m excited to share the details of it with you!
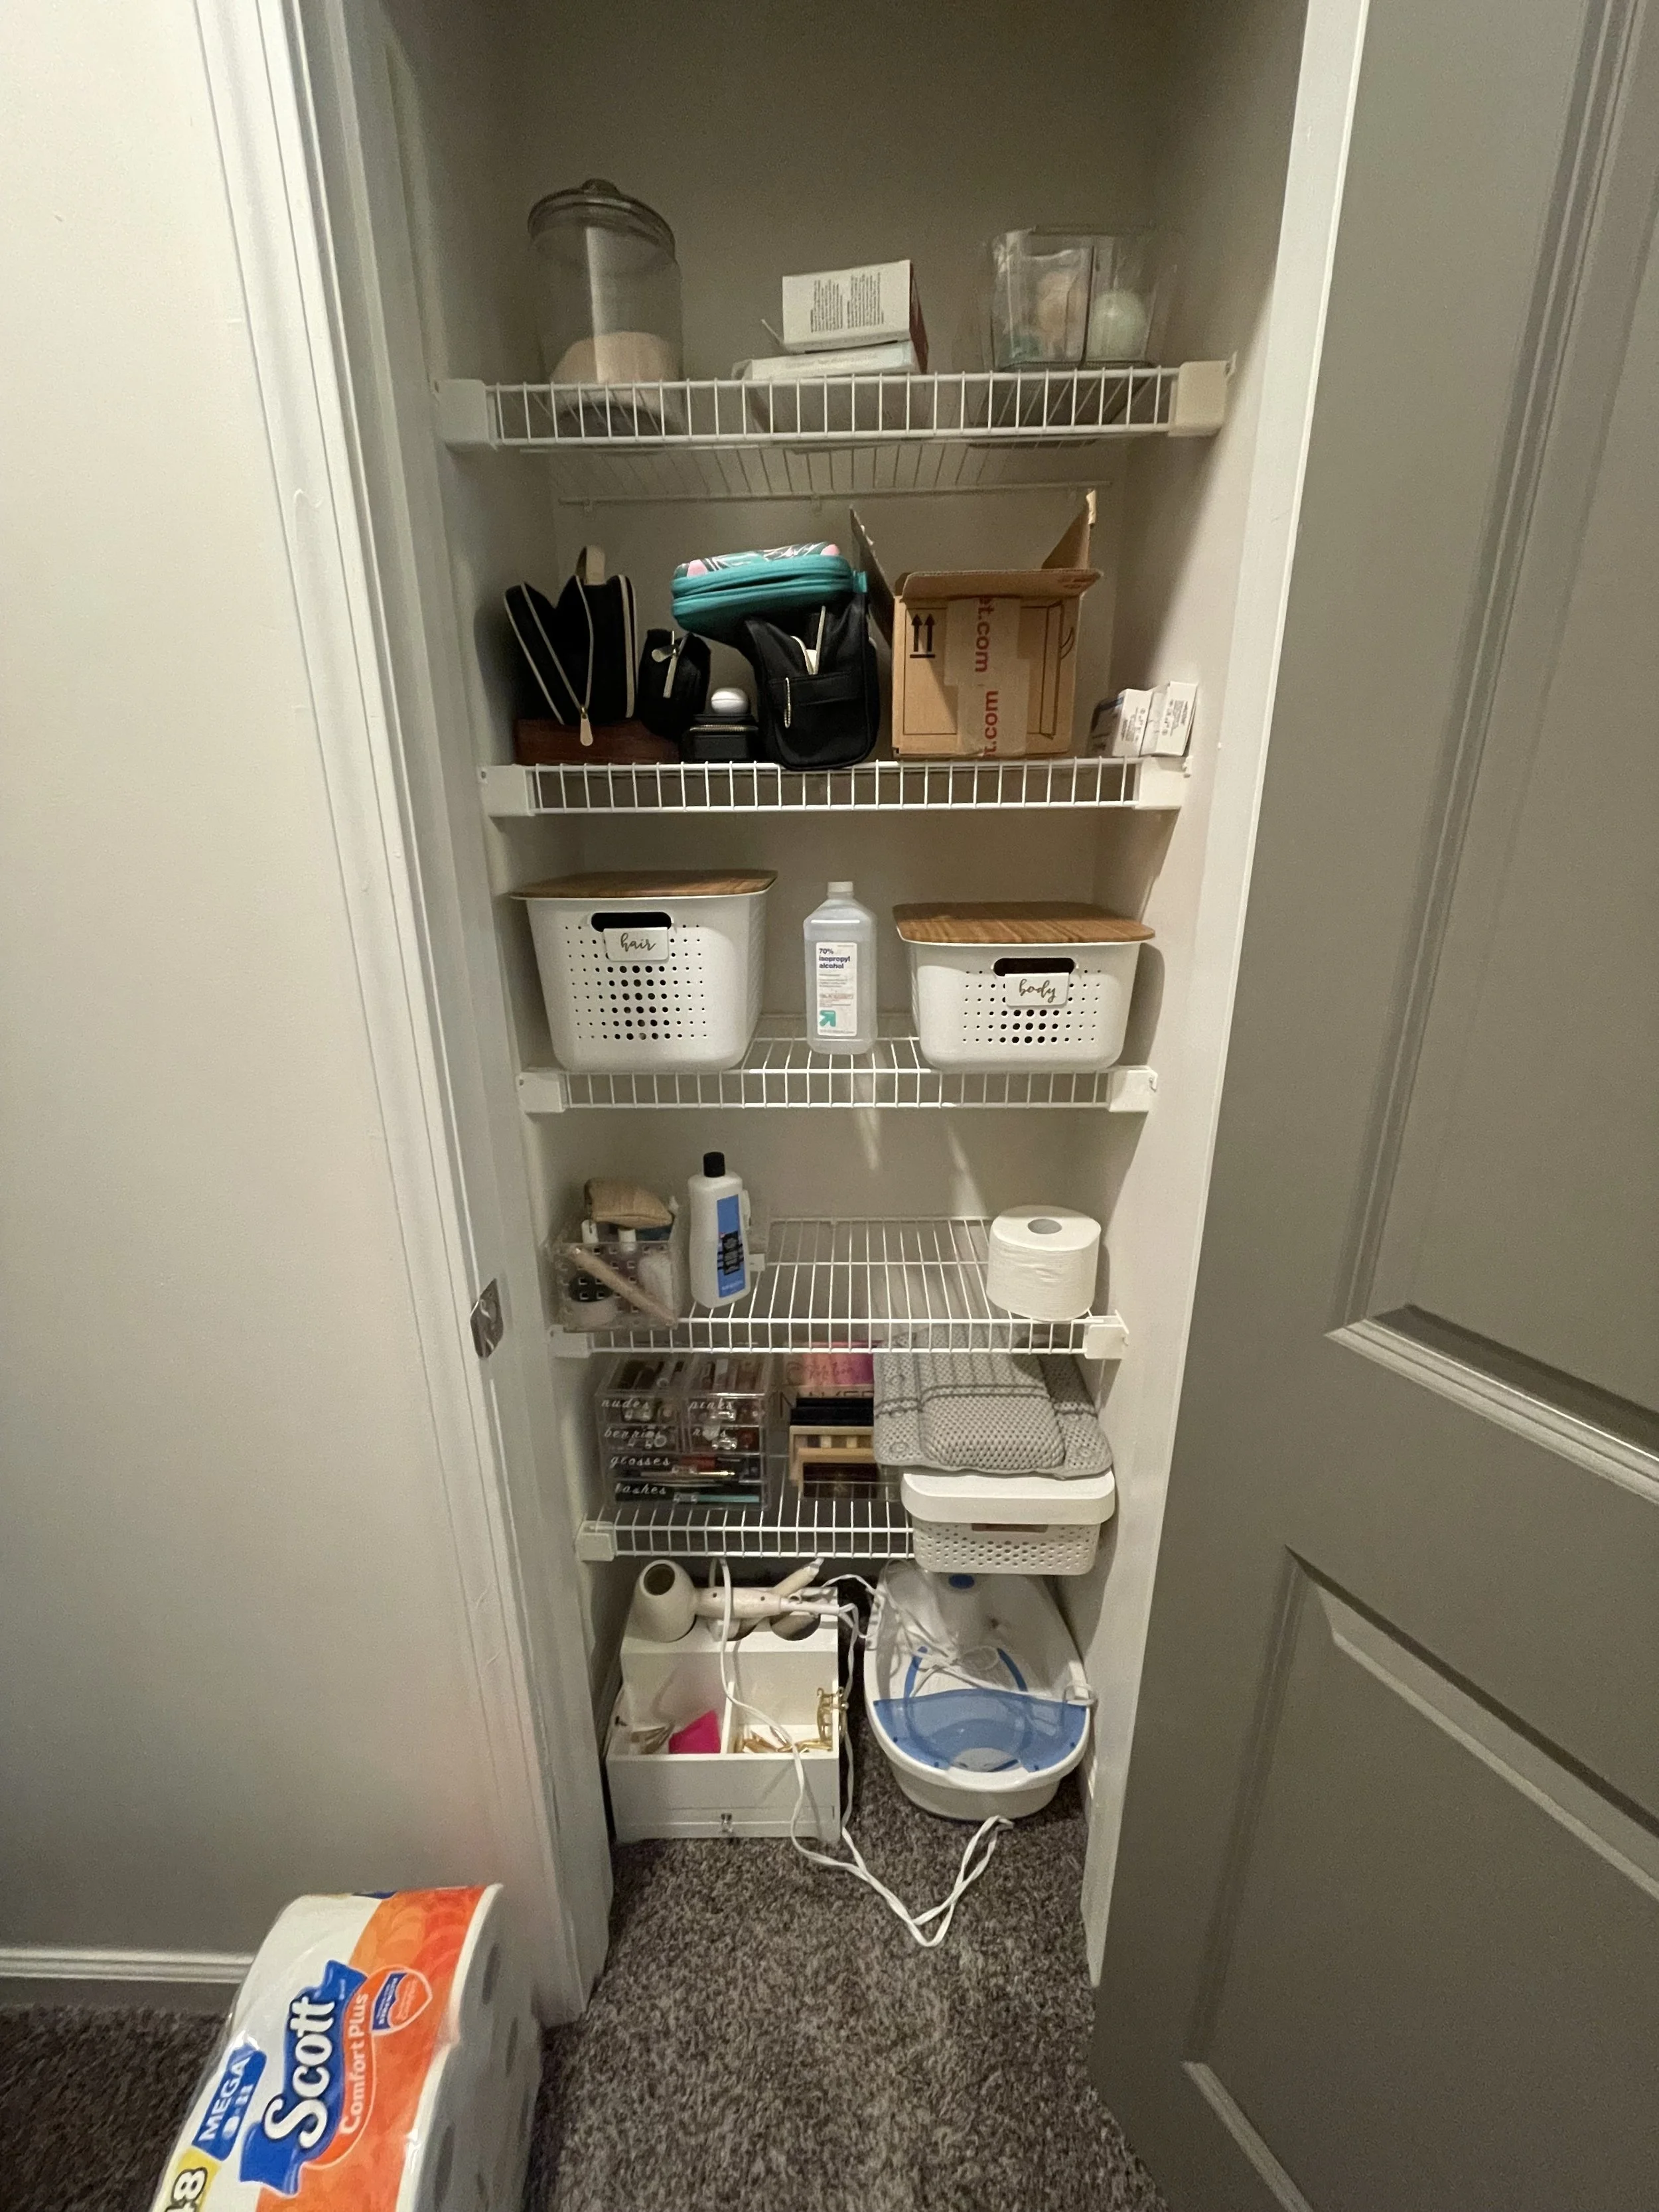
This is the before, showing that I didn’t have much of a system to it at all. I kept hair and body products in the baskets I had in my previous bathroom at eye level because I was reaching for them the most often. However, the hair tool organizer that stores my three tools didn’t fit on any of the shelves (with the tools in it, anyway) so that was driving me a little crazy to have to bend down* to grab them.
*For the record, I’m not necessarily that lazy that bending down is an annoying task. I’ve mentioned in past posts that I suffer from a rare brain disorder and also was diagnosed with POTS last year. So when I bend down, it either tends to trigger an awful head rush with subsequent migraine or usually makes me feel really lightheaded and dizzy. So placement of things I grab regularly is extra important to me. If you have any physical limitations, please consider them when setting up systems in your space. It’s more valuable than you may think!
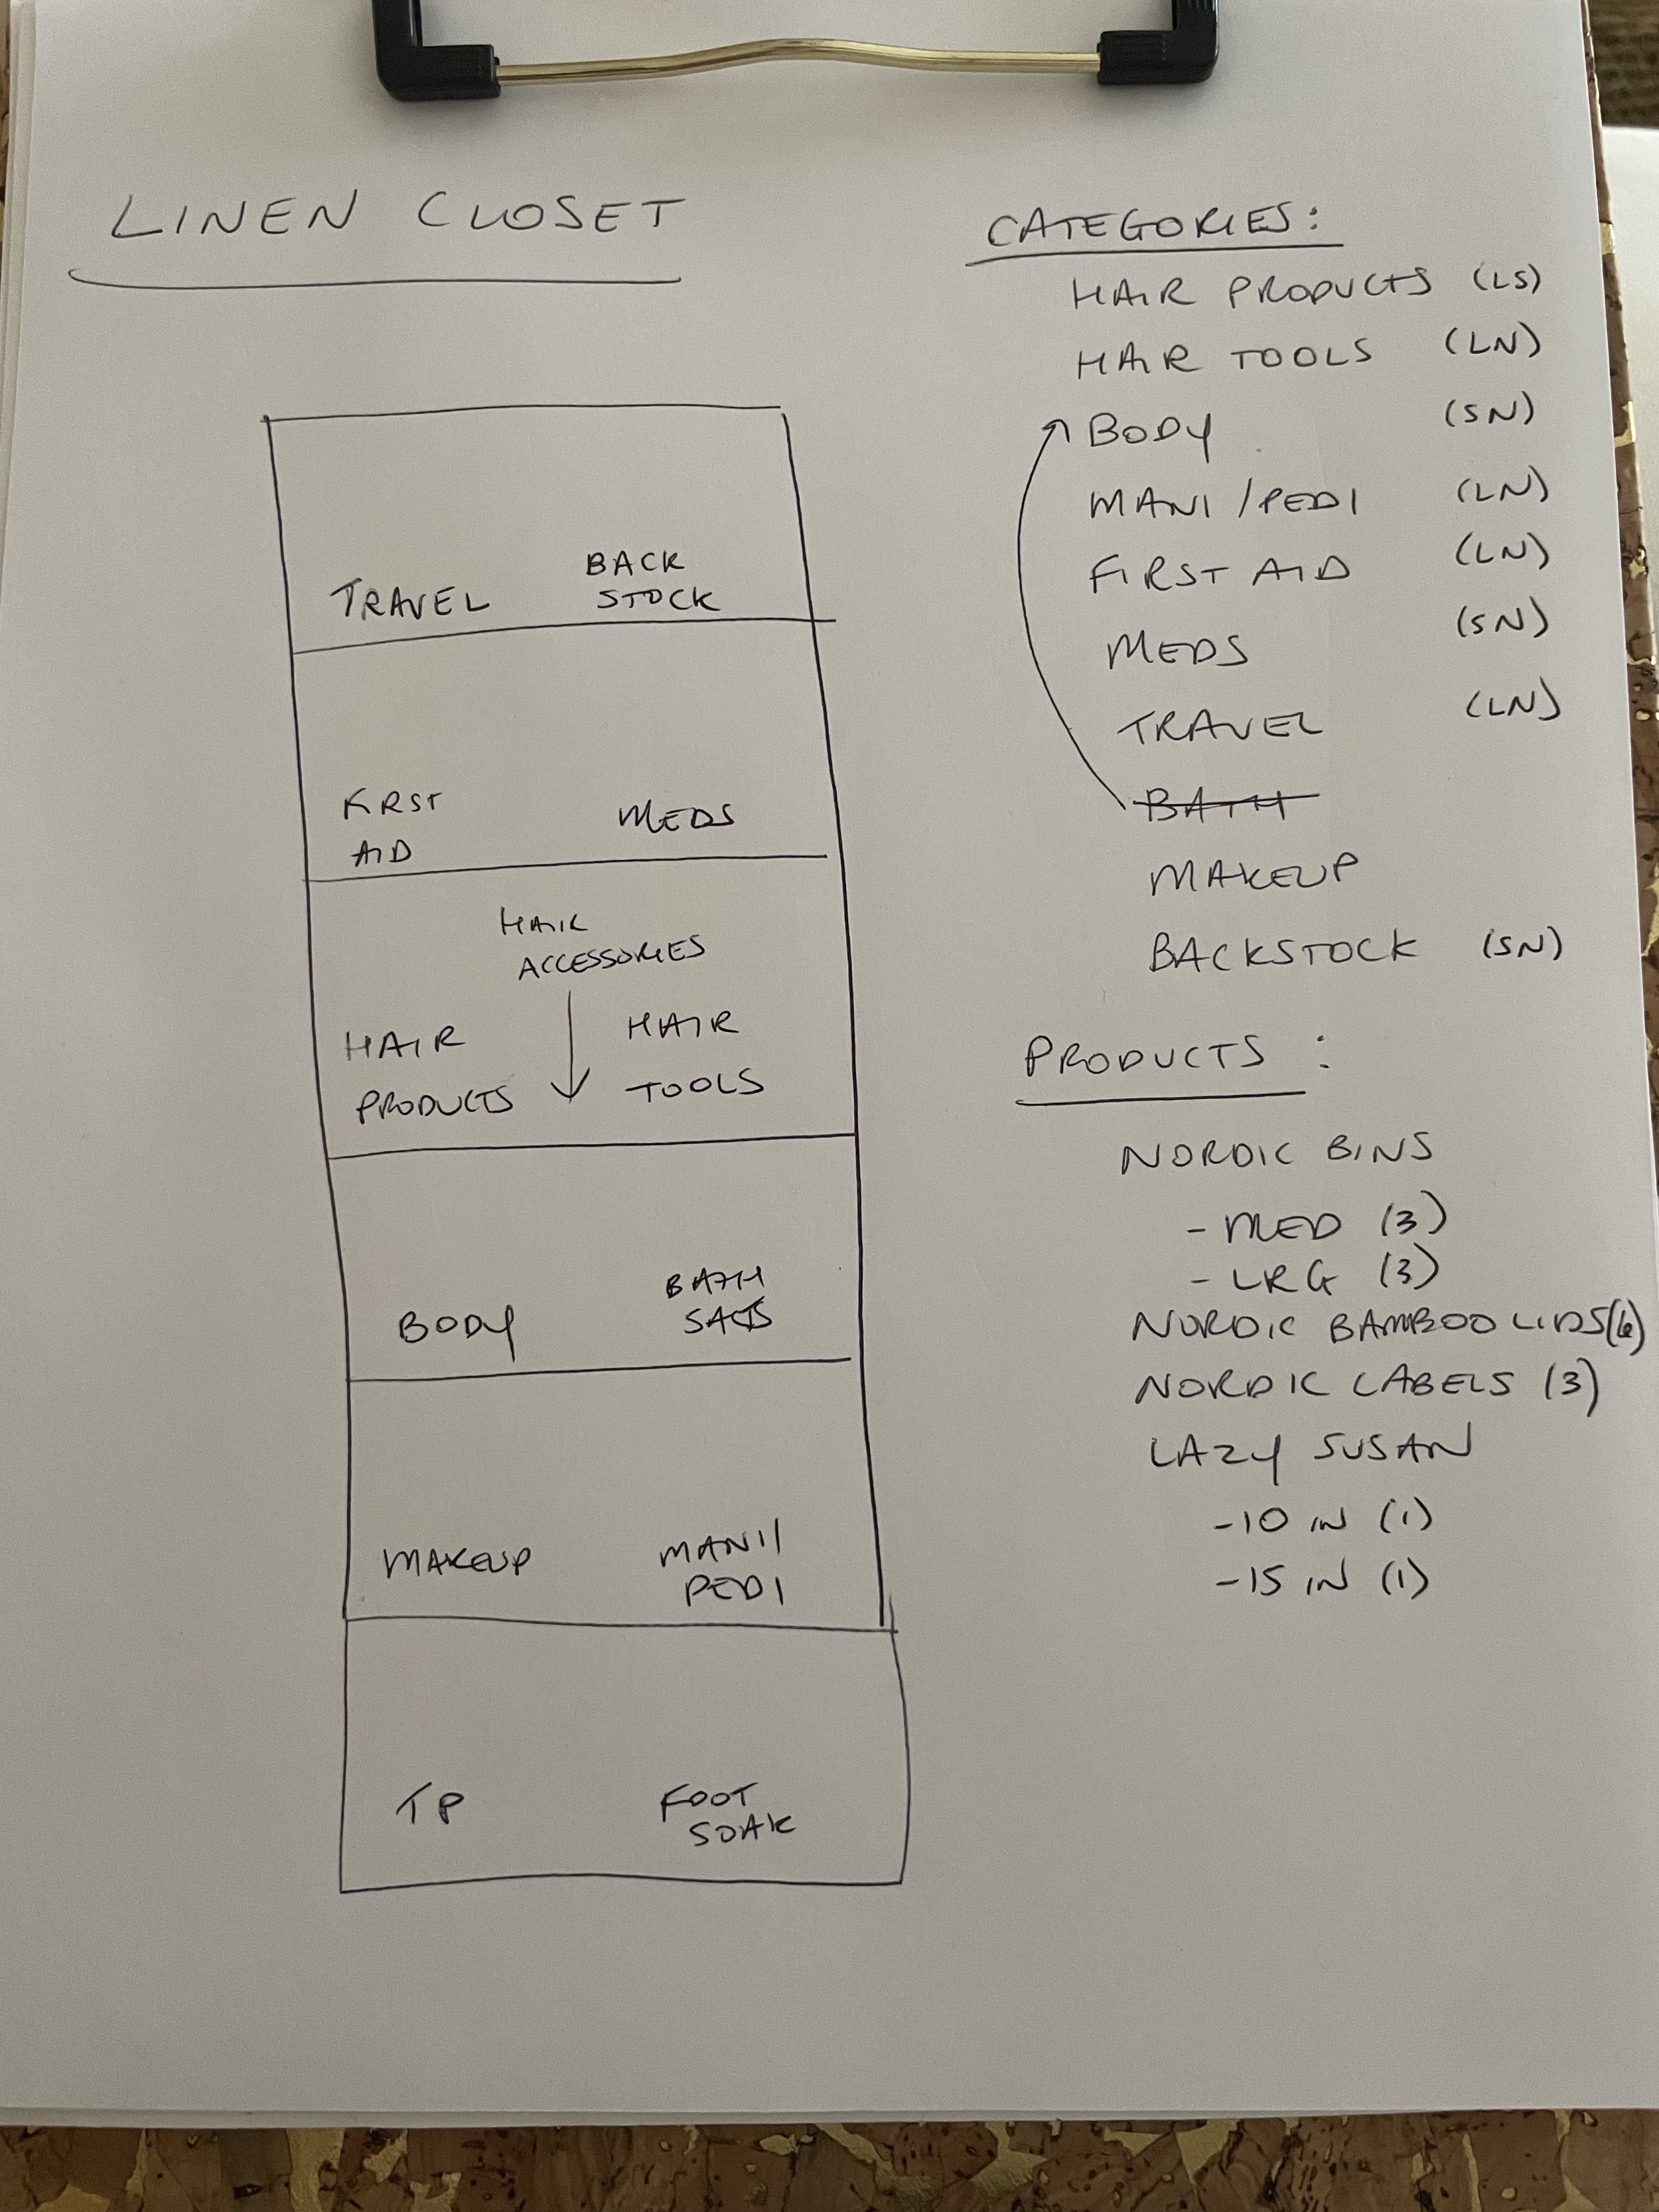
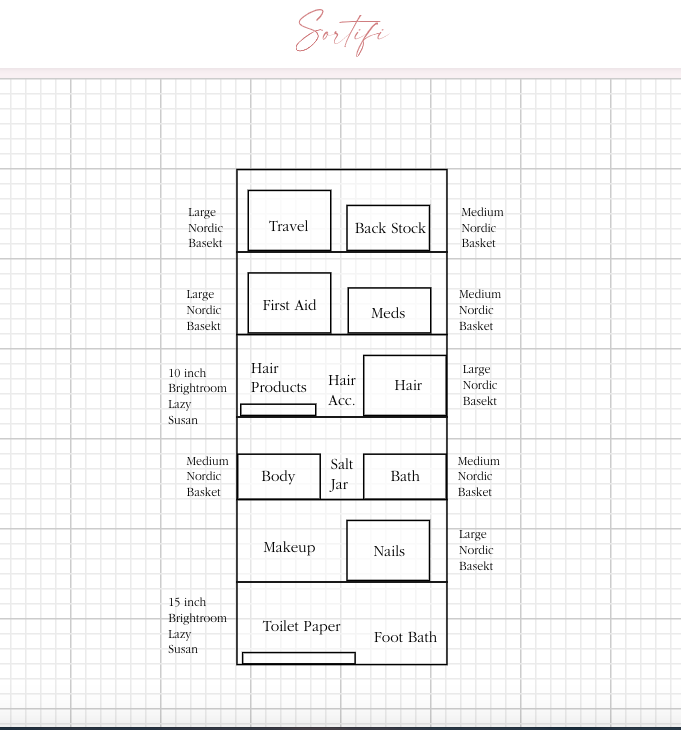
So the first step was to create a system that would work best for me. The things I don’t need to reach as often go high and low while the things I do are more eye level. I made this very terrible sketch** of the closet and, after noting my categories, filled in what shelf they would go on. I also made note of the products I wanted/needed.
**Exciting side note for any other professional organizers who may be reading this! A good friend and fellow PO, Kristy Potgeiter of KLP Organizing, created and recently launched a tool for us to product and space plan. It’s called Sortifi and I totally would have used it for this closet but had used my old school technique before I had access. There is a free week trial and she has graciously given me a discount code to share for 15% off a one time purchase. Use ORGANIZEDOVERALL15 when checking out!
UPDATE! I recreated the plans in Sortifi and this is what it looks like (I’m kinda obsessed with this tool FYI):
I really love the Nordic baskets I have and even though they’re a bit too deep for the shelves, I decided I would stick with them. Besides, the door still closes with plenty of room and this isn’t my forever home so they can come with me when I move again (hopefully not too soon though if you know how my 2021 went lol).
The baskets come in three sizes (I already had one medium and one large) and with a variety of lid options. I chose the more expensive bamboo ones which, in hindsight, I didn’t need to but I liked the look. For reference, they run about $10 per lid versus the basic plastic ones which are about $4.50 so more than double. And, yes, regardless of the bin you choose, you have to buy the lid separately.
I love them though because they can stack, have ventilation and are easy to clean if things such as a hair product spills inside (which may or may not, OK definitely, happened to me during the move). These are the different options you can choose from:
Once I put that order in, I ran to Target for their Brightroom lazy susans. I already used the smaller one under my bathroom sink and knew I loved them. The price point is seriously unbeatable!
Here are the two options:
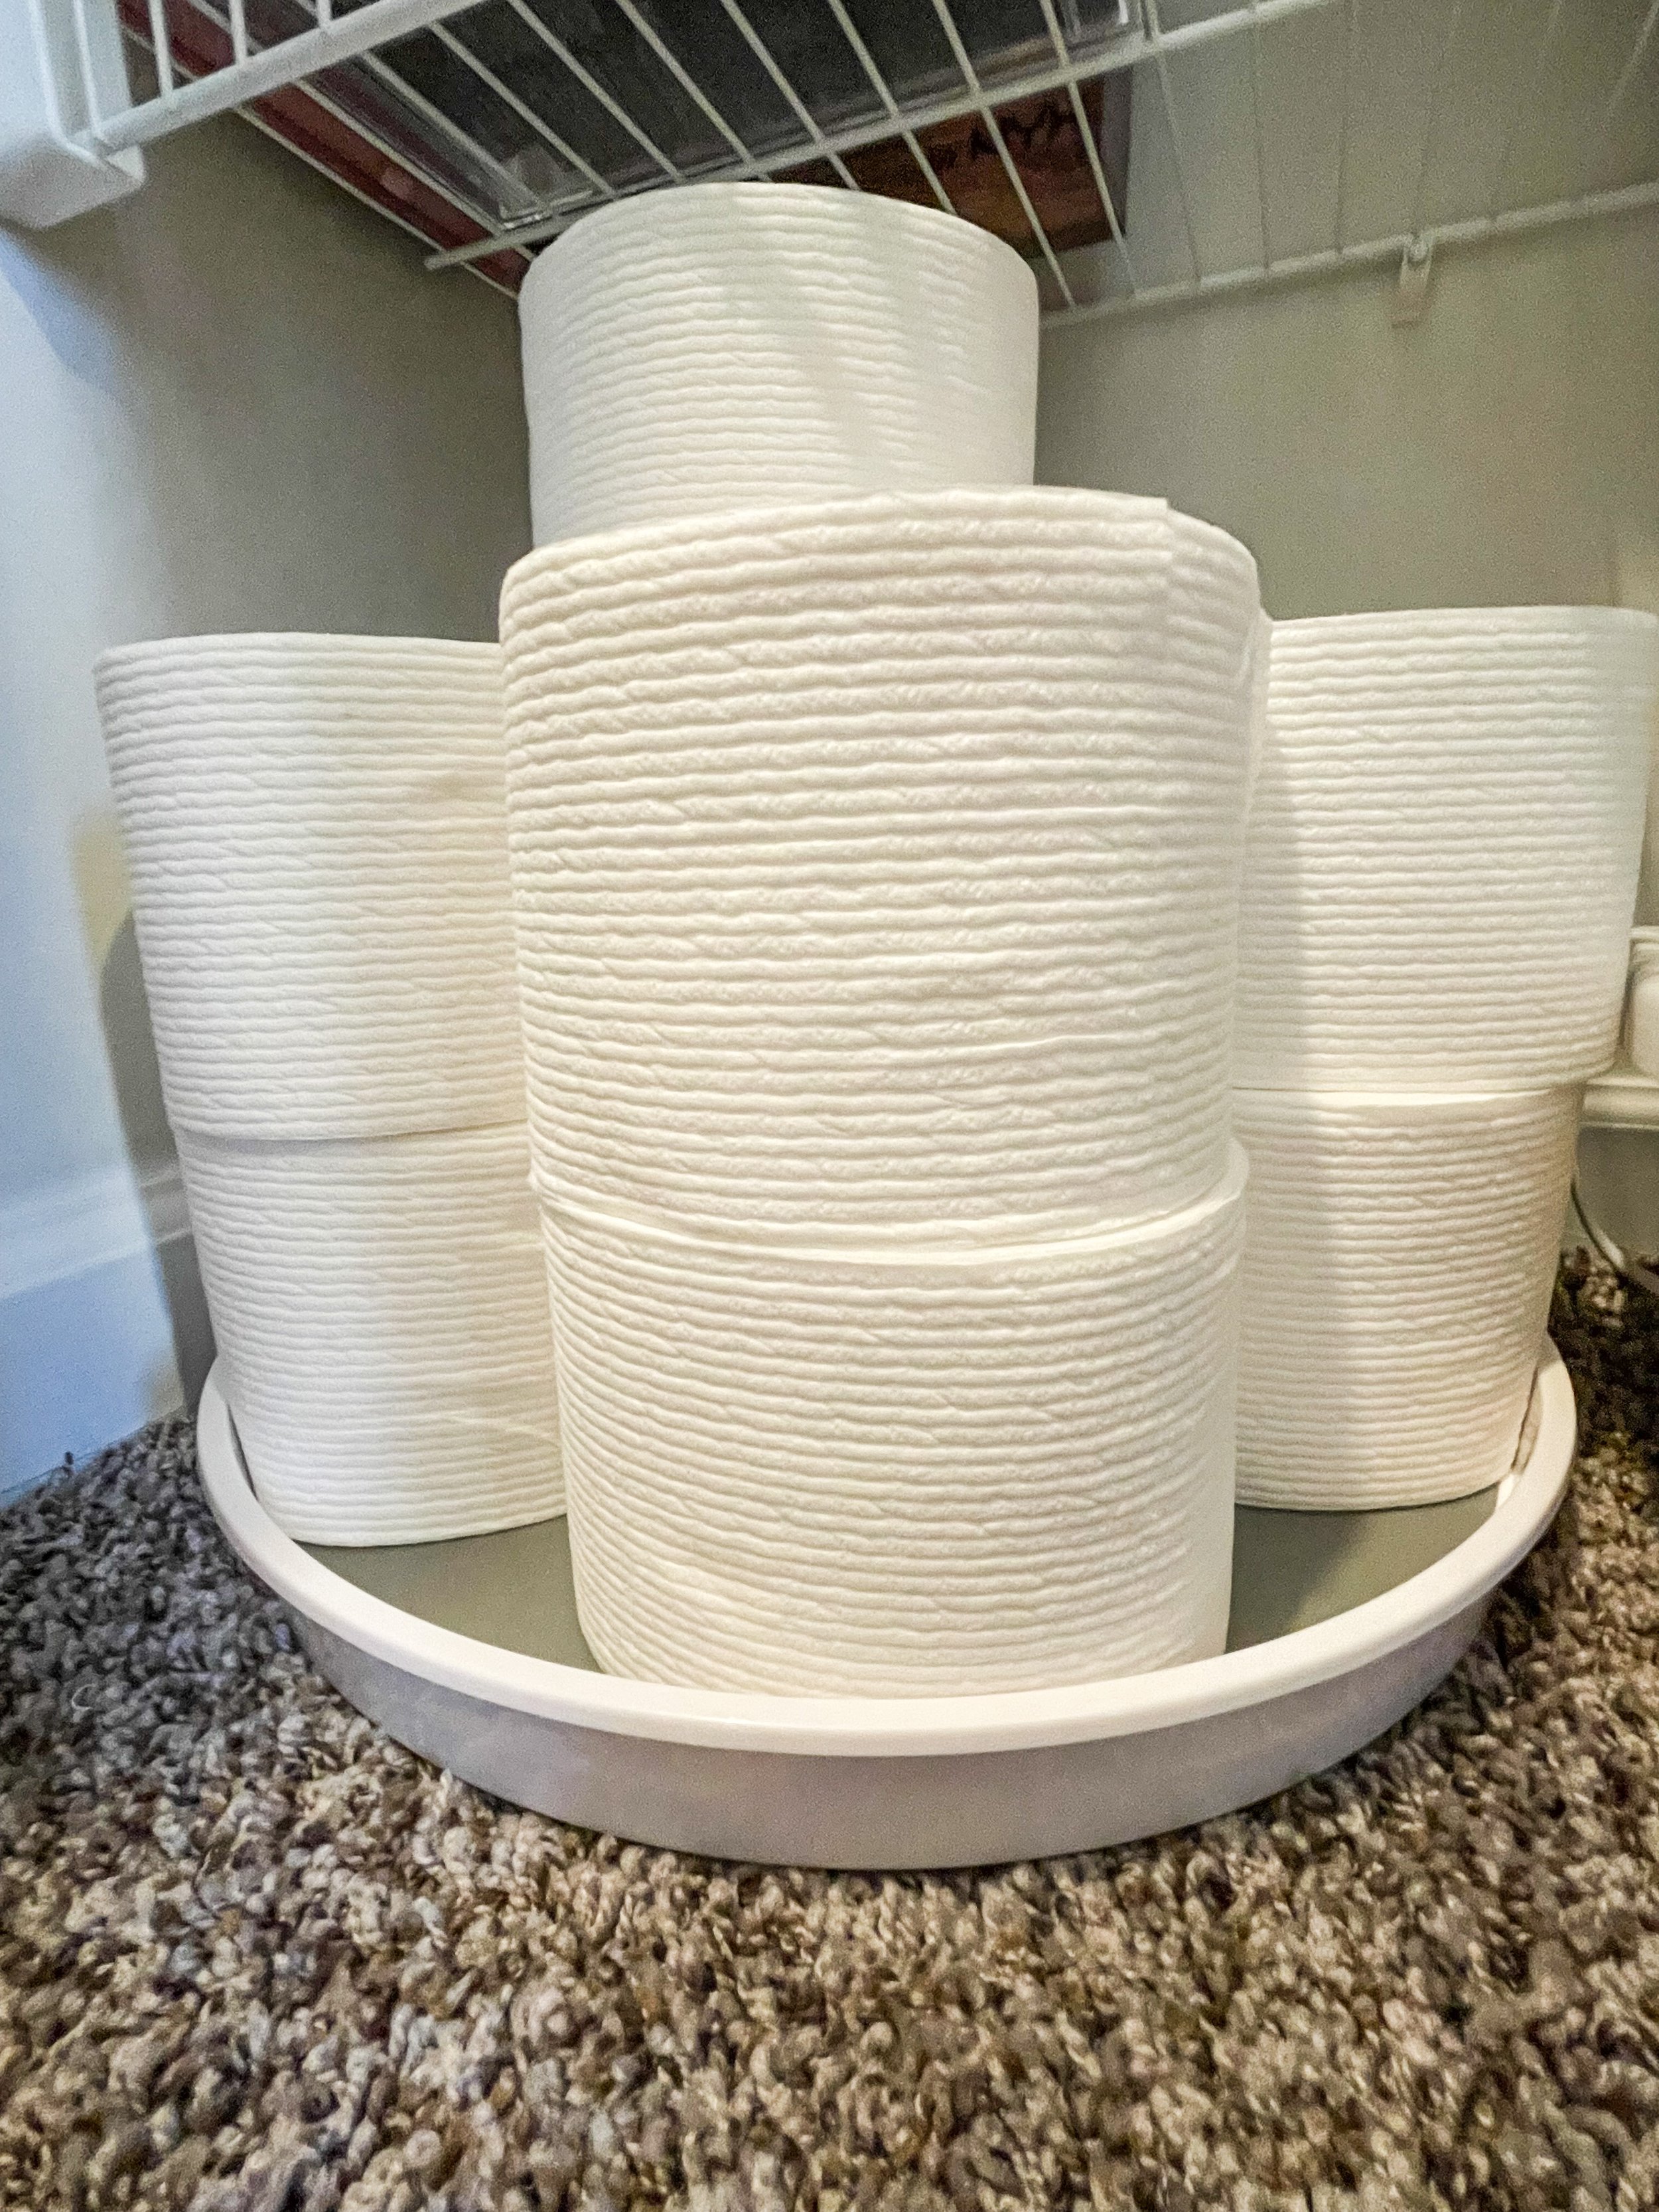
I decided to use the large one for toilet paper which might seem weird but remember this: round items on round containers maximize the space! I was a little nervous that the lazy susan wouldn’t spin on the carpet but I tested it first with the under my sink and it works with no issue.
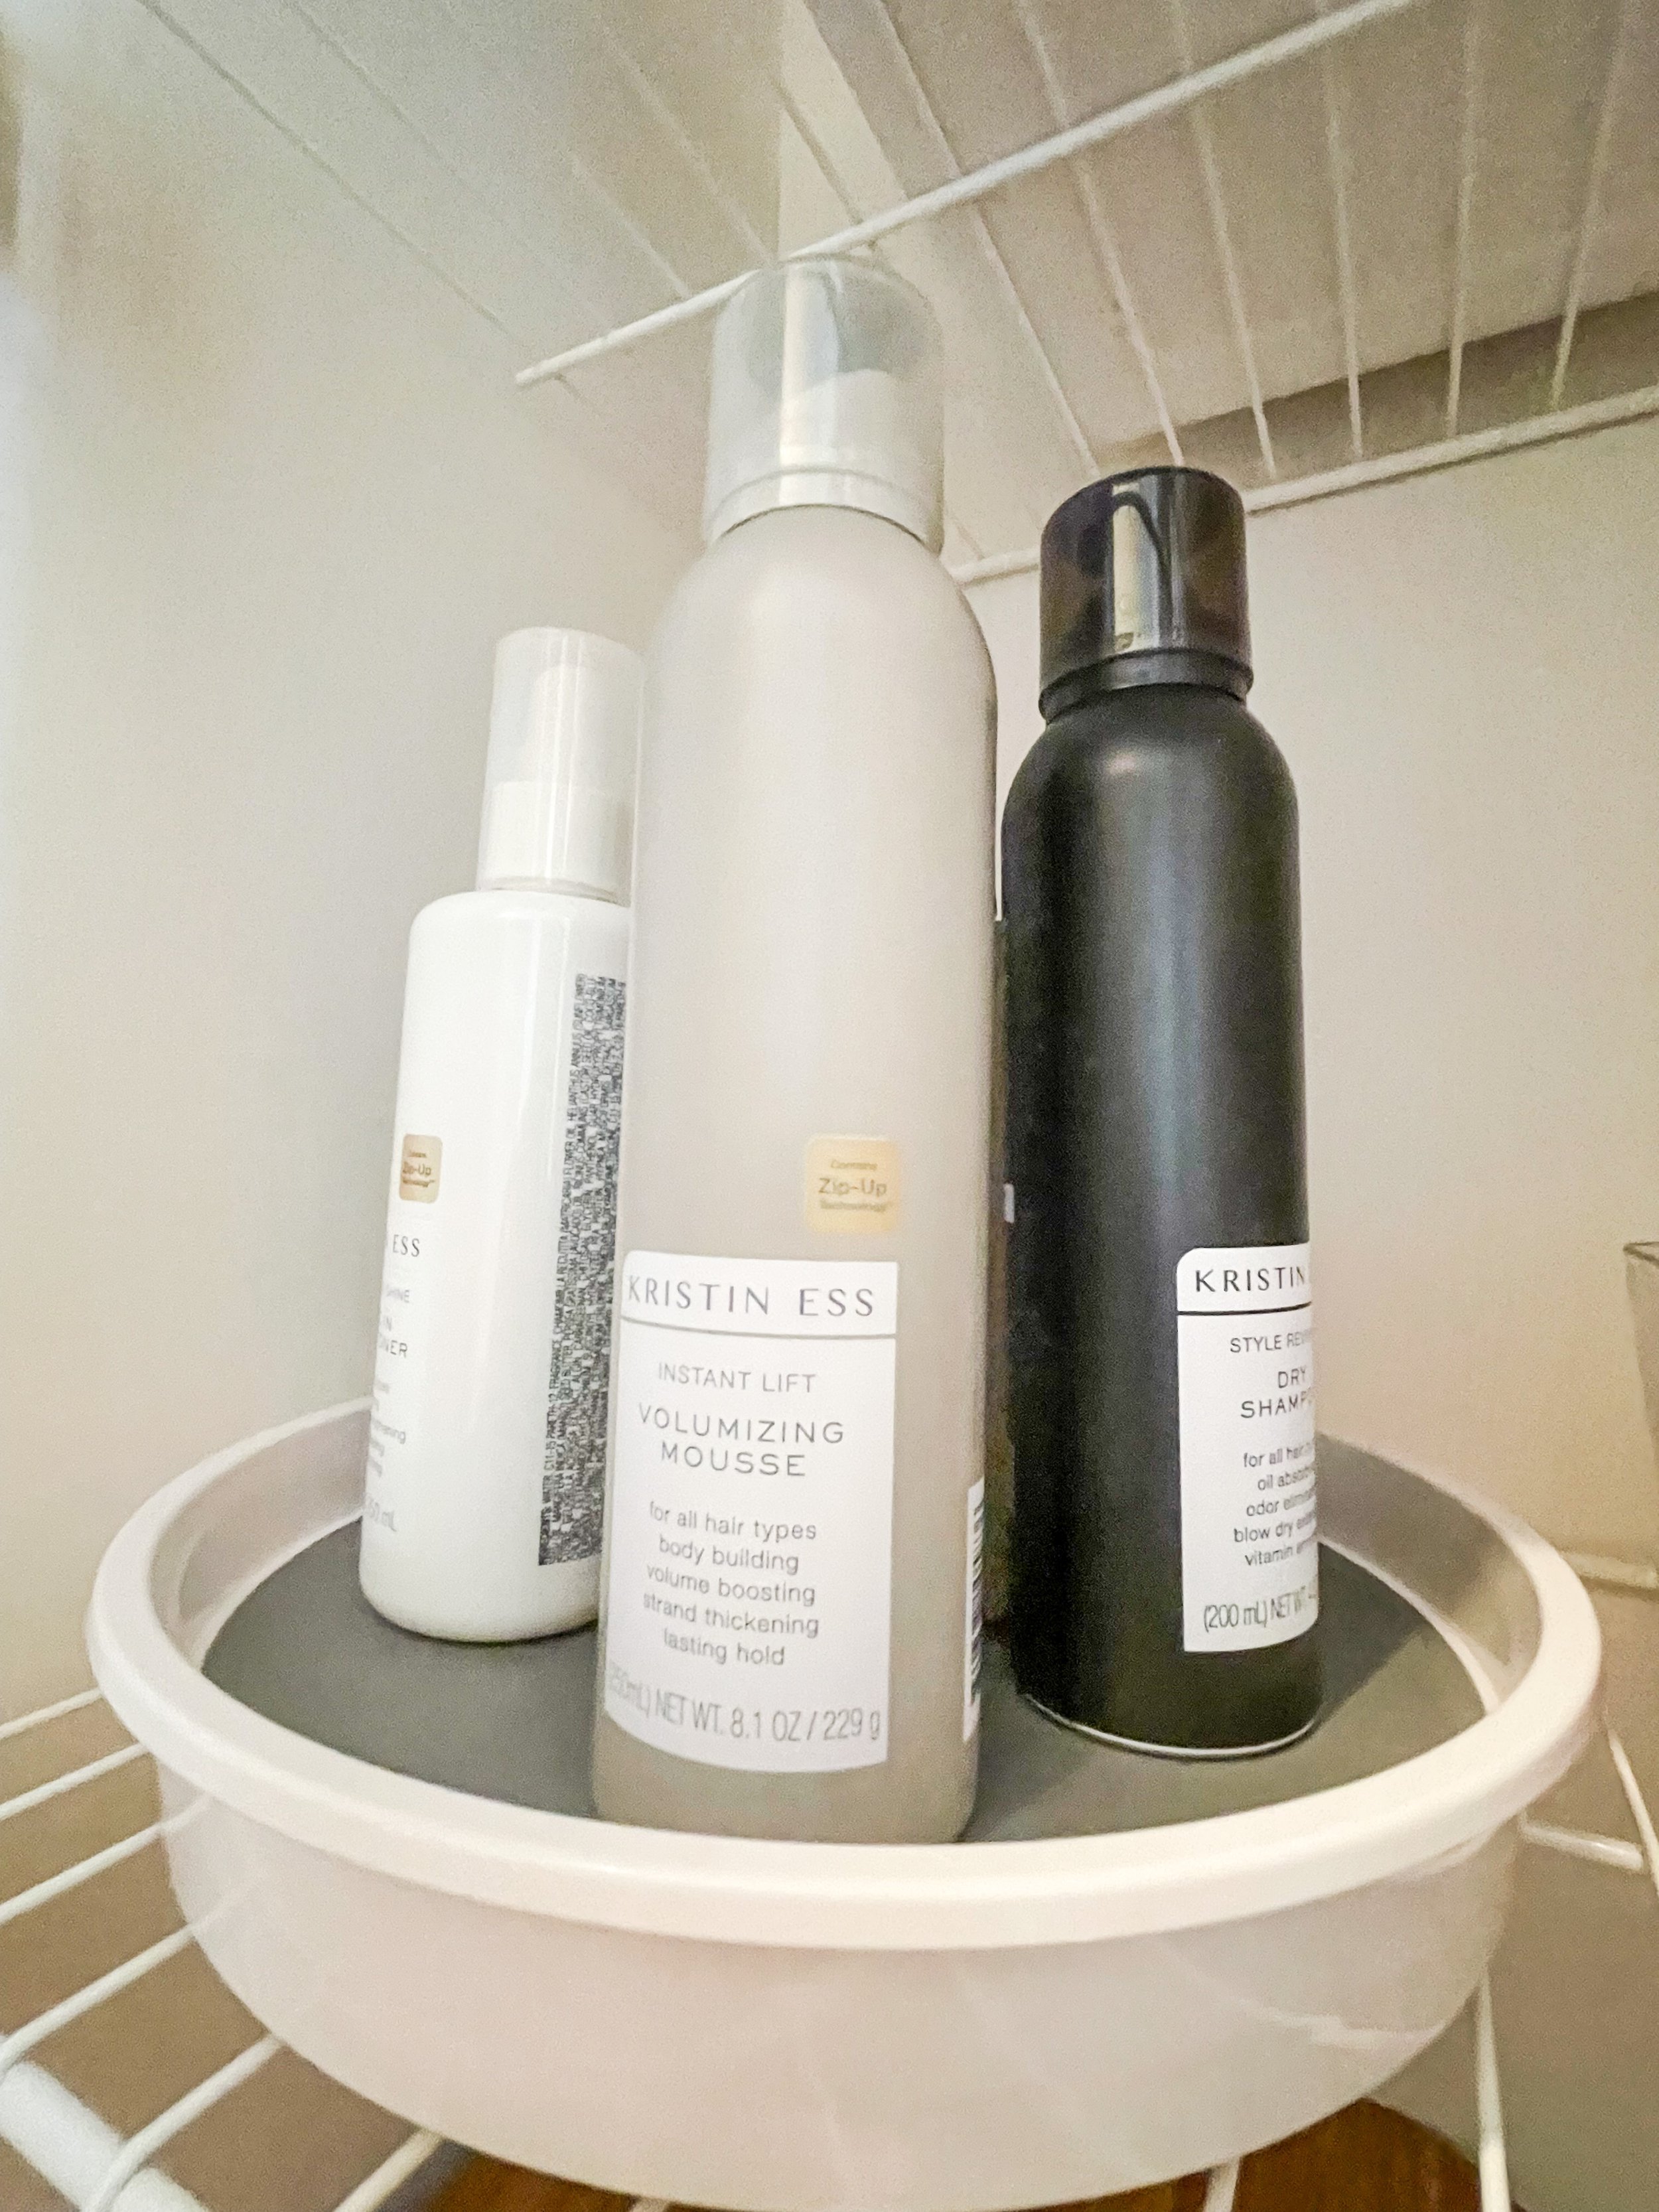
The smaller one I got was going to be used for hair products because, as I mentioned, I’ve had some accidents with them being inside the basket on their sides.
This then left plenty of space inside the basket for my hair tools. I decided to put the organizer (which I found in HomeGoods but there is a similar one on Amazon!) in storage because it’s in great shape, I truly love it and hope to use it again in the future.
While I was waiting for the Nordic baskets, I used extra bins I had on hand to better organize my things temporarily and in the spots I planned out. This definitely helped me realize that the system would work and, hey, if it doesn’t, it can always be changed. Never forget that!

The only real tweak I did between my design and the actual system is adding a basket for “bath” products i.e. extra bars of soap, bath bombs and my bath pillow.
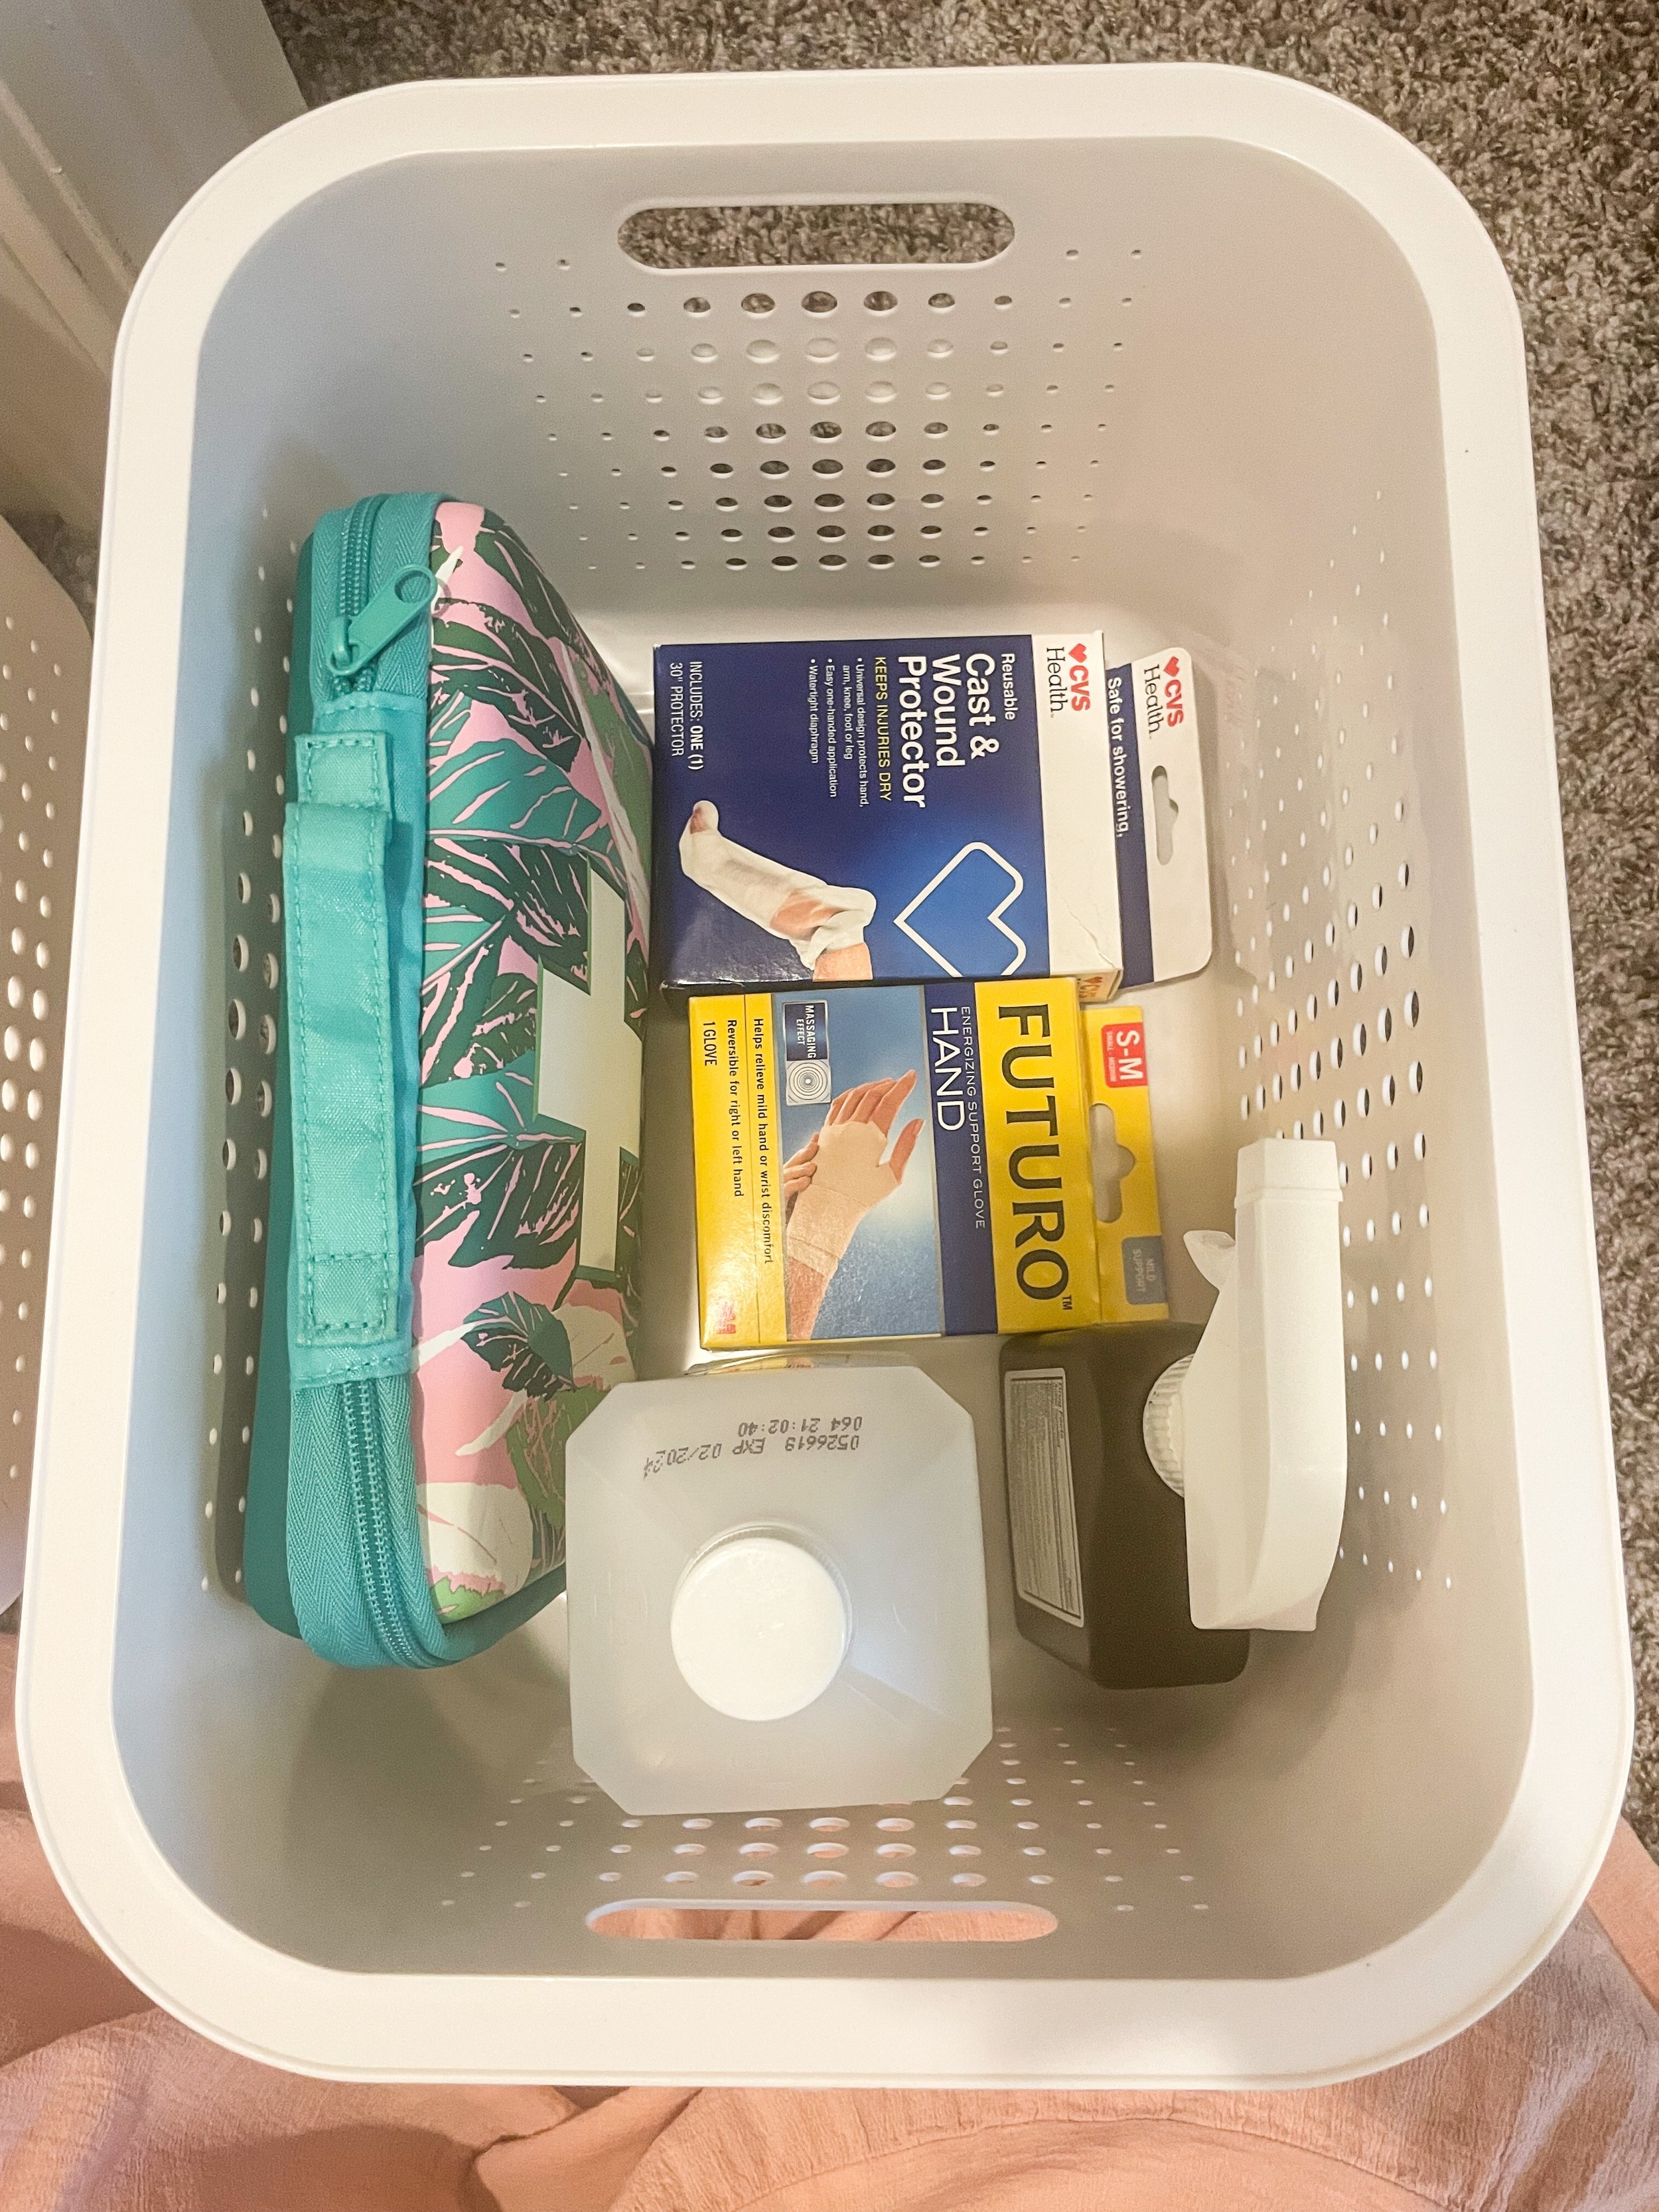
The larger baskets were good used for any categories that had taller items such as the bottles in my first aid:
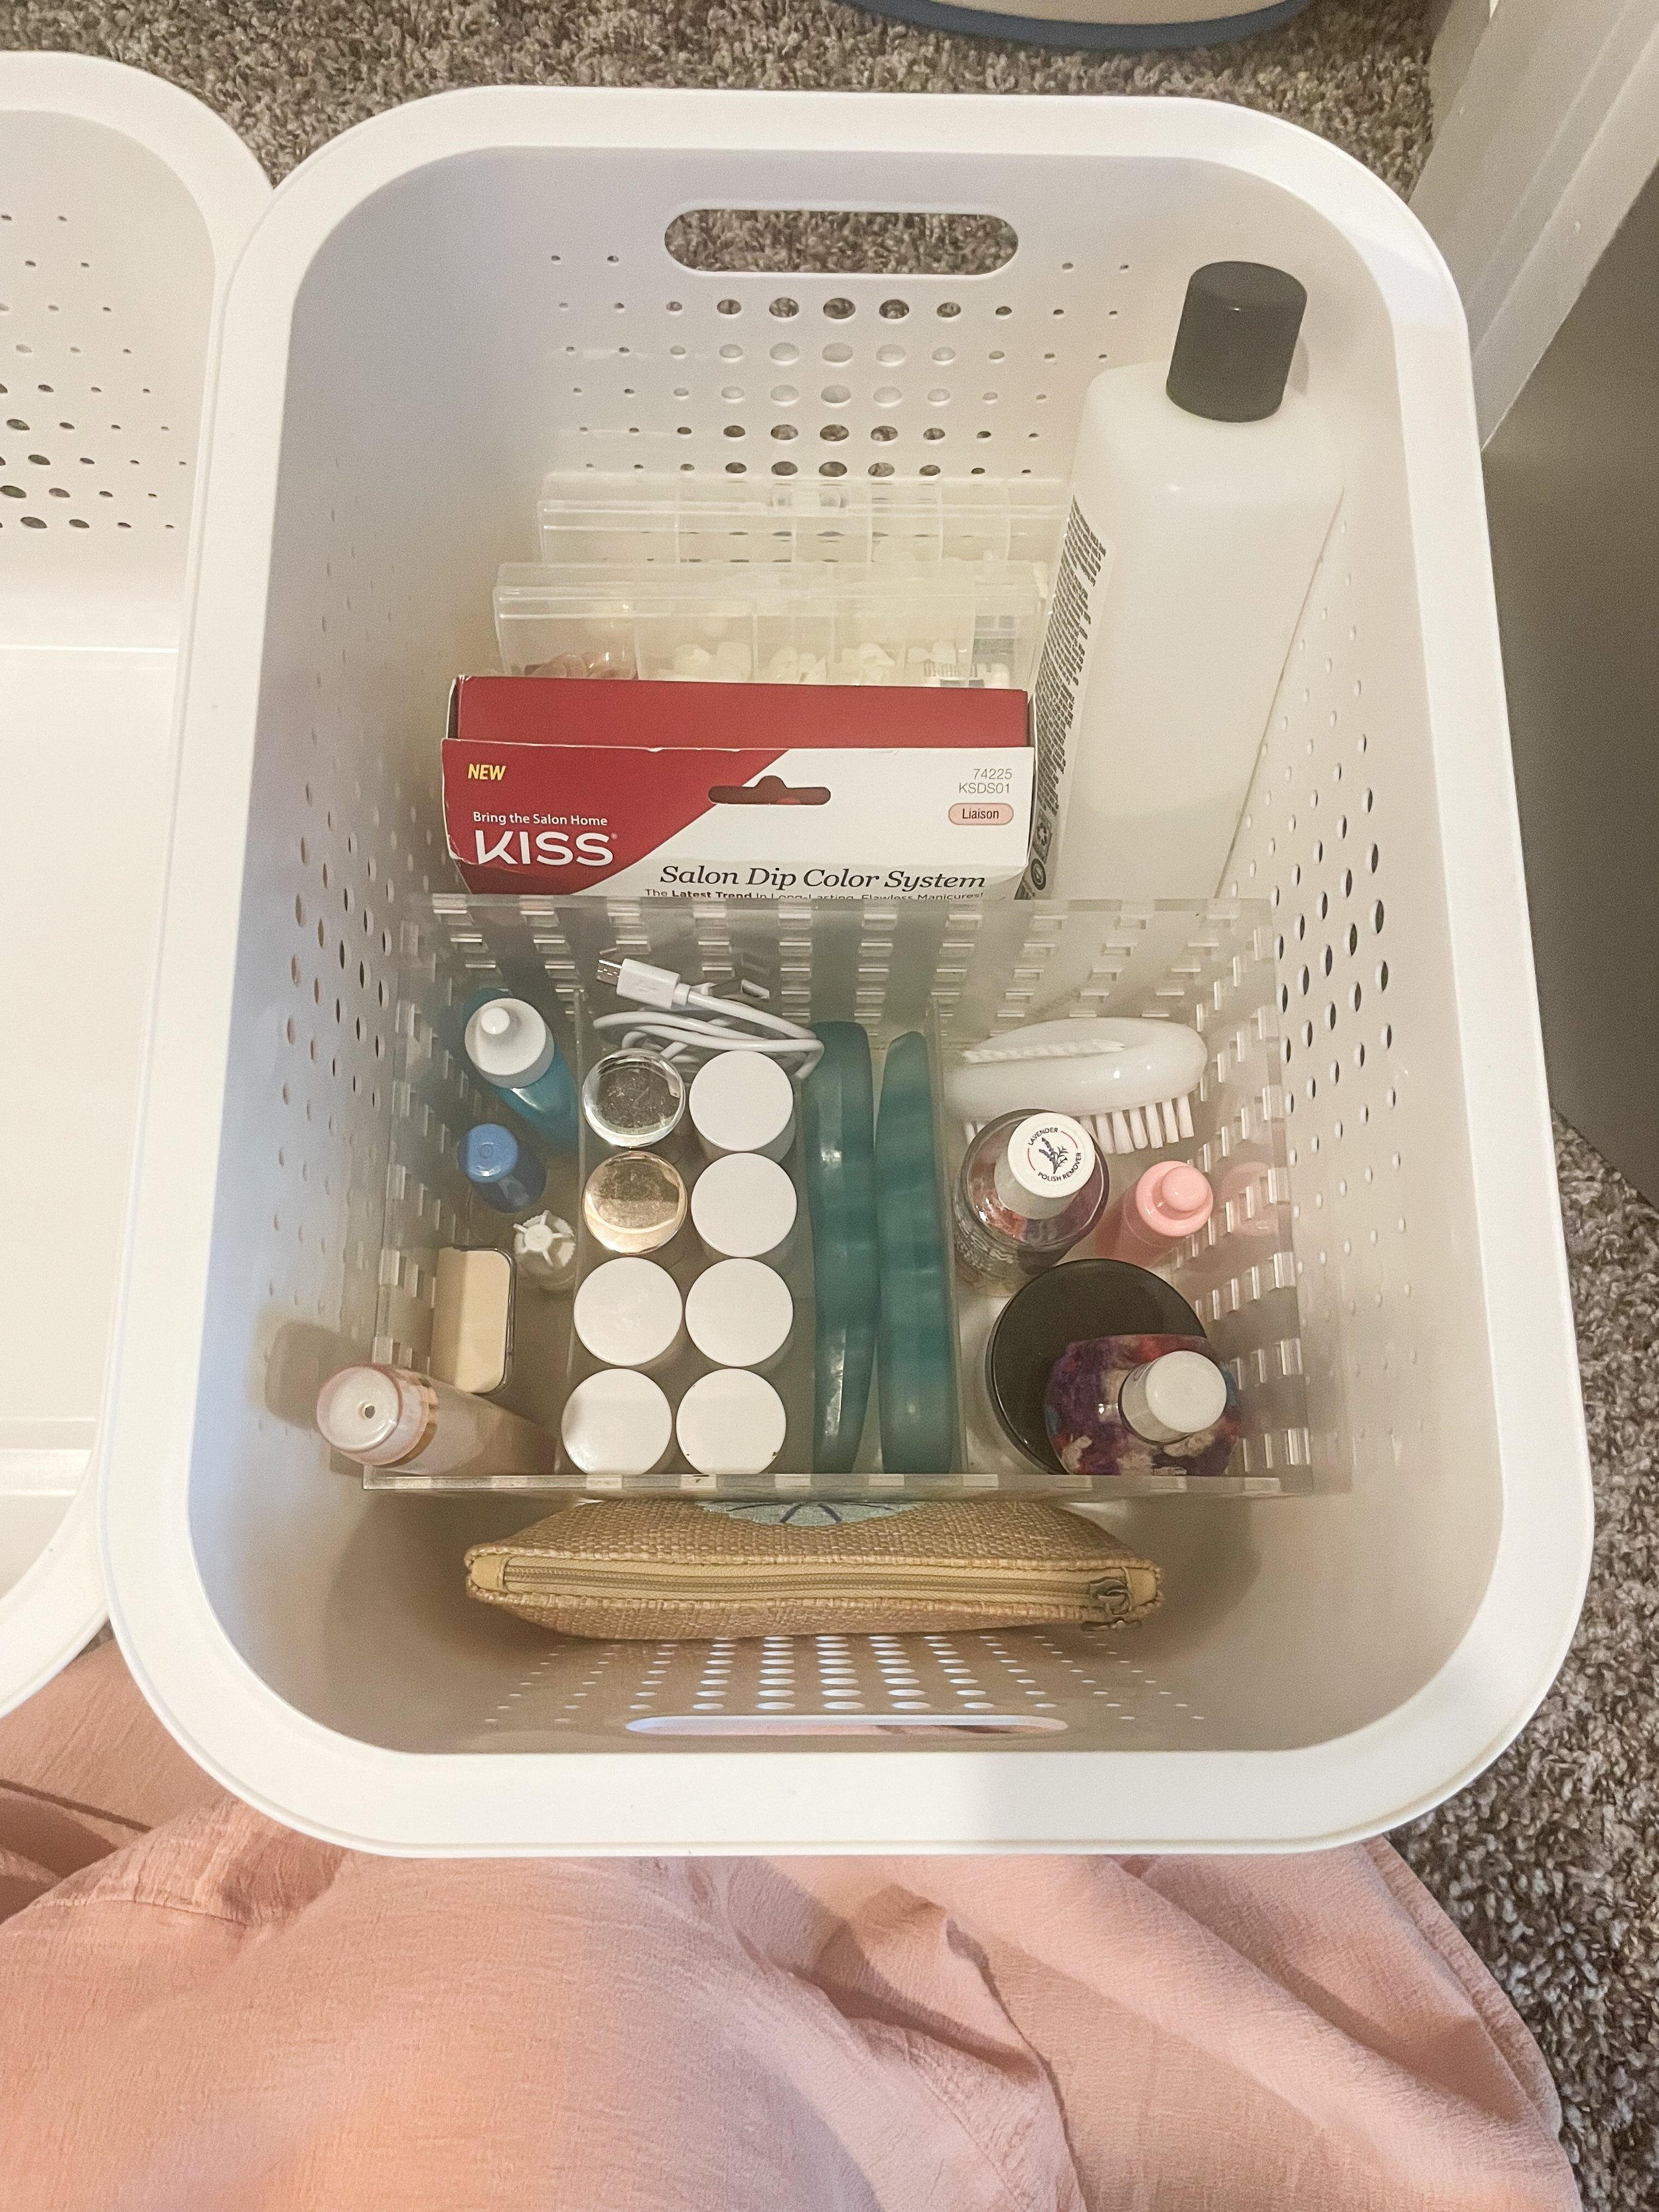
And the polish remover bottle in my nail category. I also kept the OG Like-It Brick bin that I’ve used for my nail stuff foreverrr inside the Nordic basket so the small stuff would stay organized.
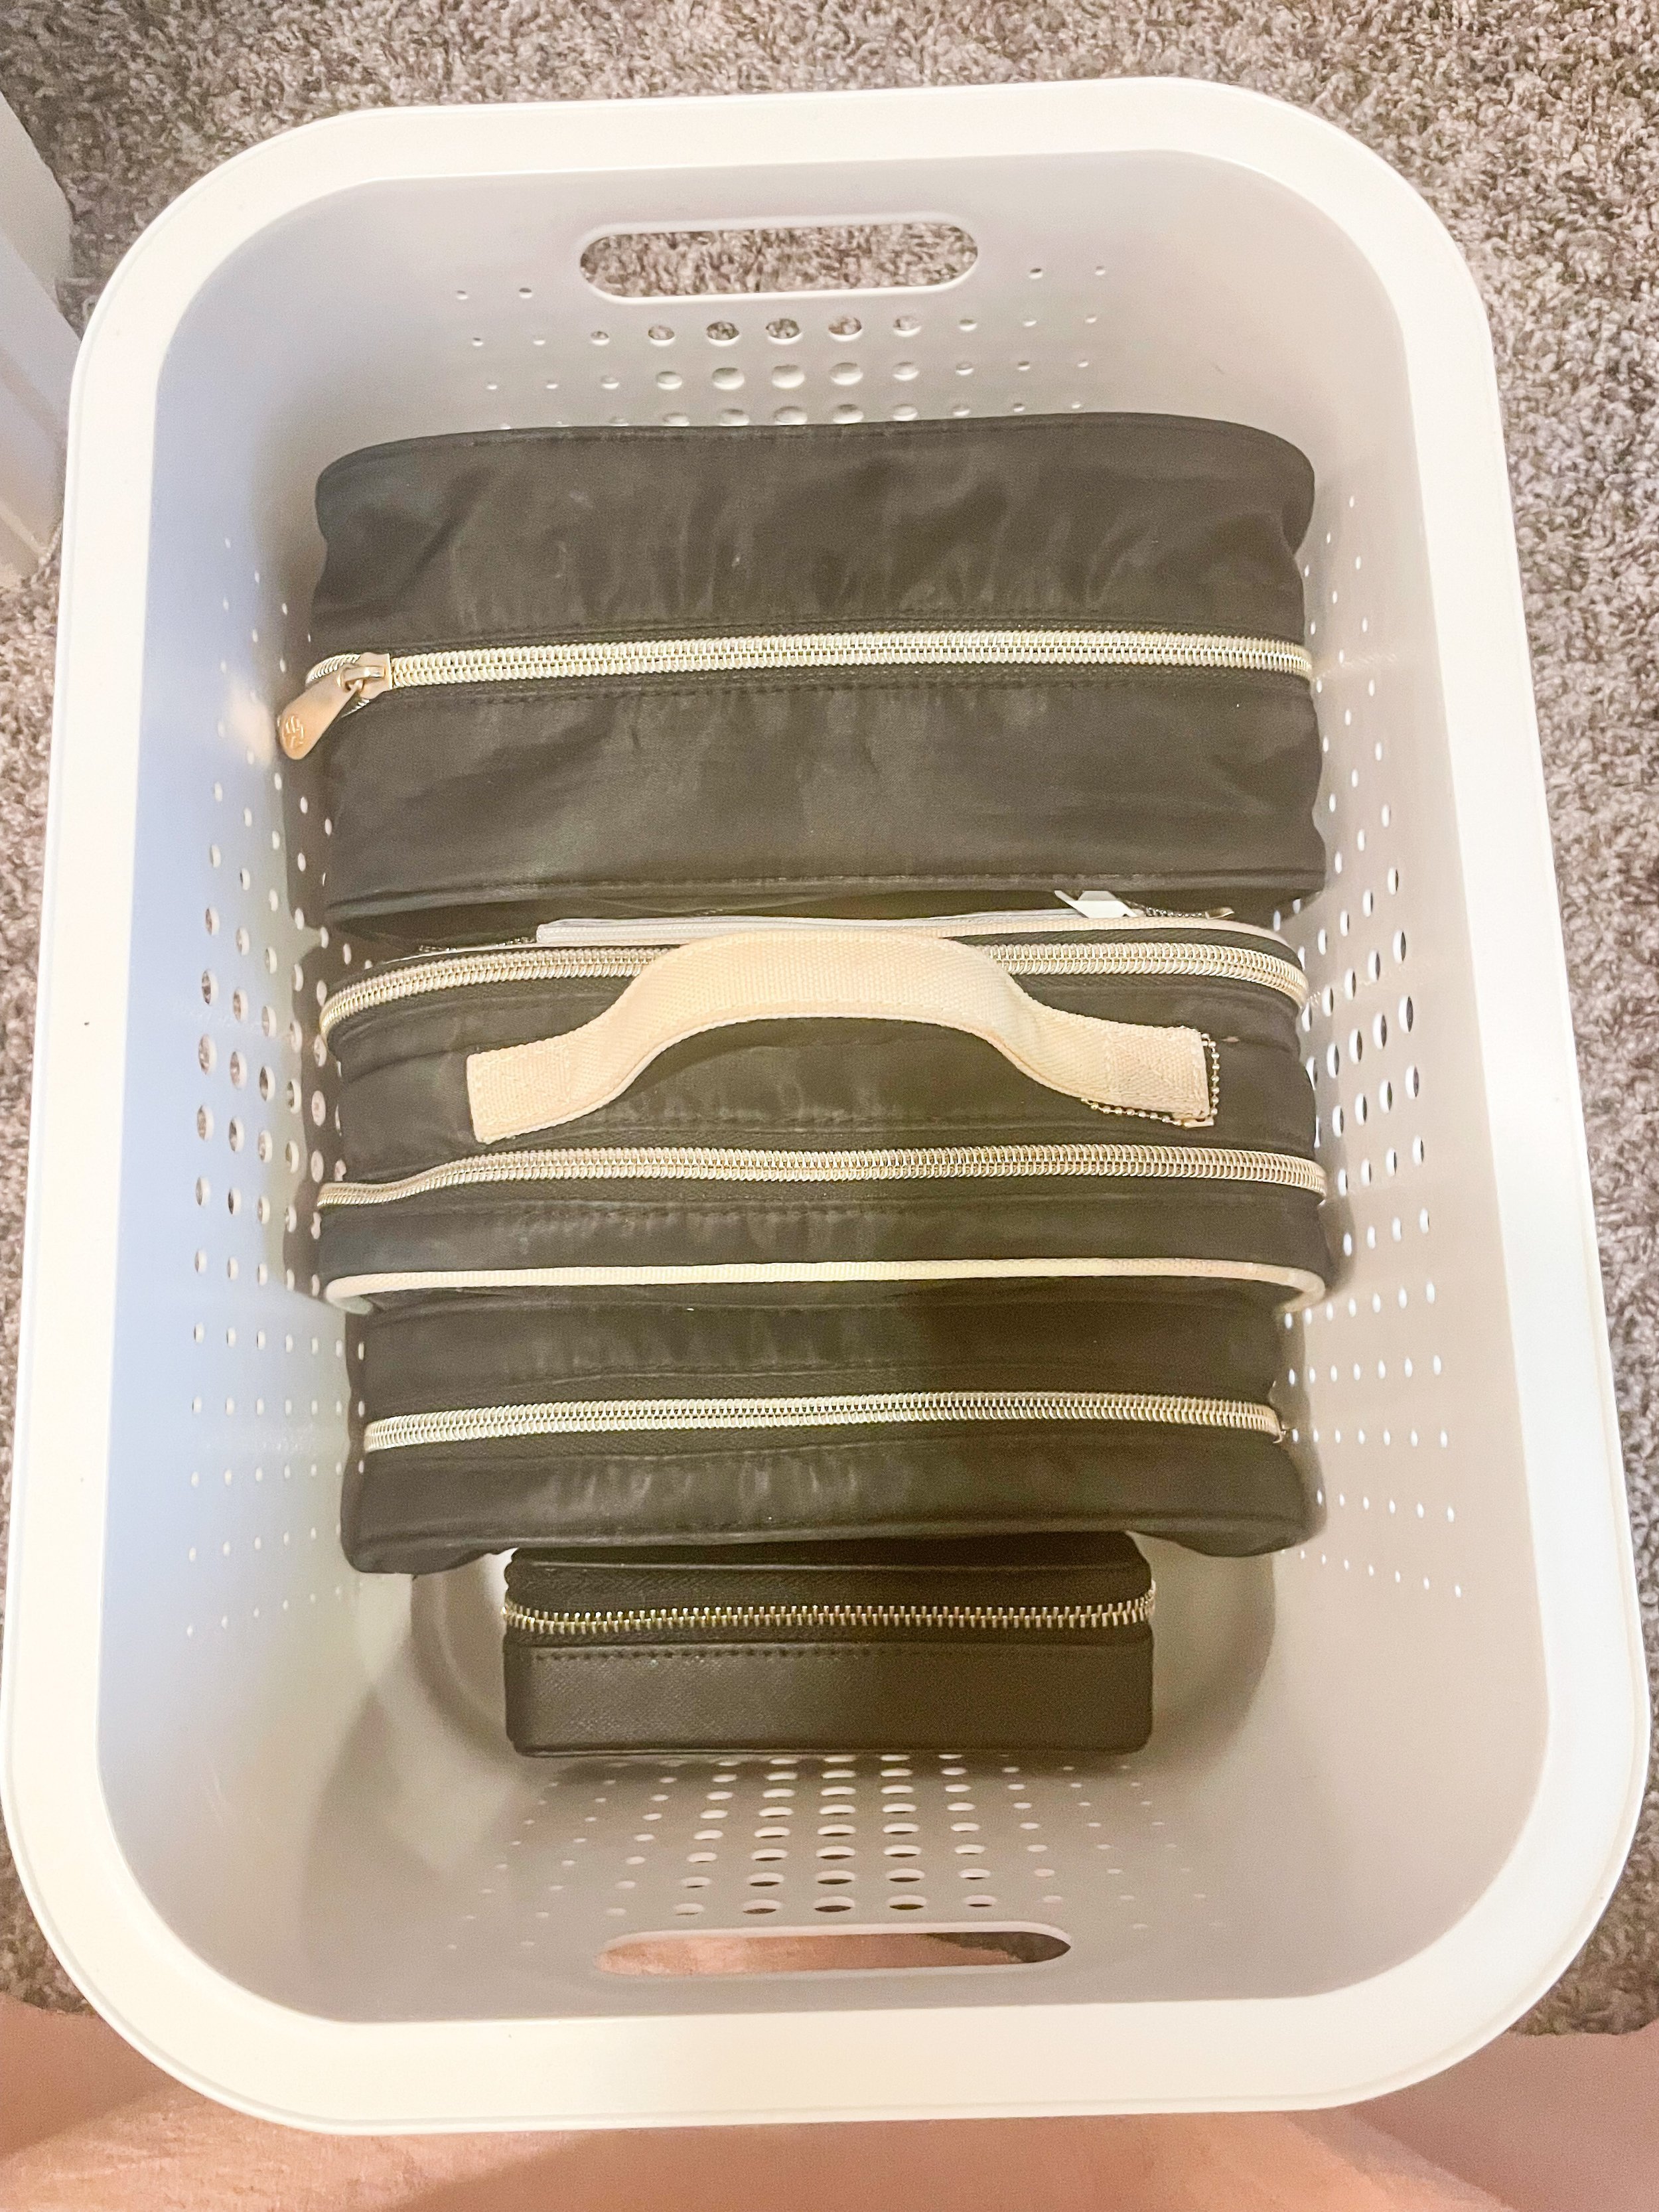
My toiletry bags (and this small adorable jewelry case) were a bit bulkier so I also chose to put them in a large basket:
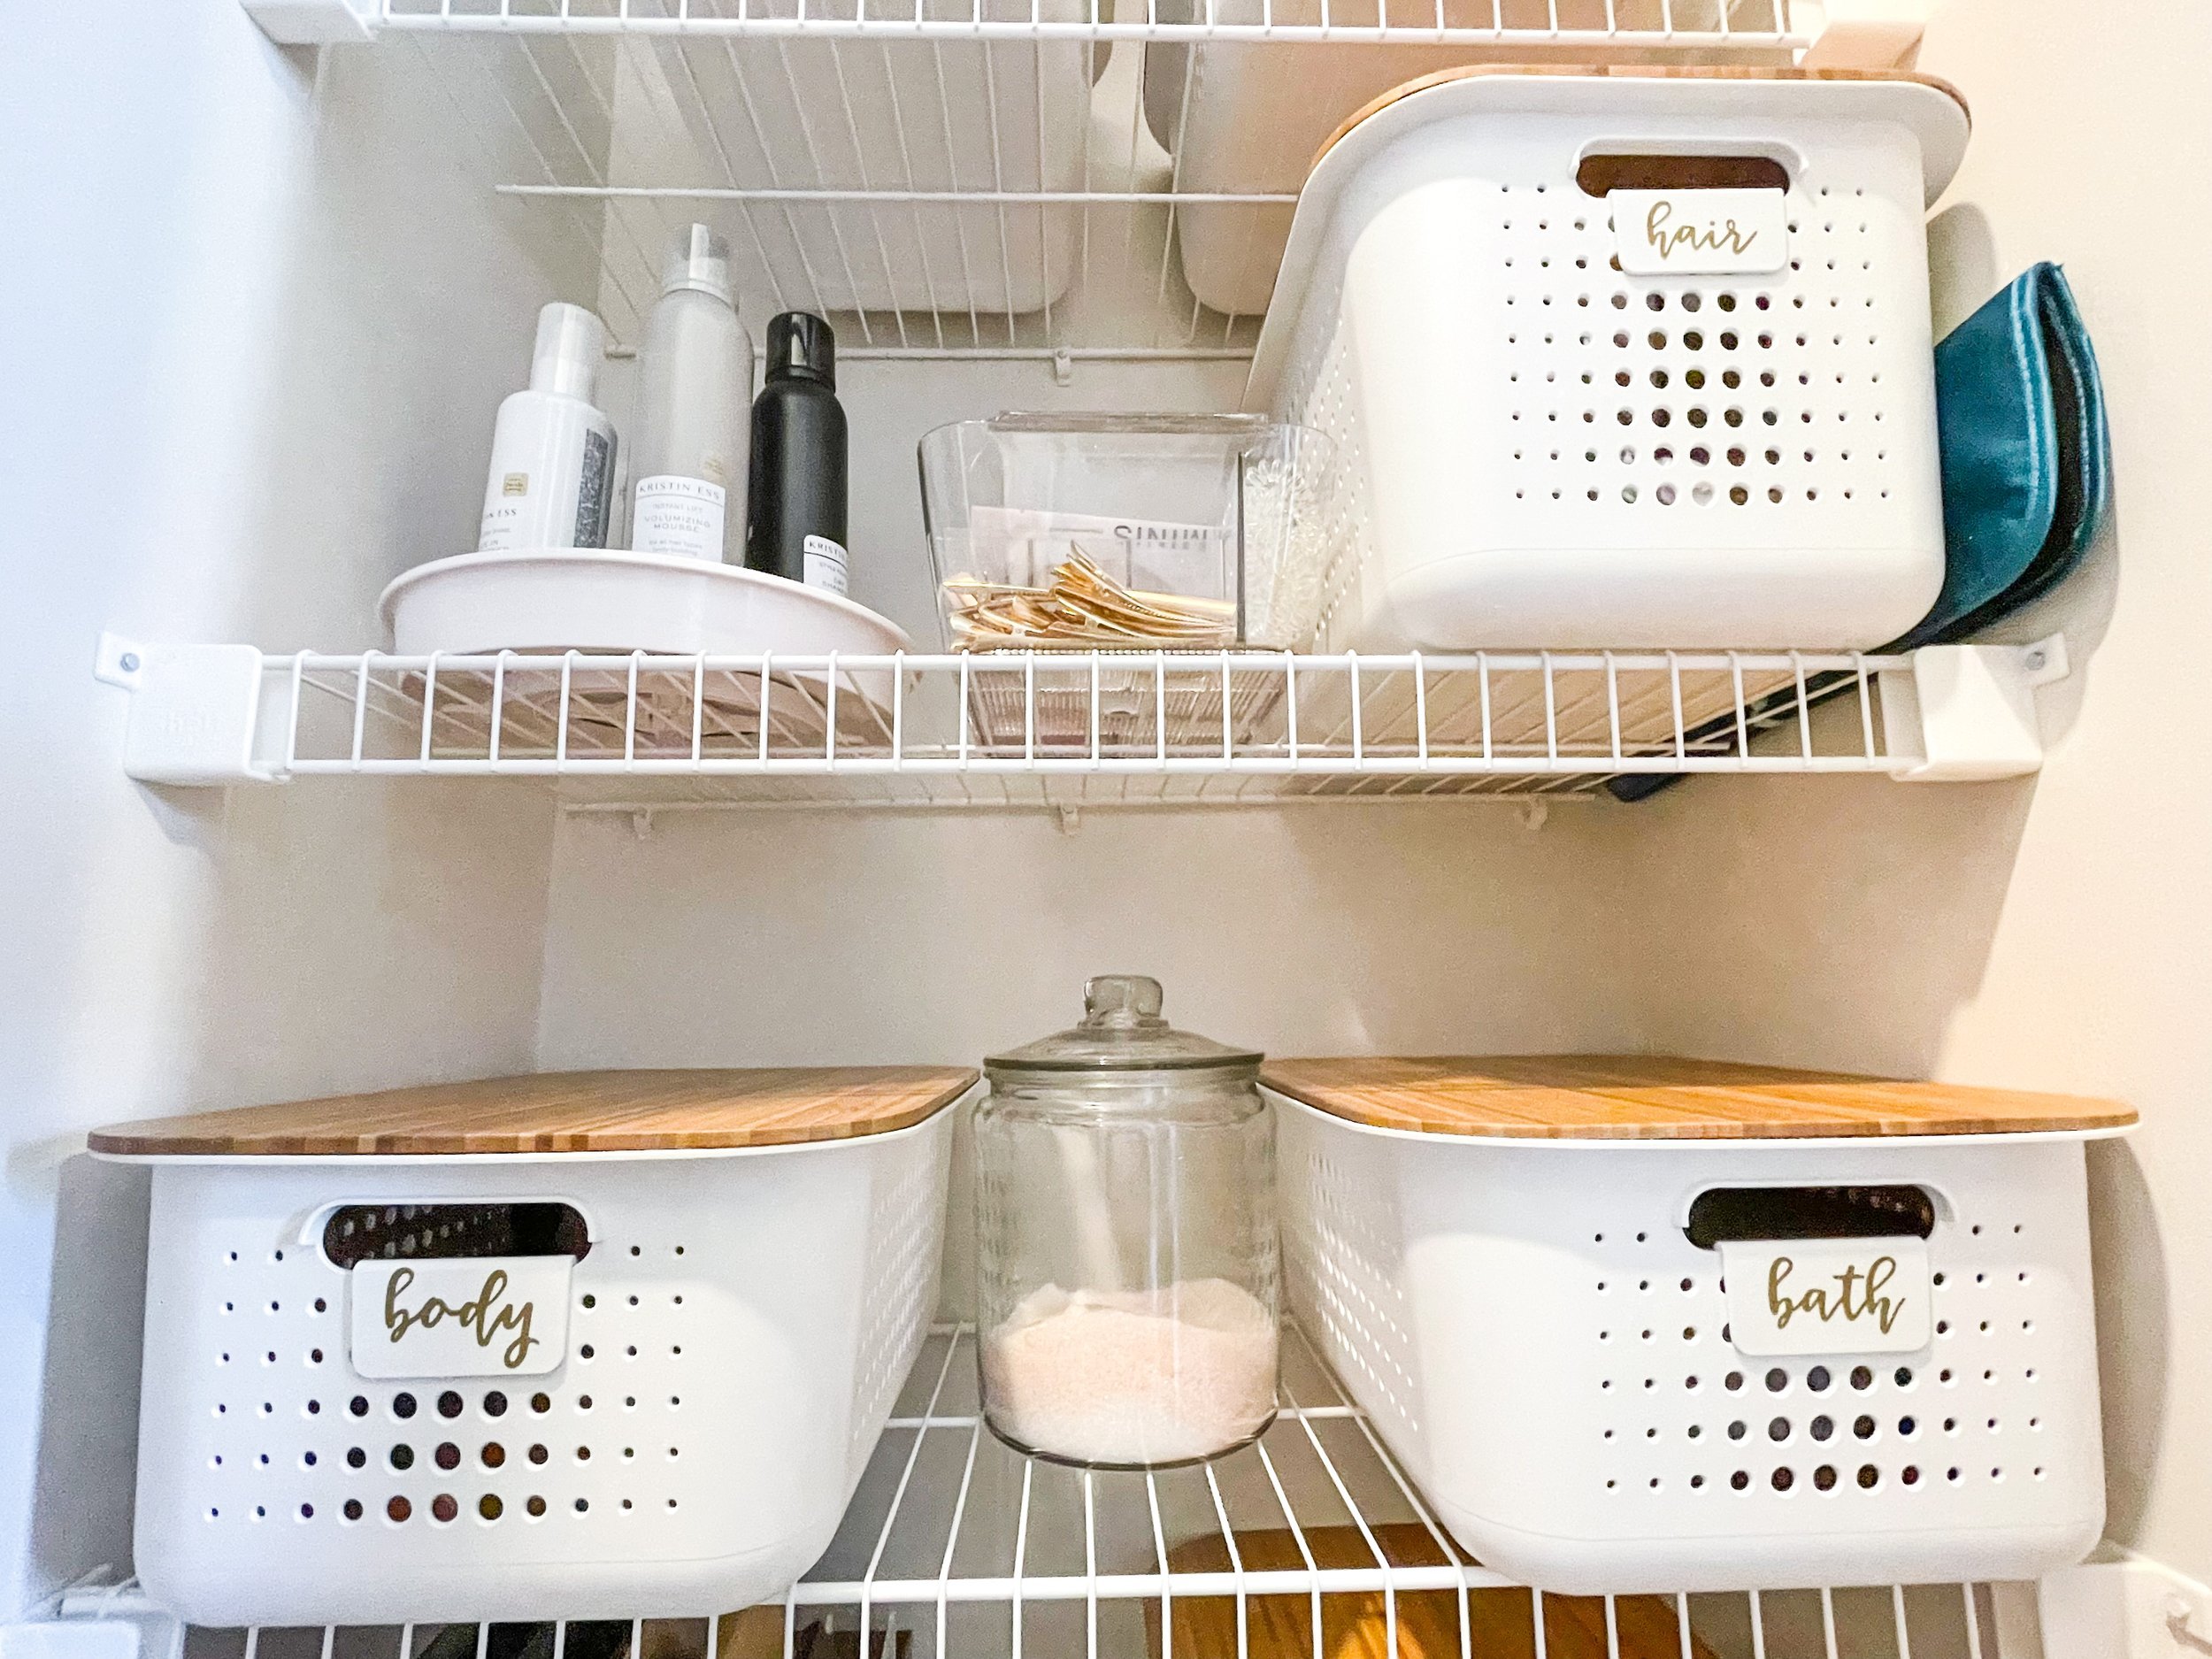
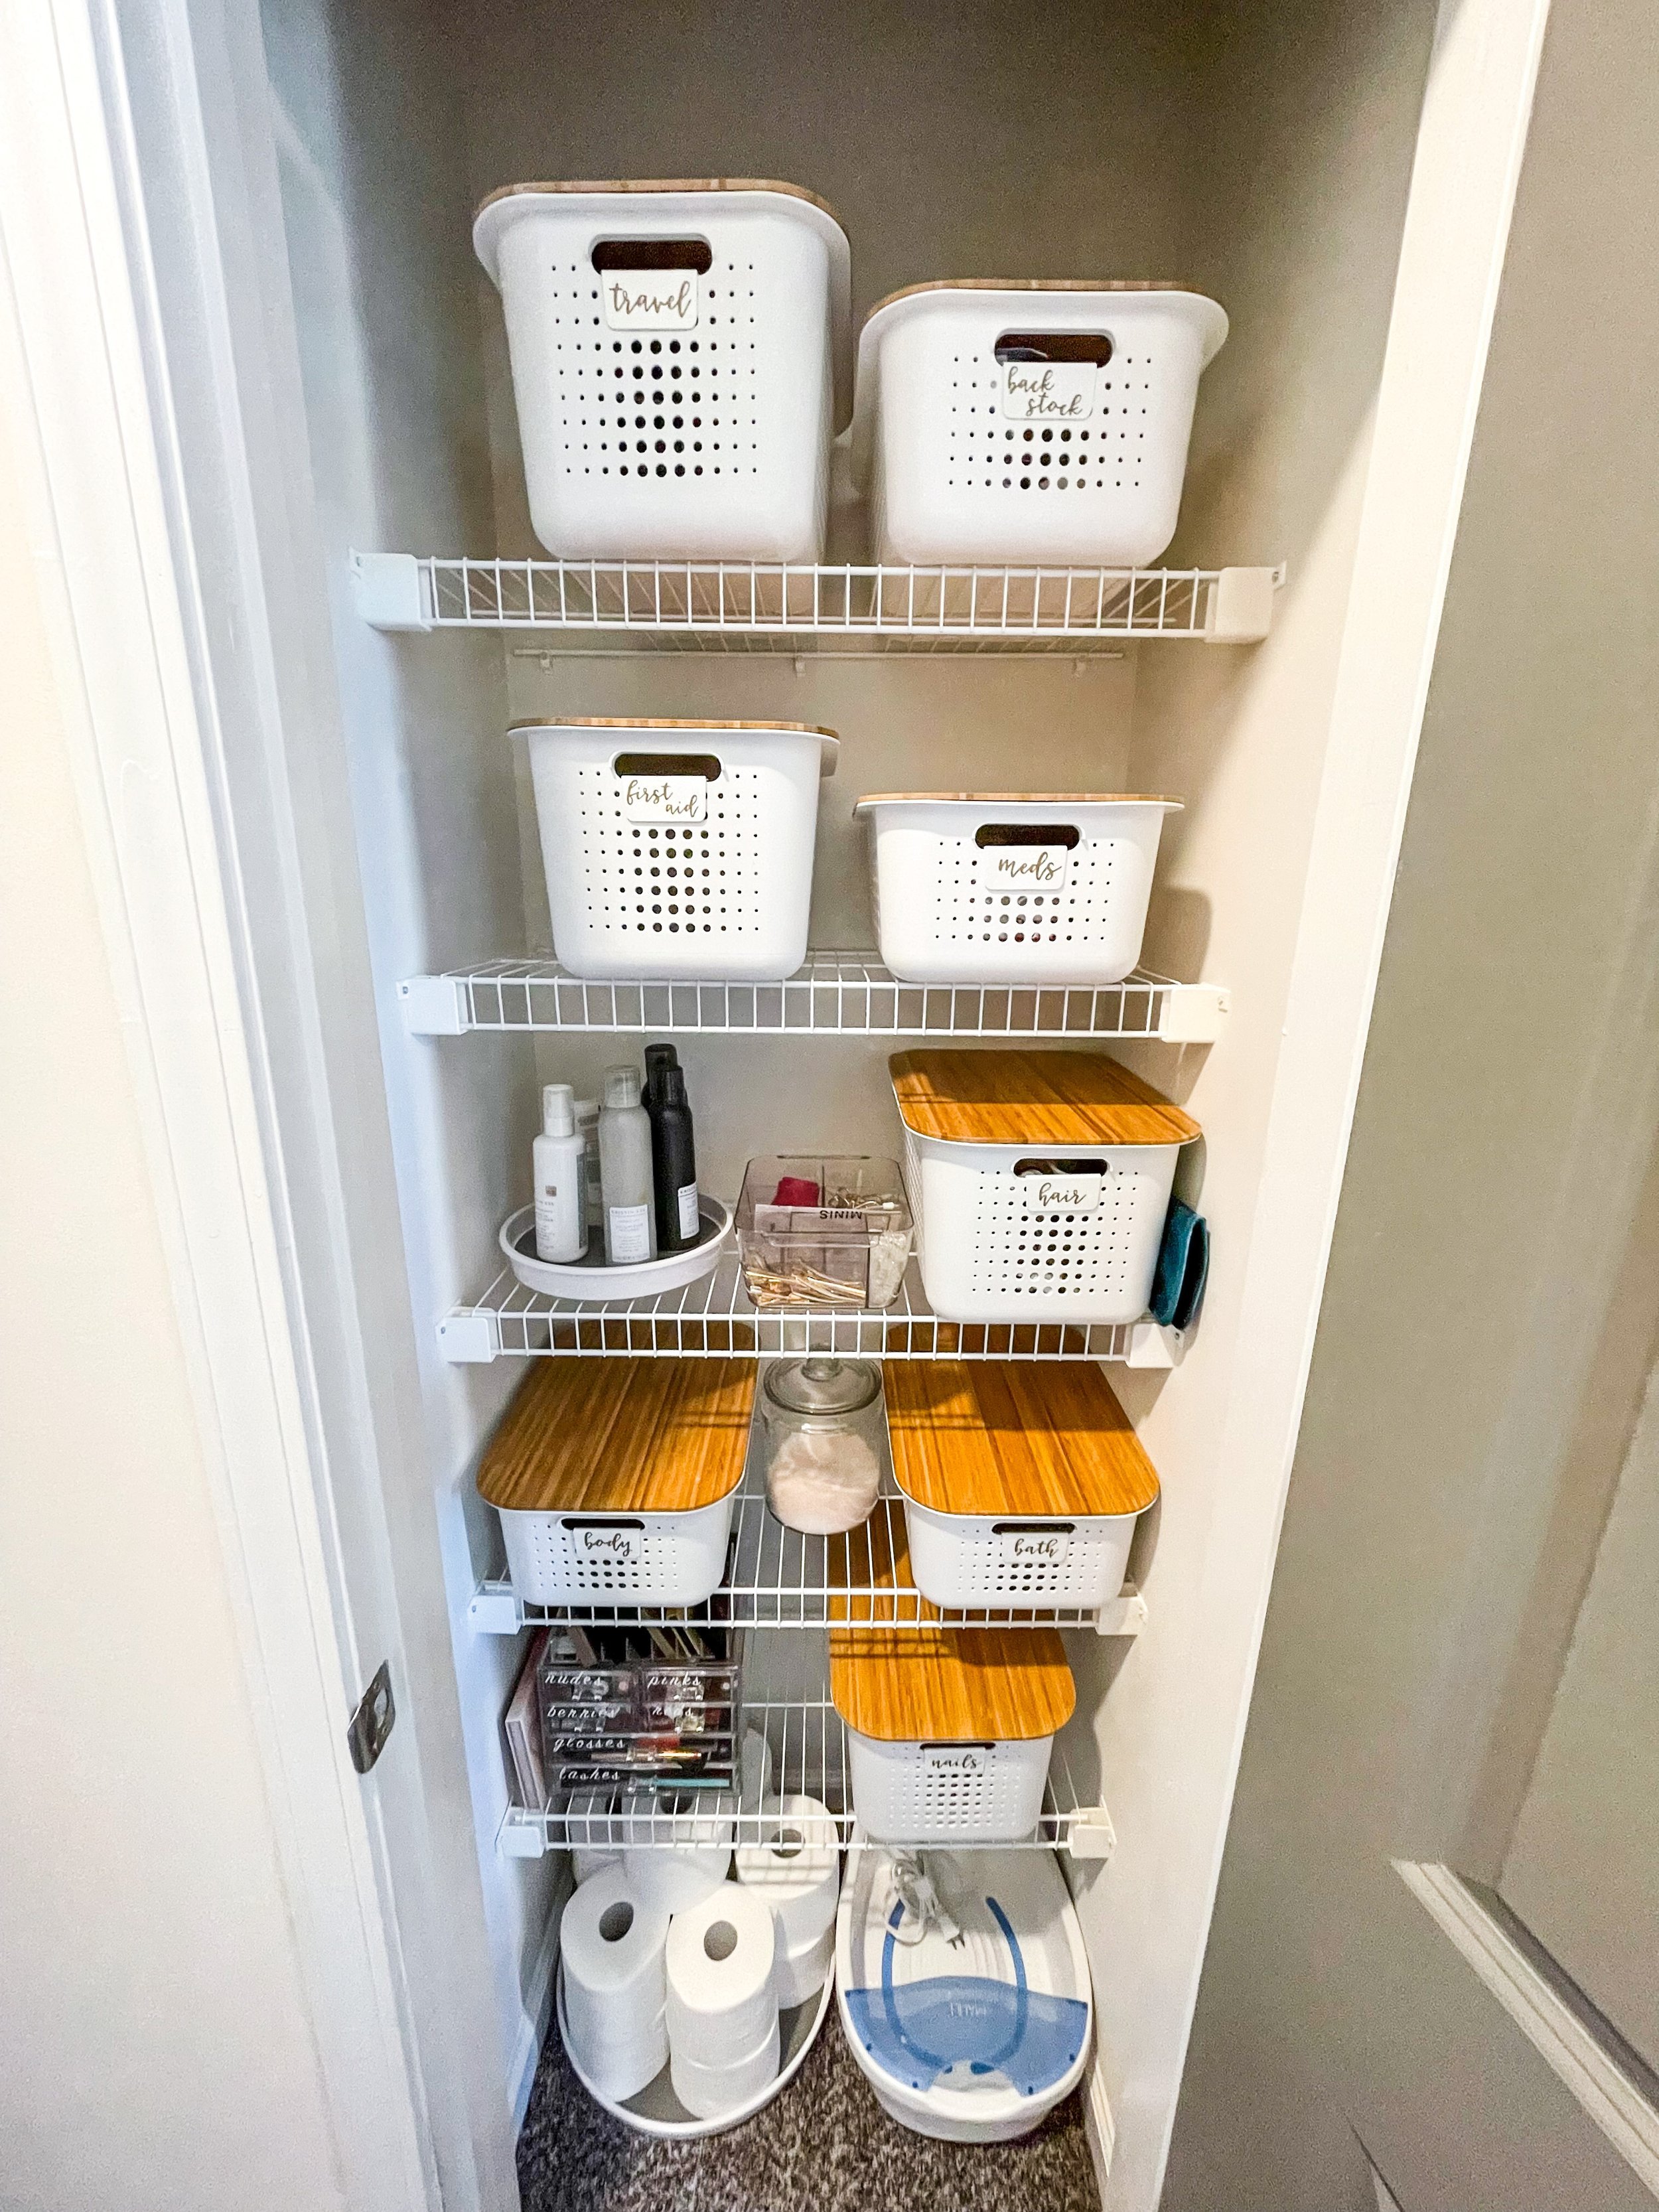
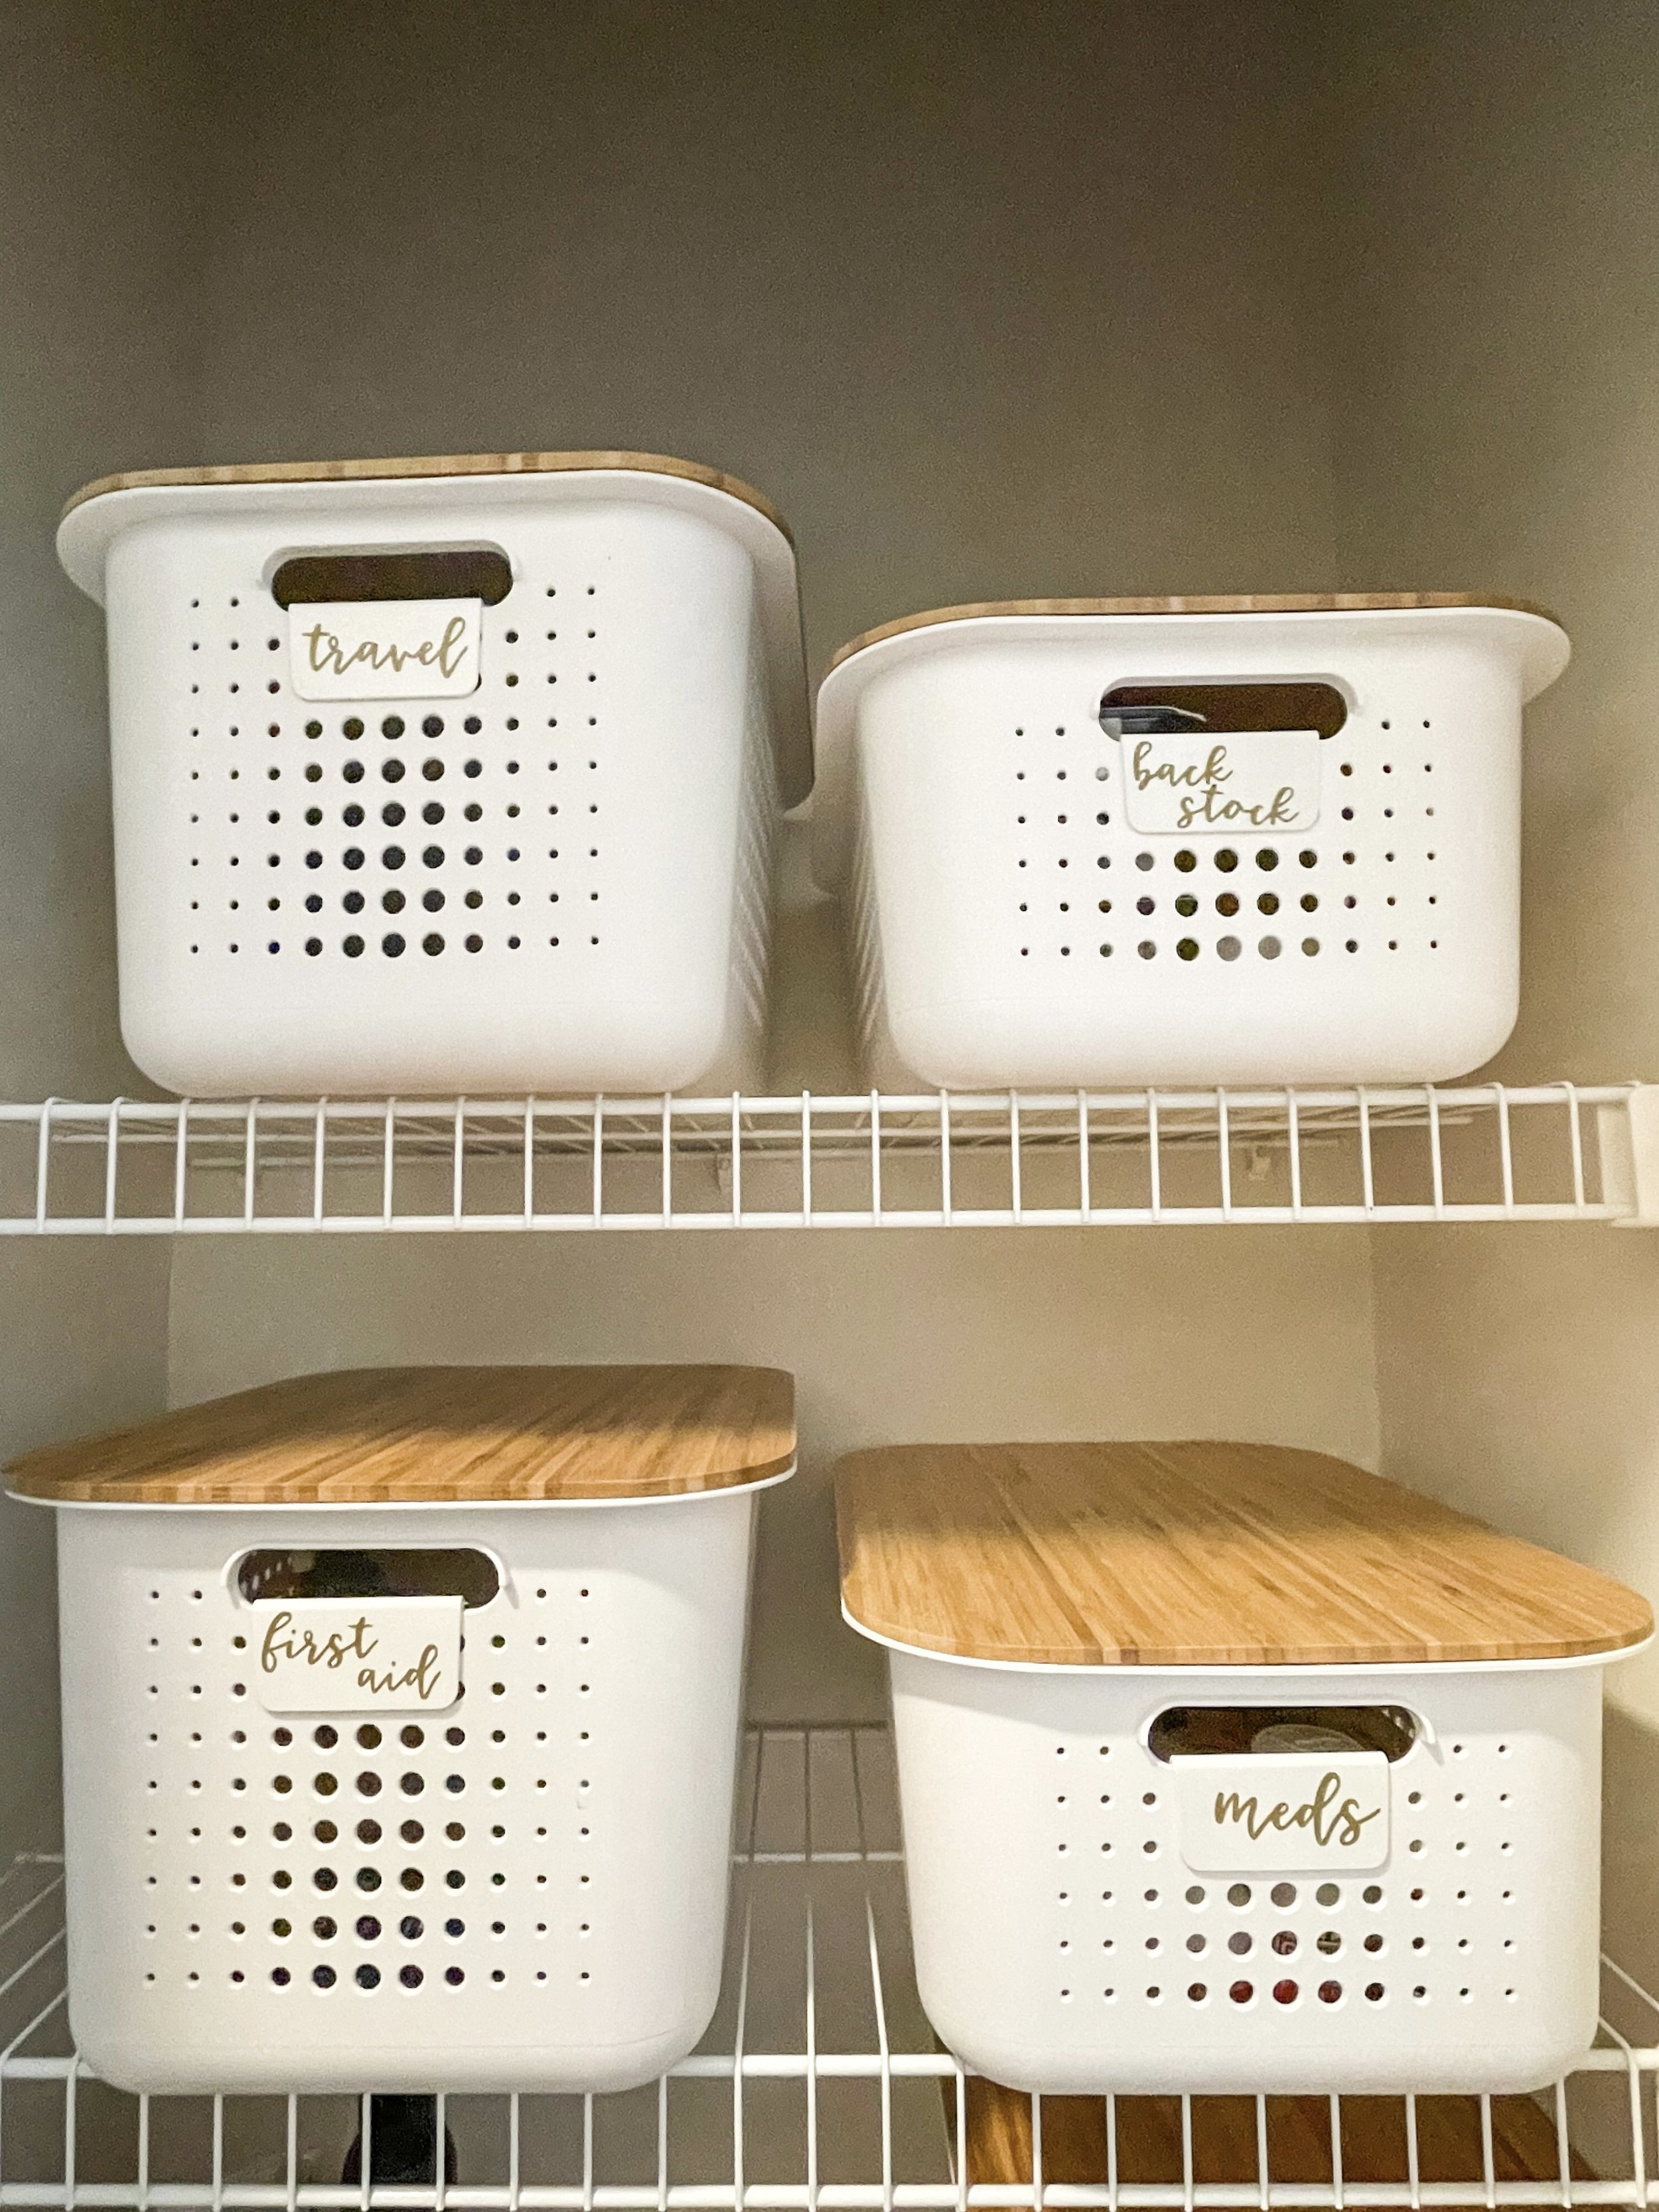
Everything else was small enough to fit in the medium size. And this was the end result:
I kept the acrylic makeup organizer and glass bath salts jar from before. And then repurposed an extra acrylic organizer (that had some bath bombs and soaps in it which moved to the bath basket) to store my hair accessories that used to be in the hair tool organizer. I love being able to just reach in and grab what I need quickly. This was an old school TCS find but they currently have something similar and I’ve also used this organizer for hair accessories in the past which is good if you’re concerned about dust!

Overall, I love how simple and streamlined the closet is and even though I don’t go in it all of the time, it still makes it so much easier to find what I need when I do.
Probably my favorite thing is the look of the white bins and their clips (yes, you have to buy separately just like the lids but they’re about $4 for a 2 pack) with the gold vinyl labels. I have a highlight on my IG called “label” where I run down exactly what I use to make my custom labels and where you can find the supplies.
One thing you may have noticed by now is that this closet is missing one thing…linens. Lol, yup, I don’t actually store any in here because I only have two towels for each bathroom that hang in the rooms while extra washcloths and hand towels are stored under the sinks and I only own one set of sheets for each bed. So, they’re either on it or in the washing machine. Sounds crazy but living minimally is just so damn easy!
I hope this inspires you to give your linen closet or honestly any space in your home that needs a little TLC. I’m already excited to share the next space I’m working on (ahem, my walk in closet) so stay tuned!
PS I have an Etsy shop now if you’re looking for gifts for that organized person in your life!
*Disclosure: I only recommend products I would use myself and all opinions expressed here are my own. This post may contain affiliate links that at no additional cost to you, I may earn a small commission.