

Fridge Organization
Hi and welcome to my first ever blog post on the OO site! I’m not entirely new to blogging as I tried my hand at it when I first started Sort and Sweet, my organizing business. The old posts are a little cringey, I’ll be the first to admit it. But with the help of my business partner, we put our heads together and revamped it for 2021. Feel free to check it out here.
While also all about getting organized, this blog will be much more personal in that it will showcase exactly what steps I take to organize my things in my new home (and eventually how I keep it that way).
When I recently moved, the fridge was the first thing I tackled. Because, priorities.
Being a professional organizer of a few years now, I know for a fact that the refrigerator is a struggle spot for most people. After I finish organizing a kitchen or a pantry, some of my clients will ask to do the fridge but most will tell me not to bother because it will always be a mess.
Let’s get something clear here. Your fridge will never be perfect. My fridge will never be perfect. But it can be more organized and less of a hassle by following one of the organizing commandments…
Create zones within the space.
This can be compared to organizing your closet by separating shirts from pants from sweaters. Everyone’s wardrobe or closet size might look different but if your shirts have a zone, your pants have a zone and your sweaters have a zone, you know where they need to go when they come out of the laundry.
We all have more or less the same kind of categories in our refrigerators.The meat, cheese, dairy, snacks, produce, leftovers, etc.
By assigning zones for each category, you know where things need to go when you come back from the food store (or the food store drops them off at your door).
You can either decide where these zones are or your fridge might dictate them depending on the size and structure of it. You also might need or want to move some shelves to maximize space.
I fought using containers inside my fridge for the longest time because, in all honesty, I thought they were a waste of money. But once I became an organizer, I decided to give them a try and see what all the fuss was about. And now, I swear I don’t know how I survived without them!
Picking the right containers for your fridge depends on the measurements and also your things. Do you never buy cans? No need for a can organizer. Hate lazy susans? Don’t get one because you won’t use it.
PS half the battle of staying organized is to love the system so you actually use it.
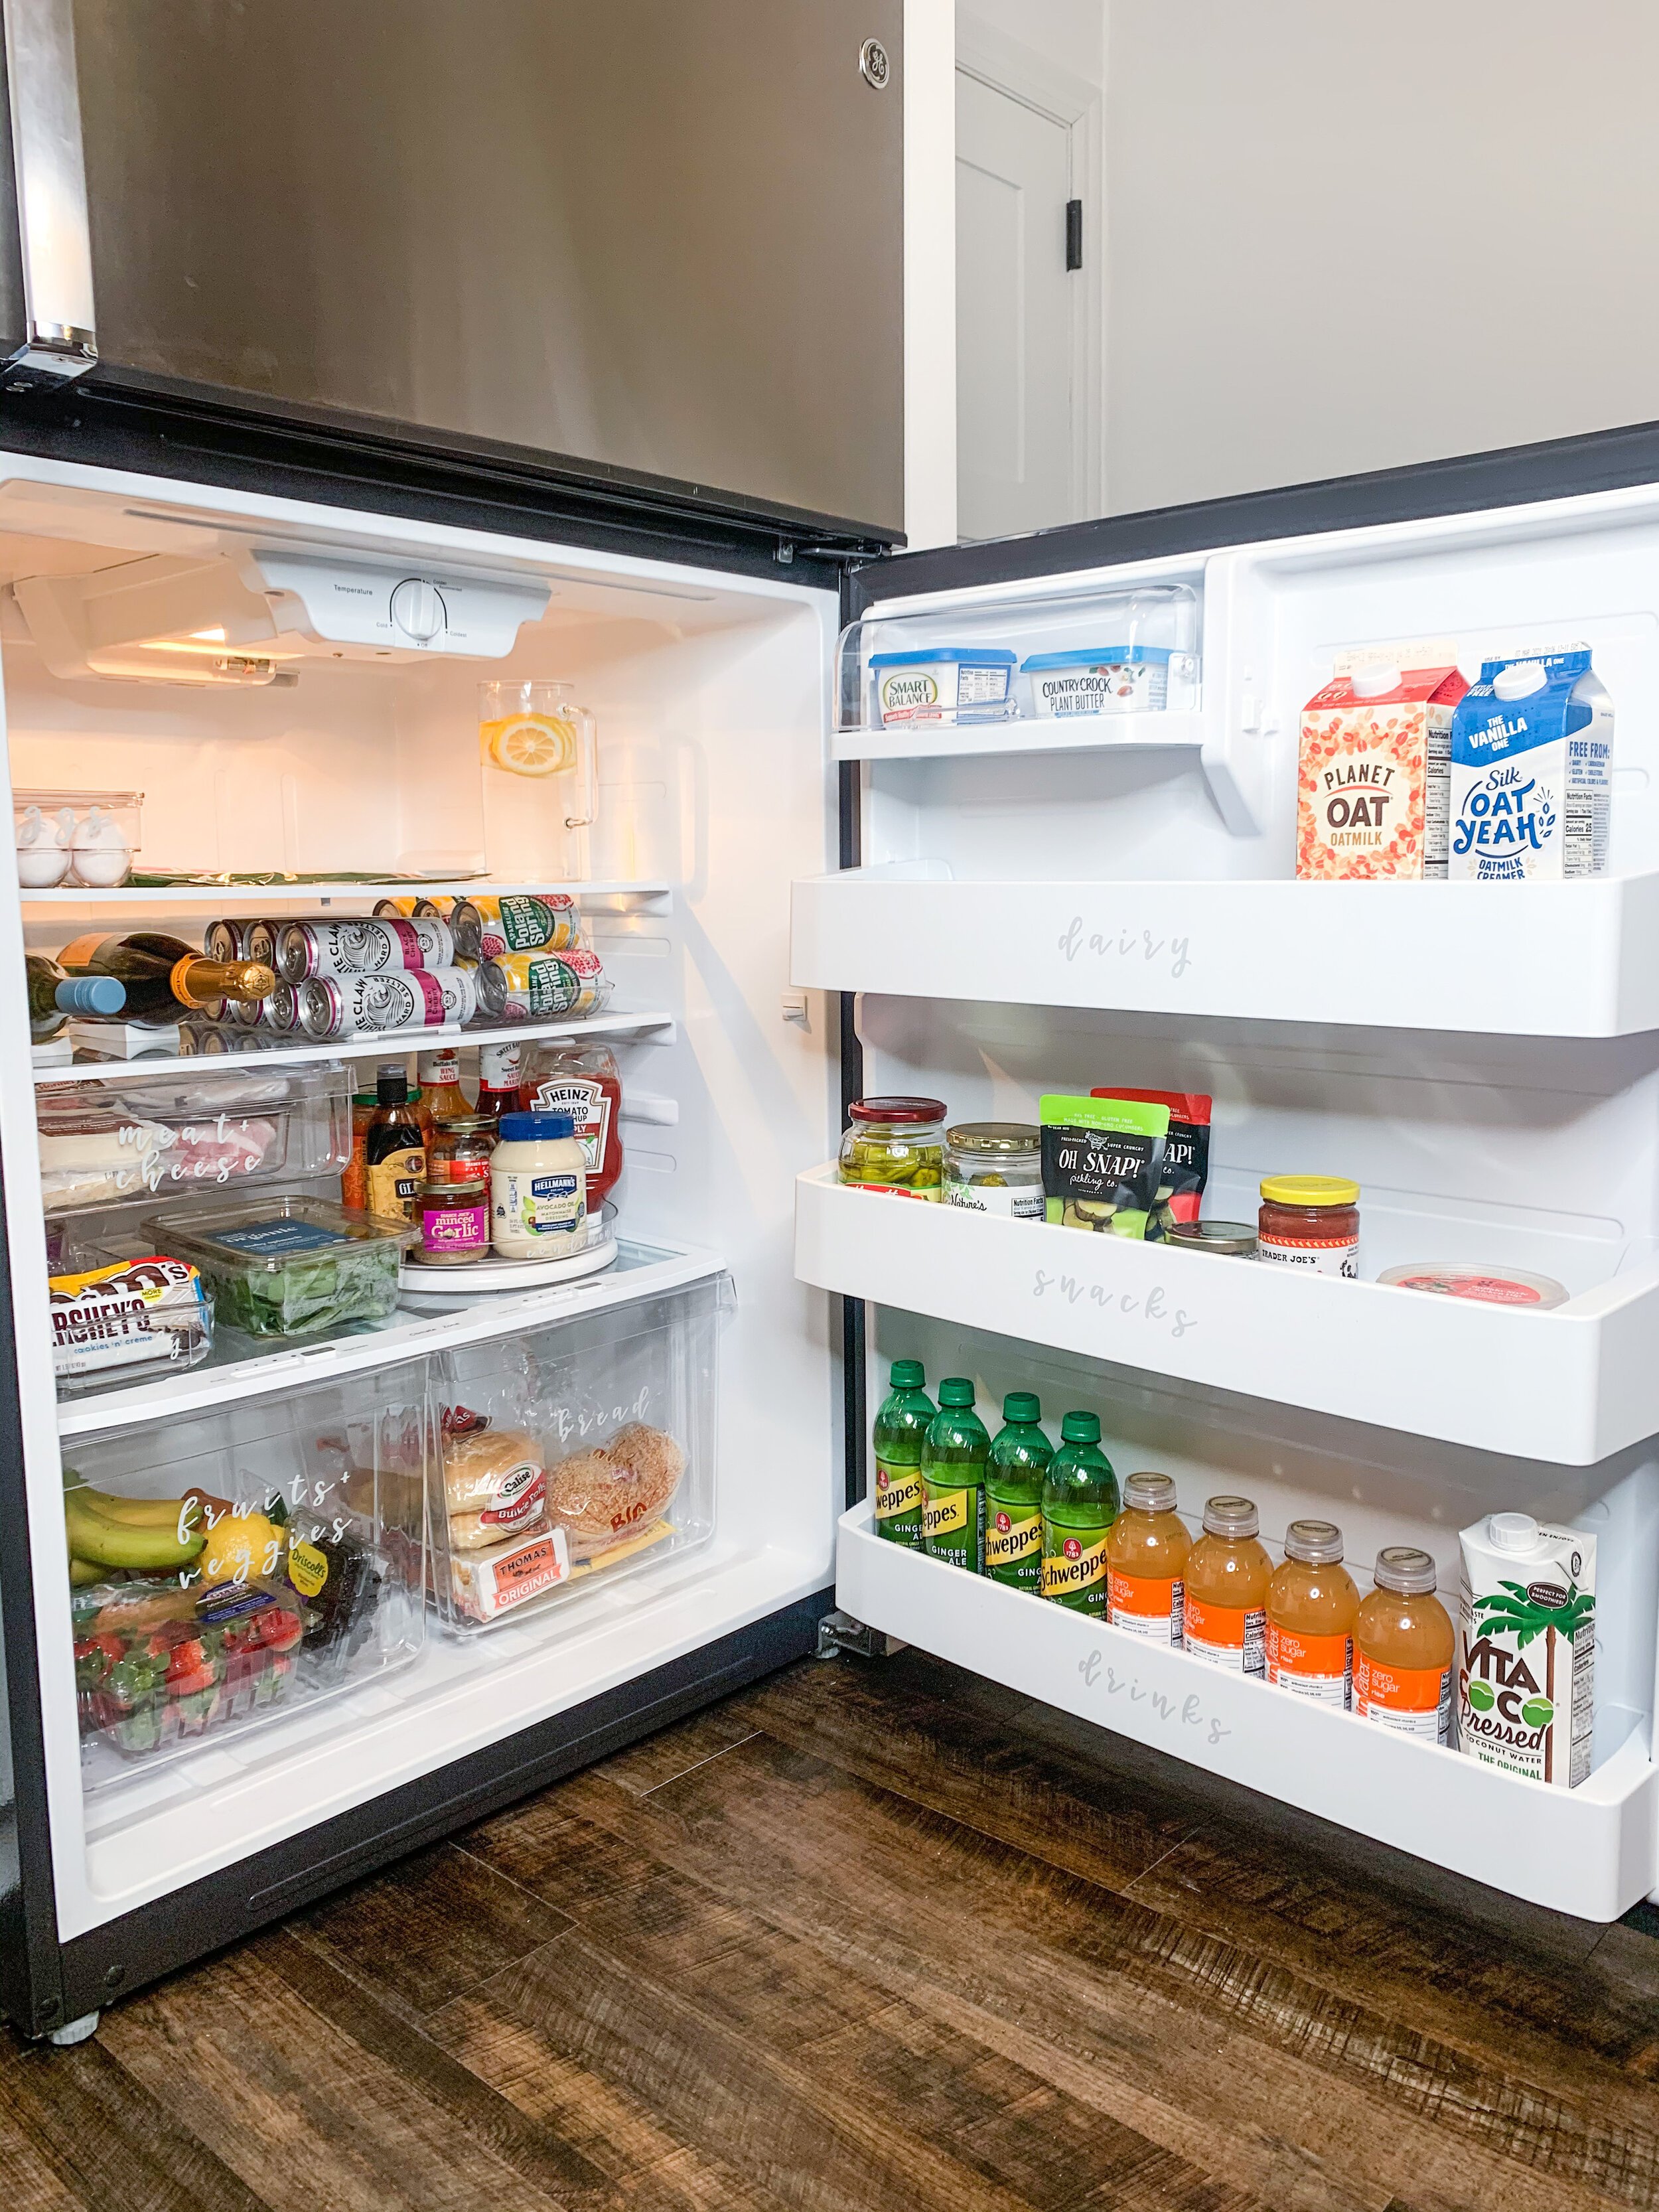
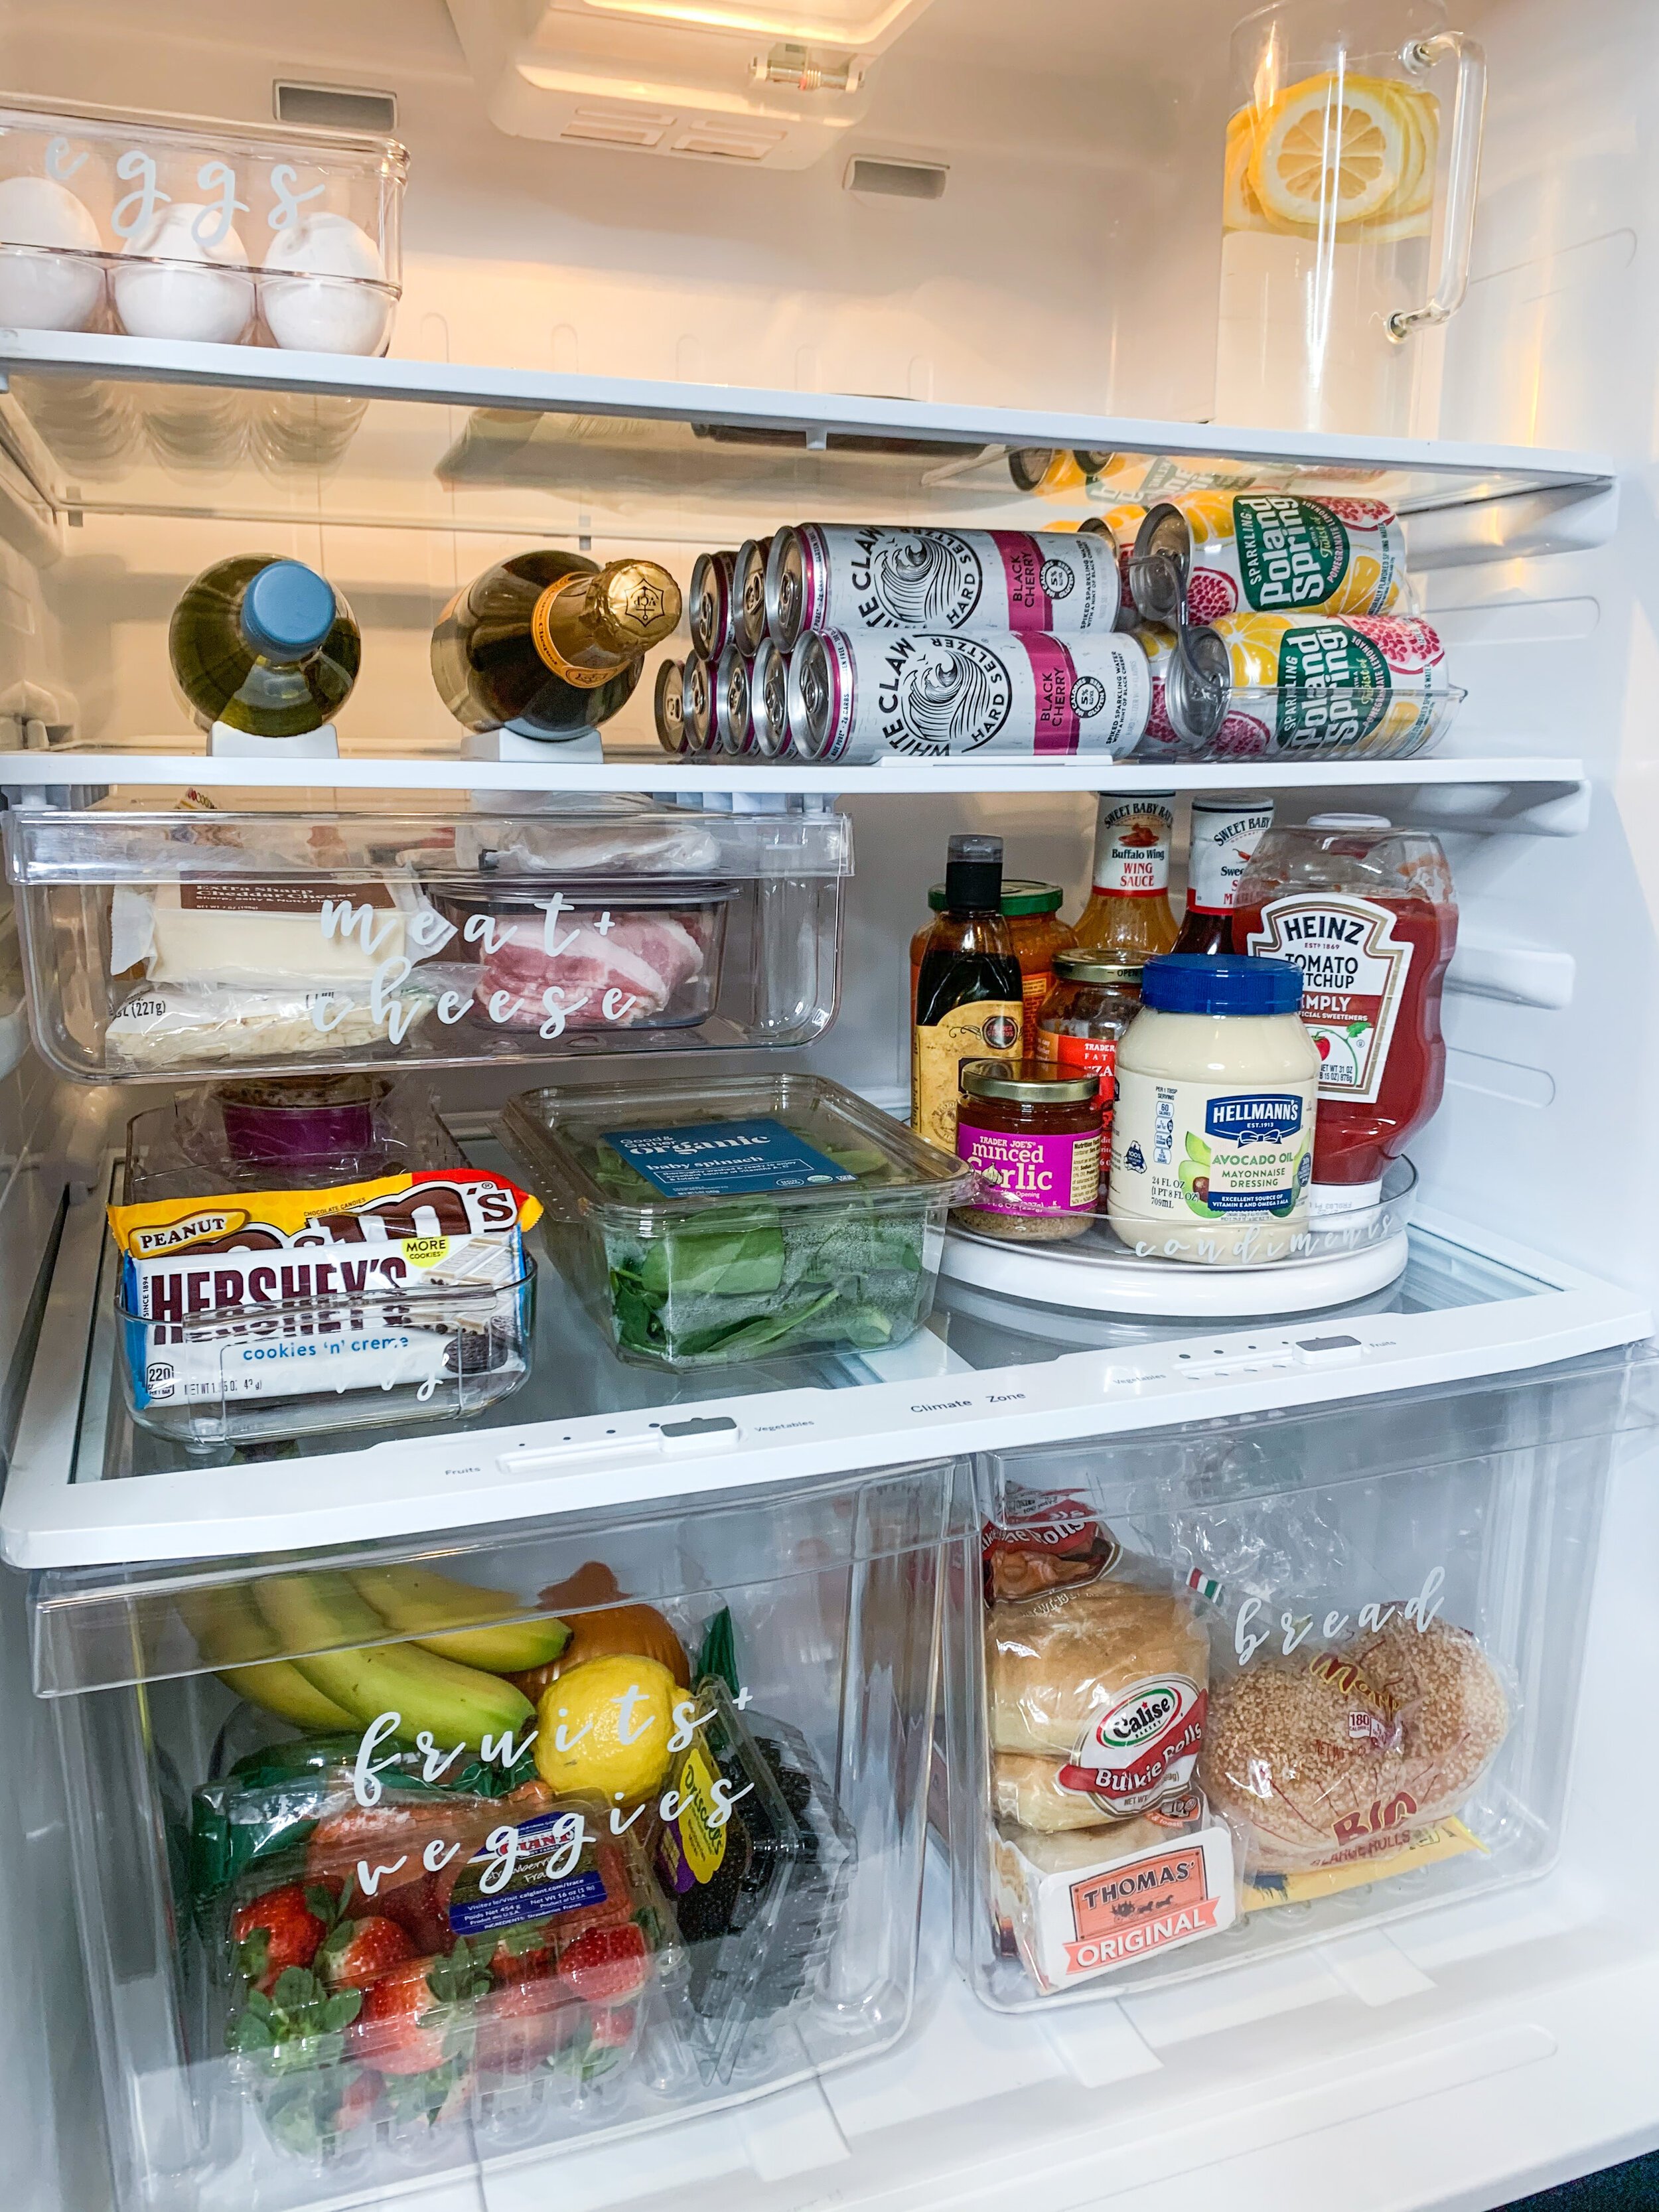
Take a look at how and why I decided to sort my zones the way I did and which products I decided were best to use…
Let’s first focus on the fact that I have drinks separated in two zones. It kinda bothers me but hey, it works for us which is the point.
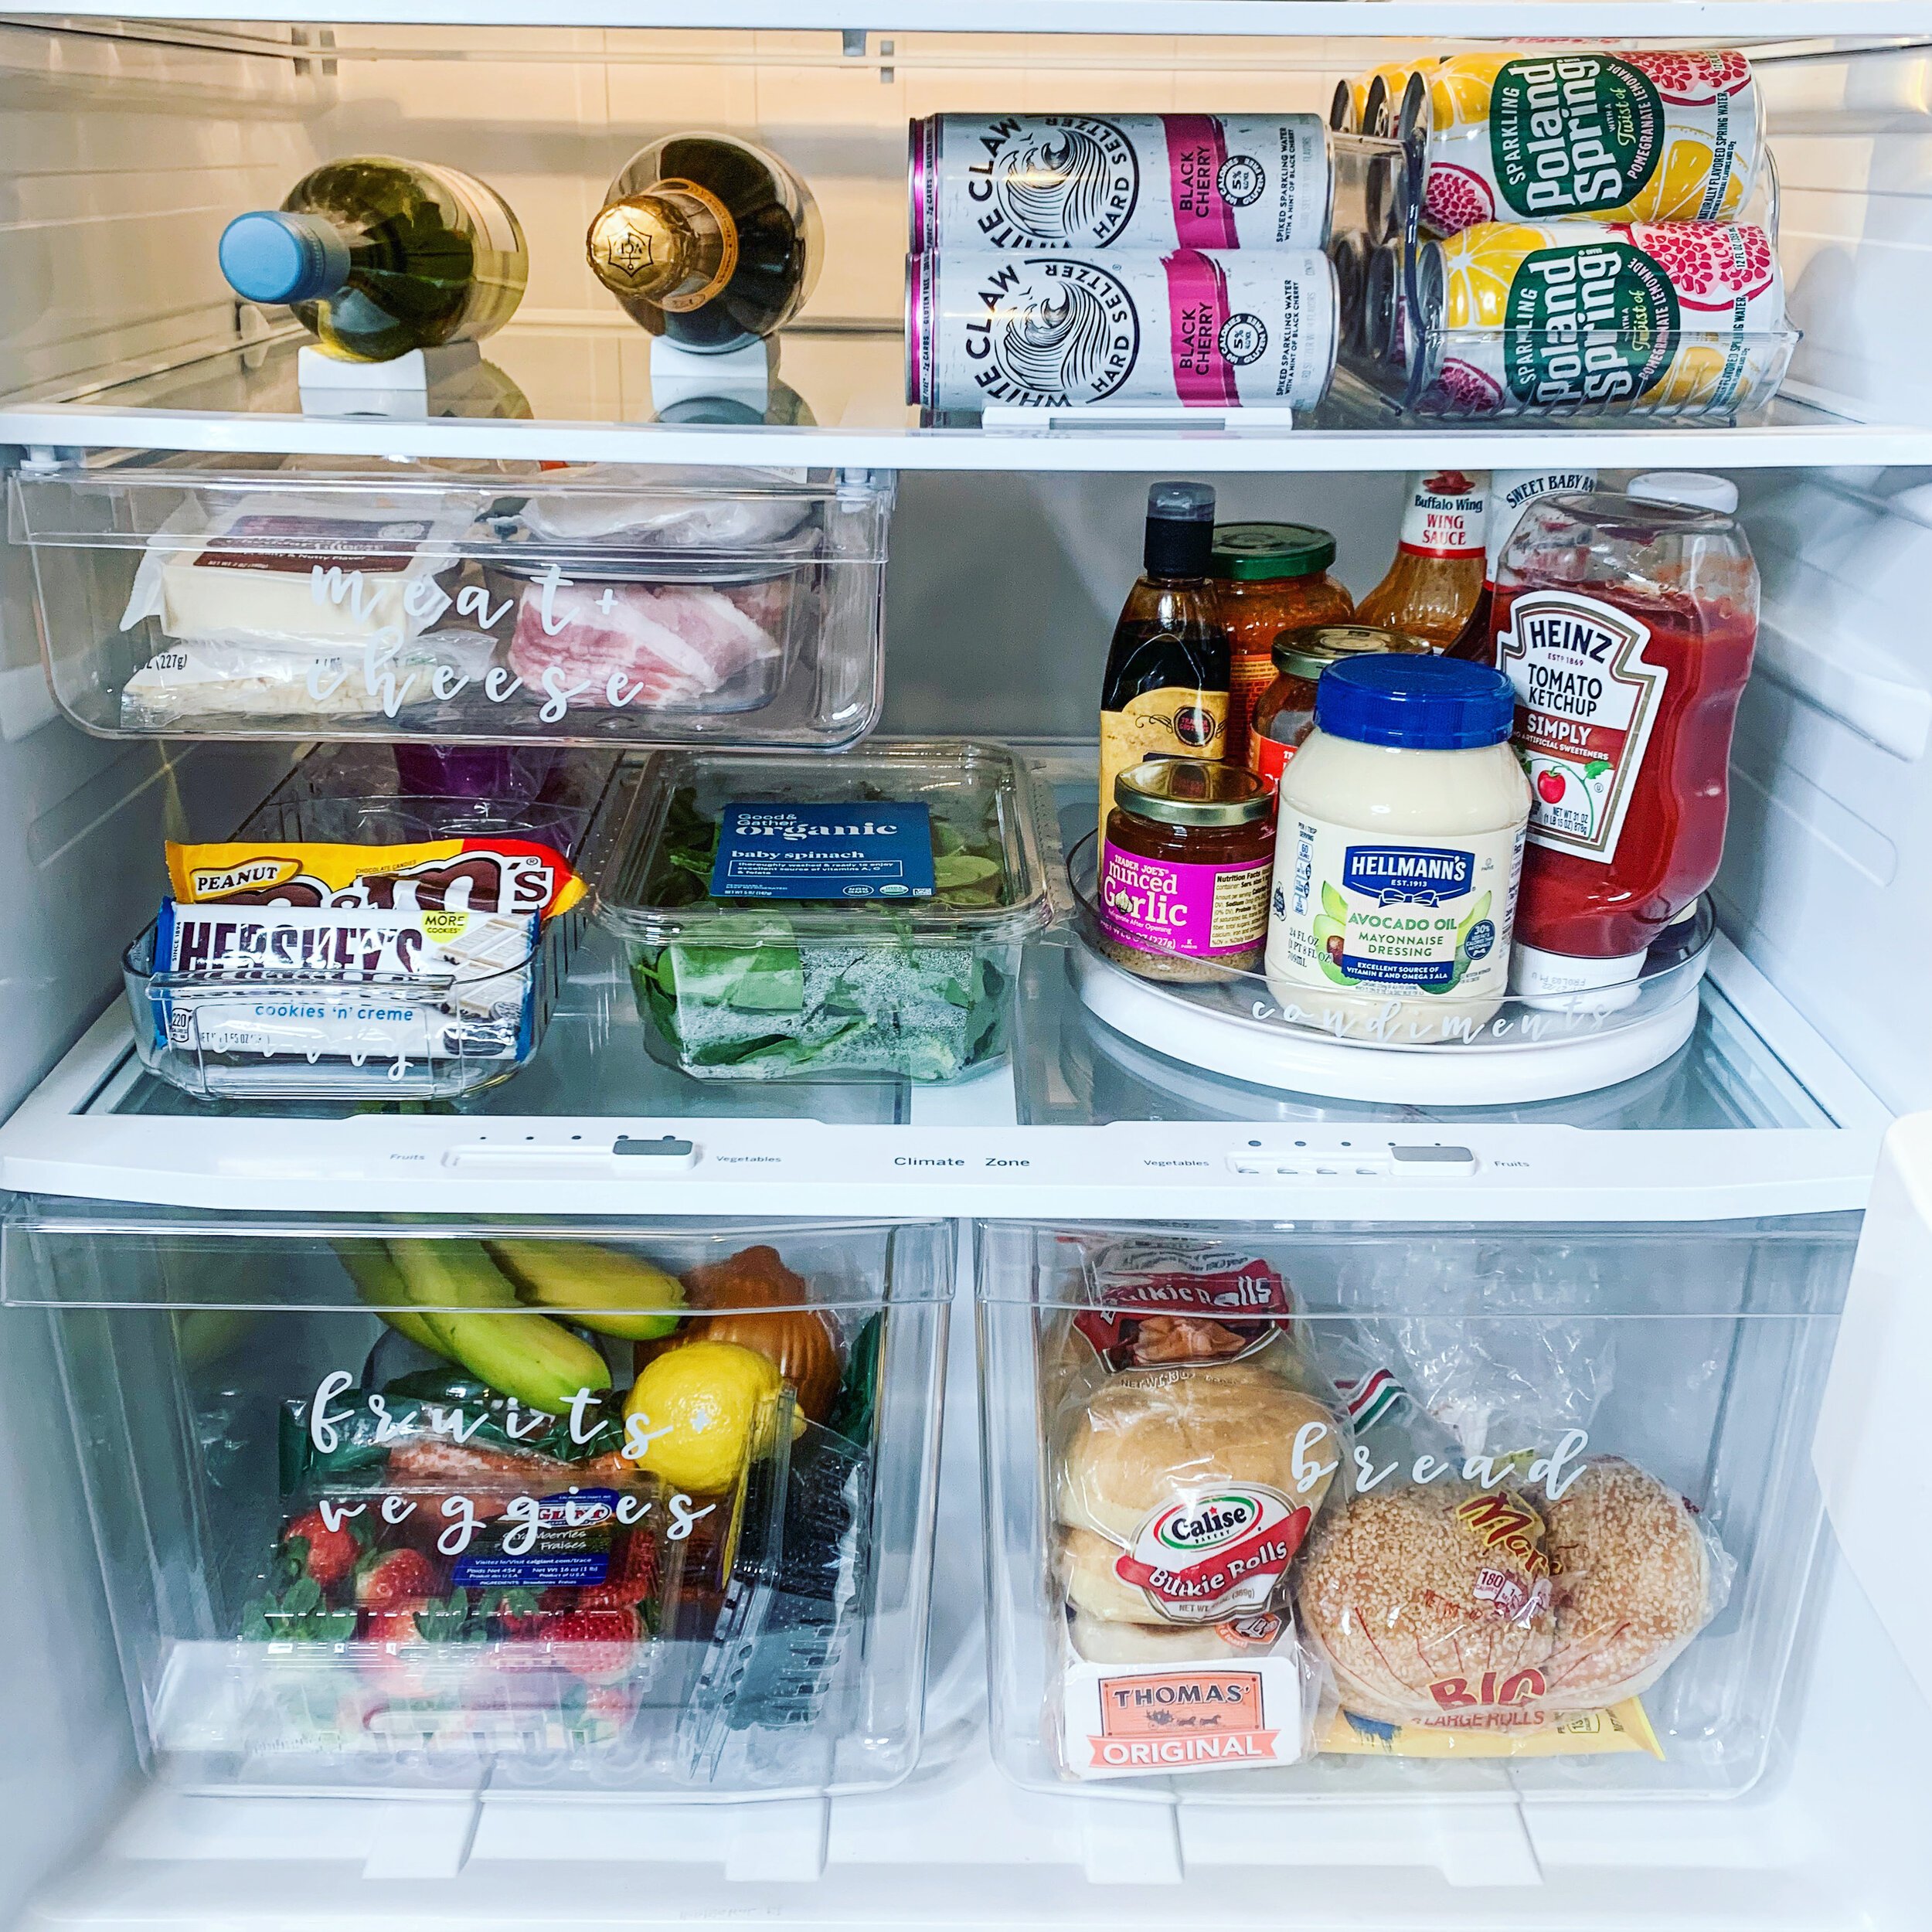
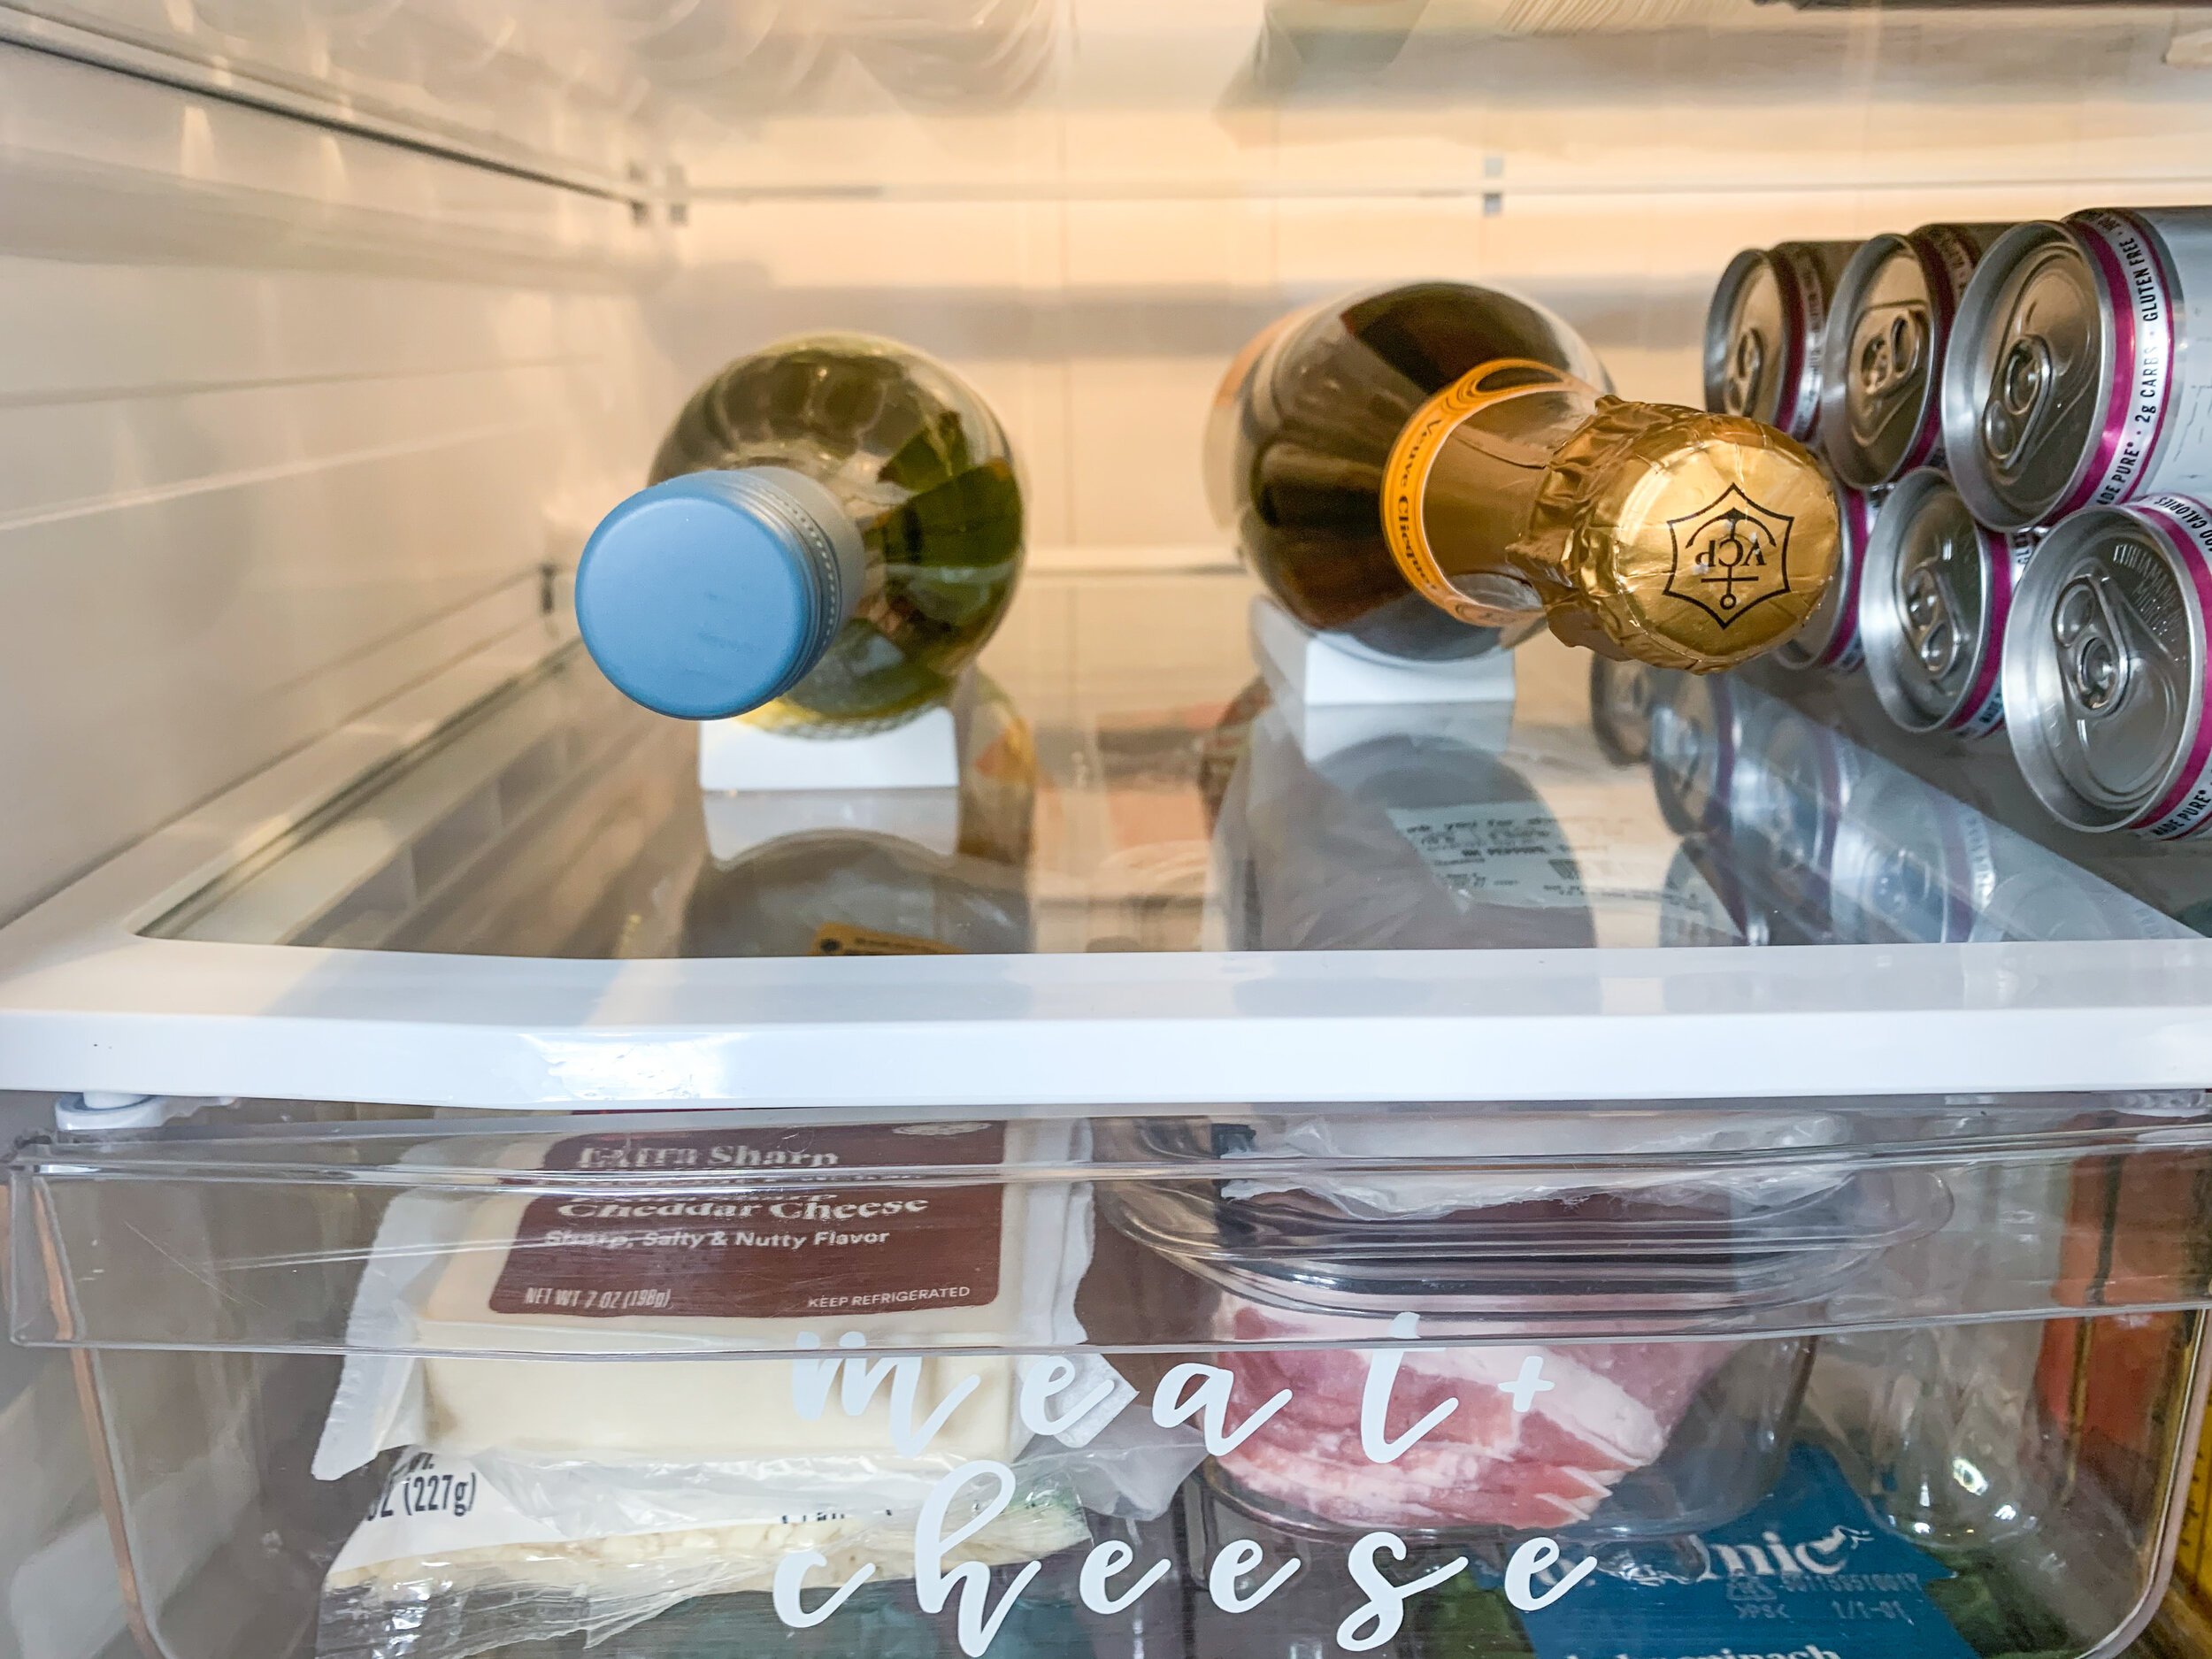
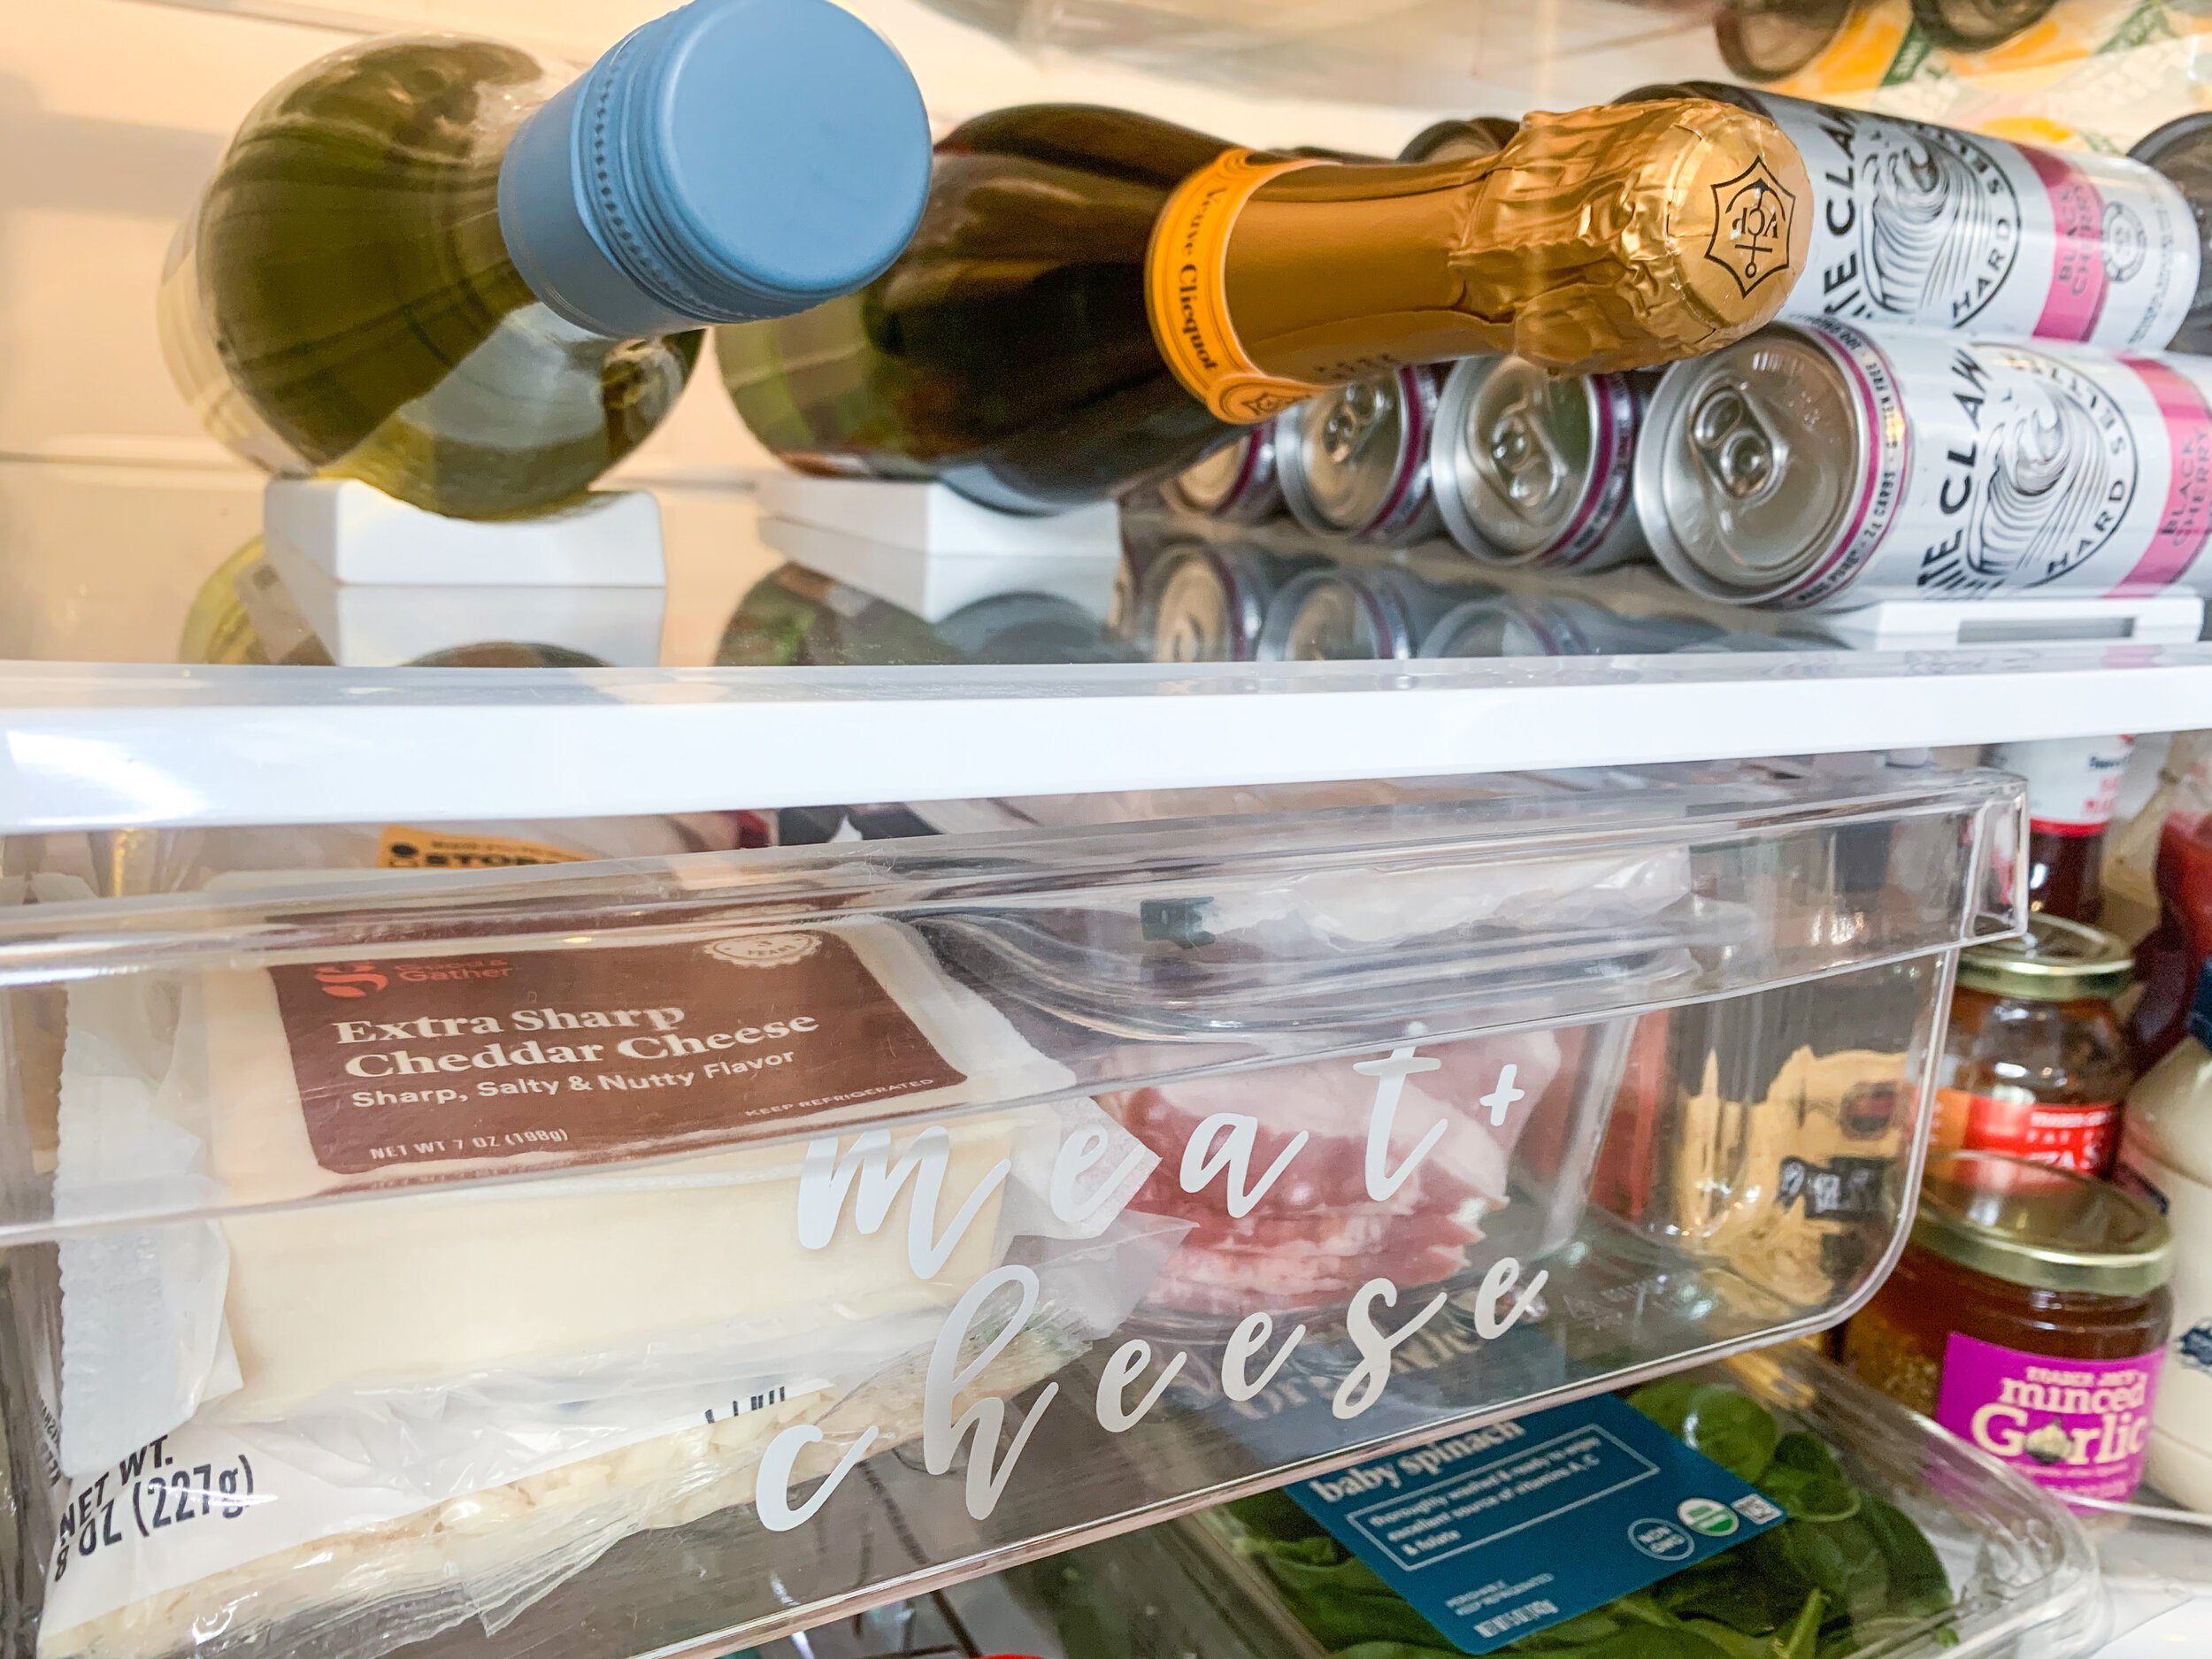
The second shelf holds one bottle of wine and one bottle of champagne (because you should always have one chillin IMO) using these bottle savers from YouCopia. I generally am lazy and buy wine with twist caps but in the off chance it has a cork, I love that they’re elevated to prevent leaking.
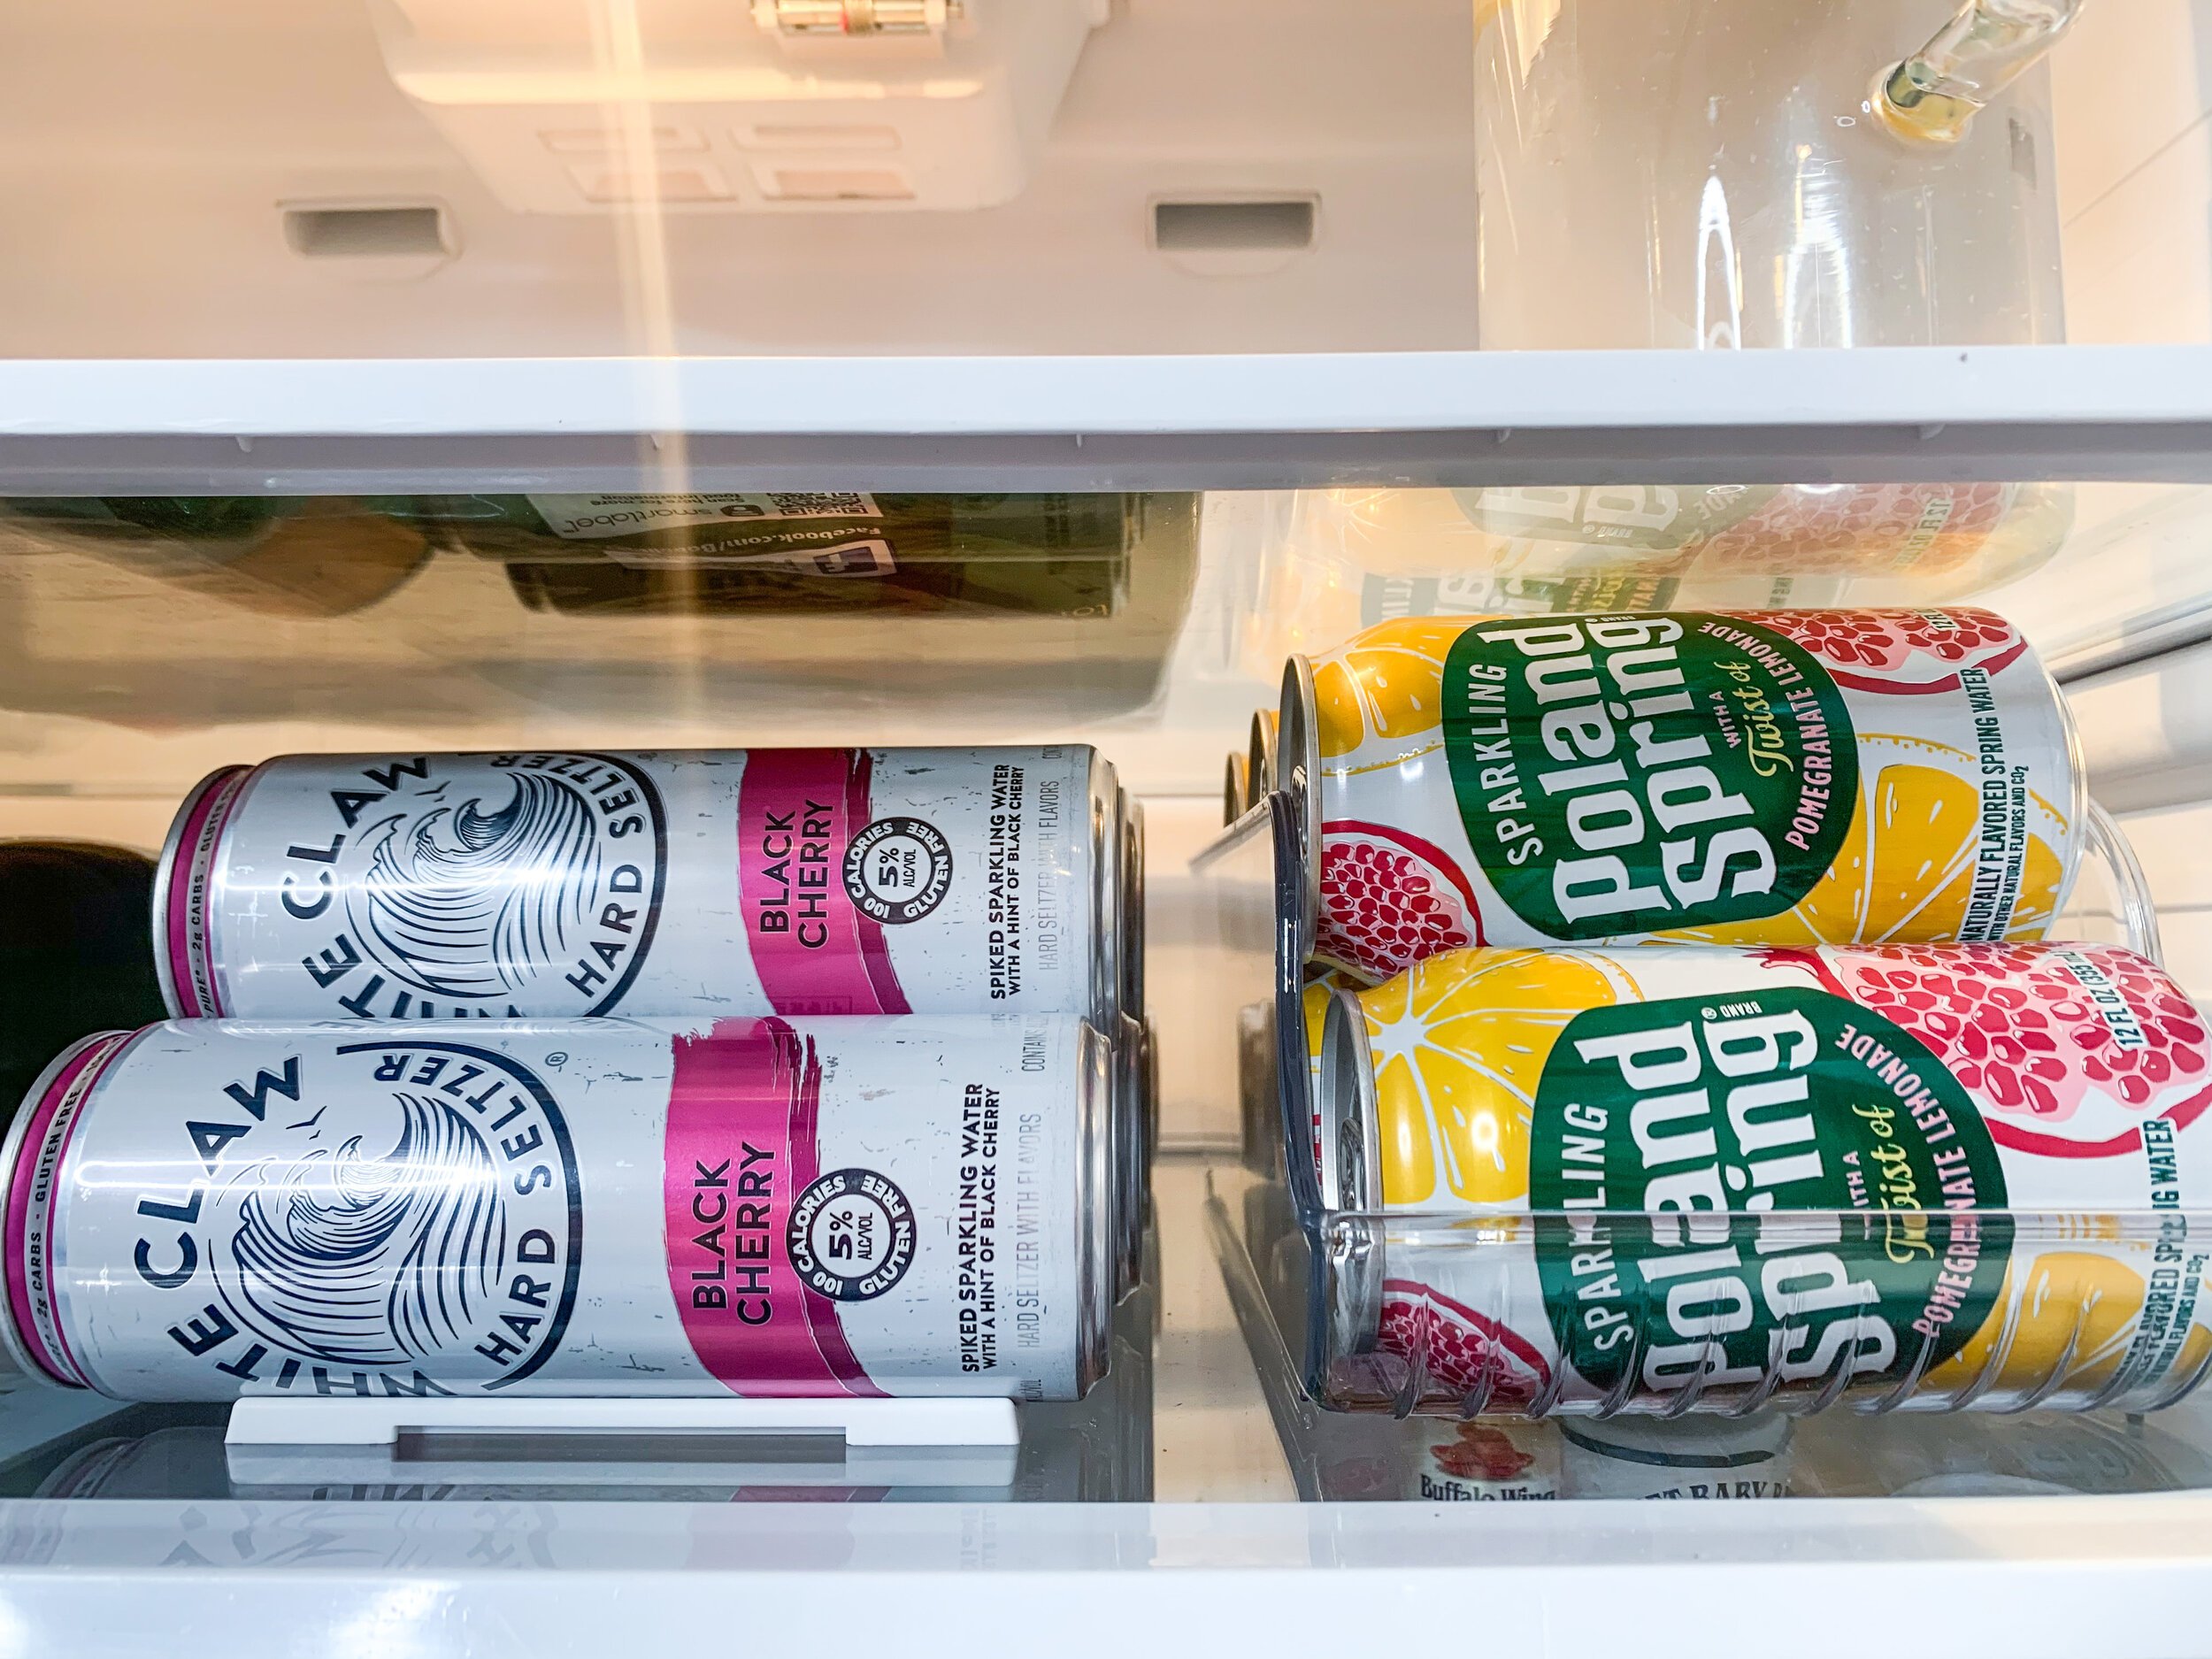
YouCopia also has can stackers which are perfect for those tall slim cans that are basically everywhere now. PS you can buy the bottle or can organizers separately or together in a pack!
I used this InterDesign can organizer for regular sized cans which was one of the very first fridge organizers I bought back in the day. I’m not a big soda drinker but I almost always have at least one pack of seltzers (the non alc kind) on hand. This can work for soda cans or beer too!
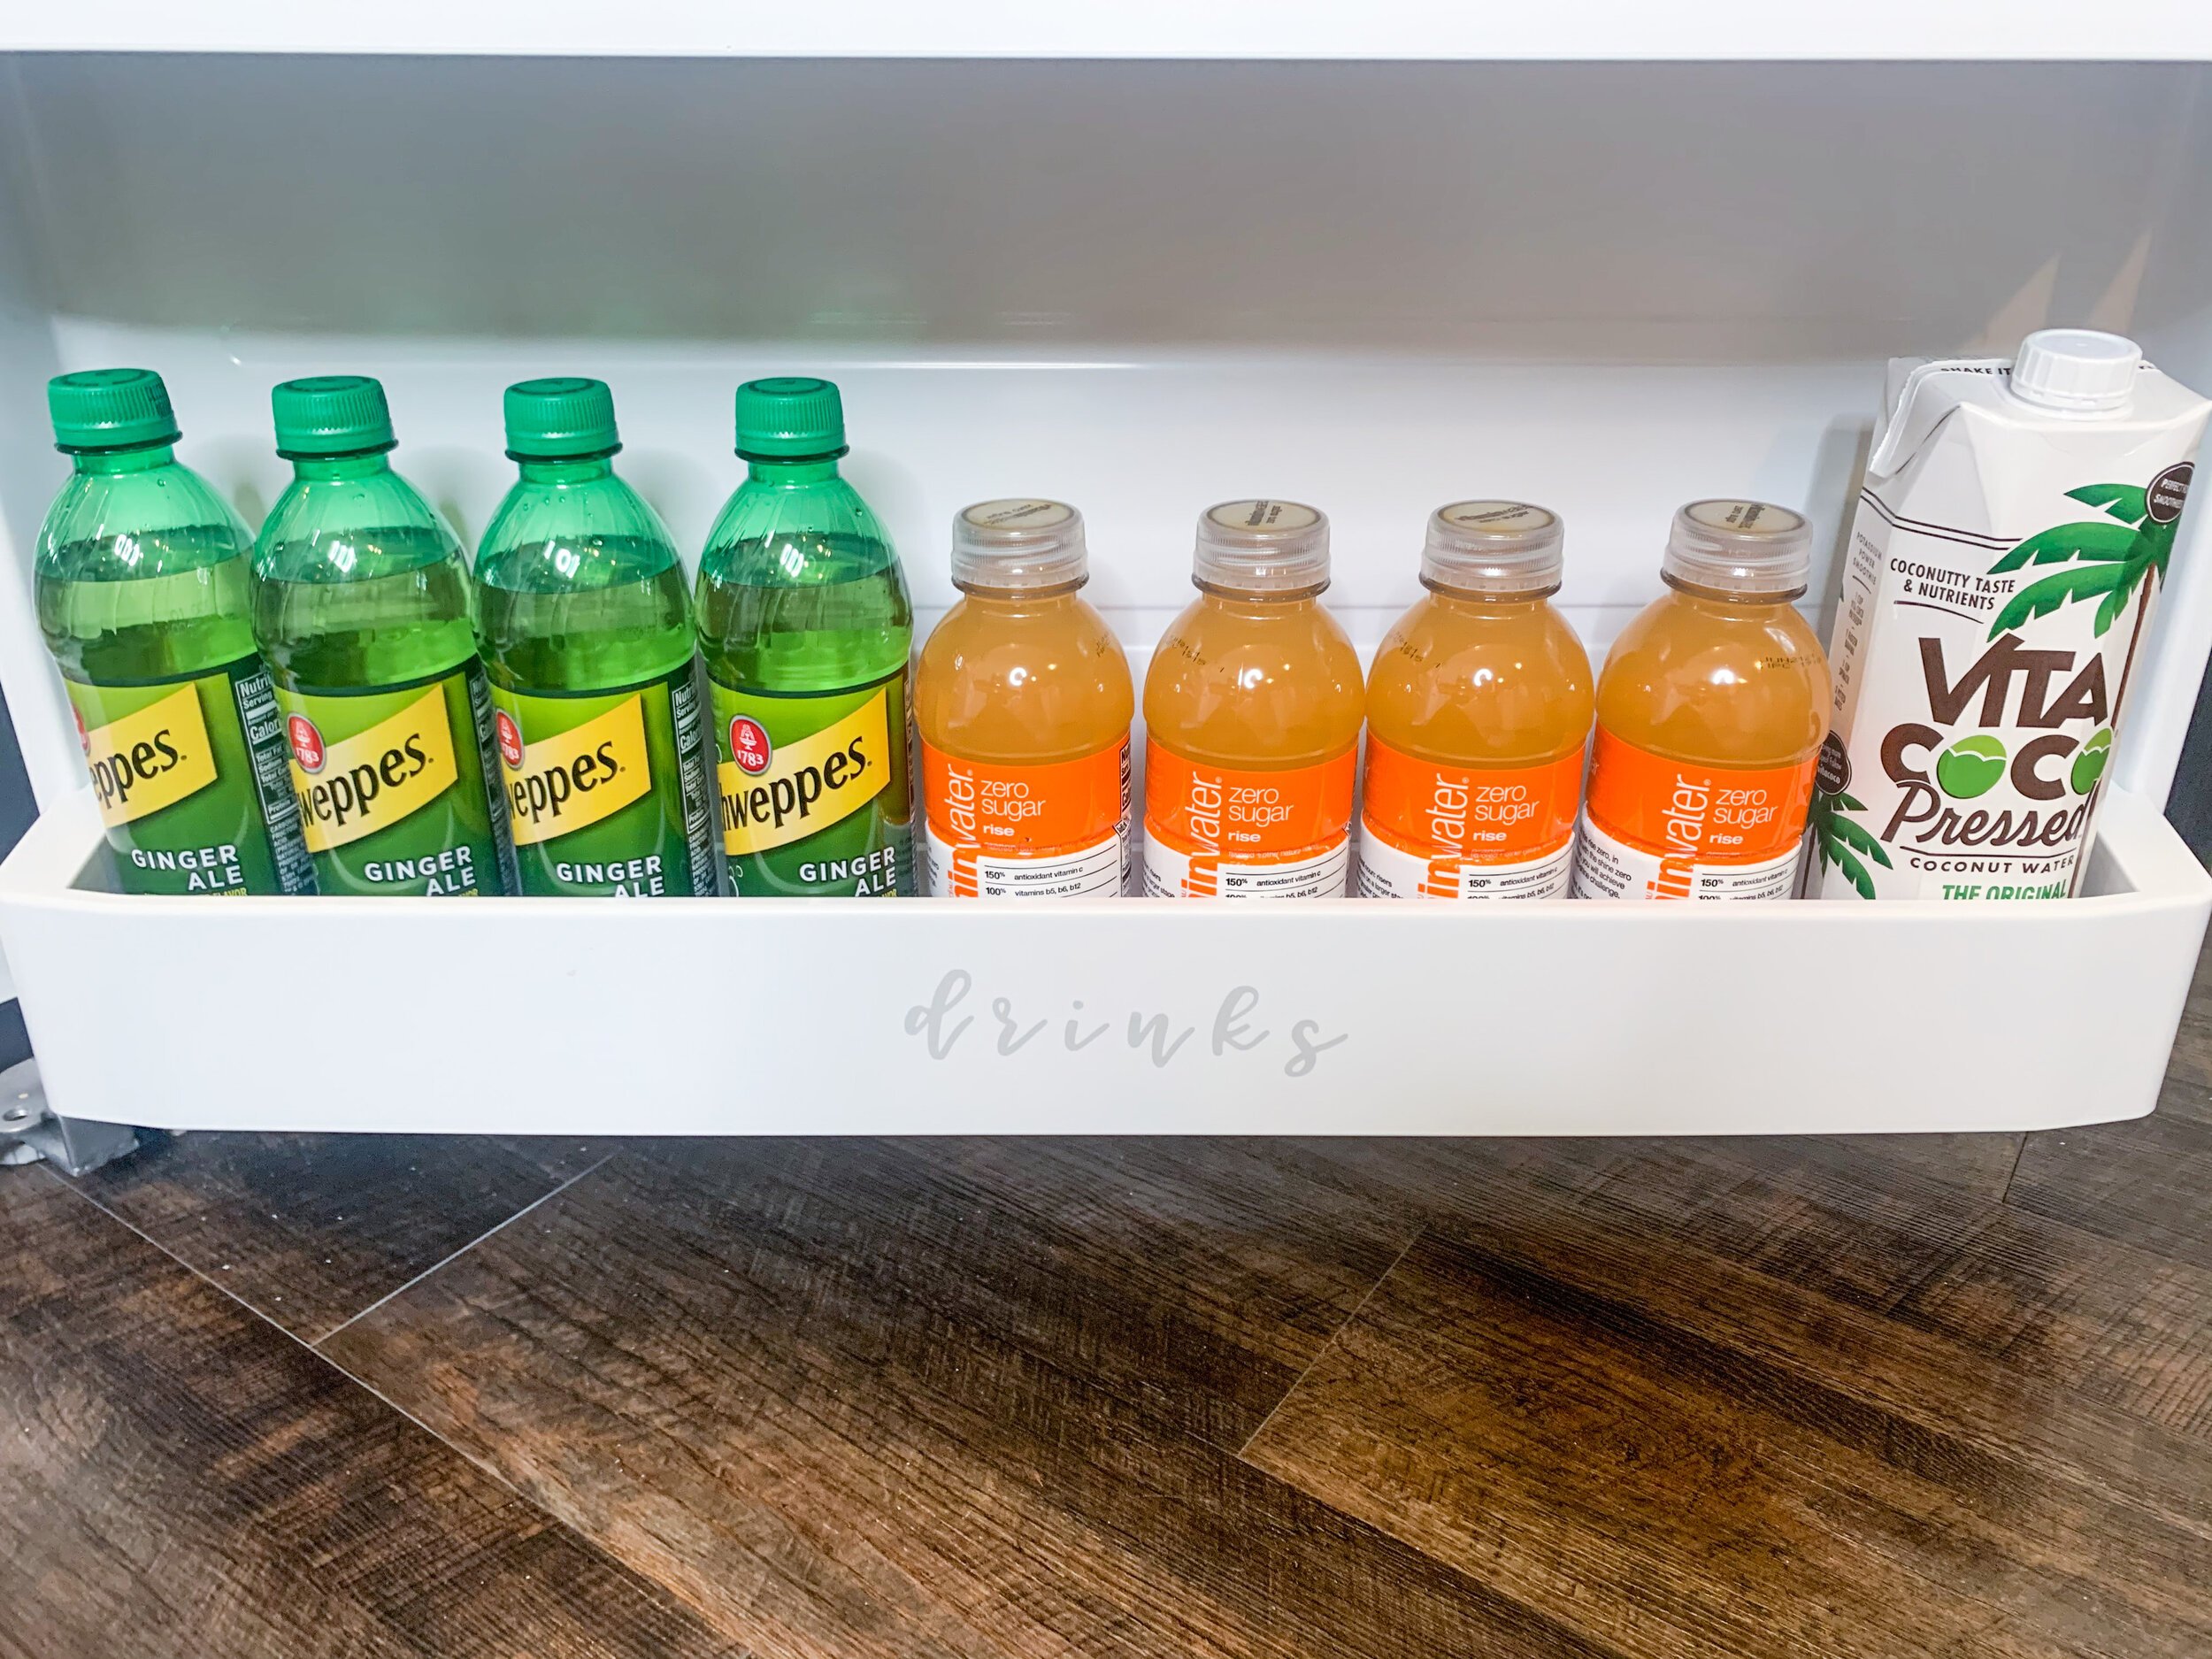
Moving onto the door, I reserved the bottom row for larger drinks. My boyfriend likes his Vitamin Water, iced tea and soda and occasionally, I’ll have a bottle of coconut water or kombucha.
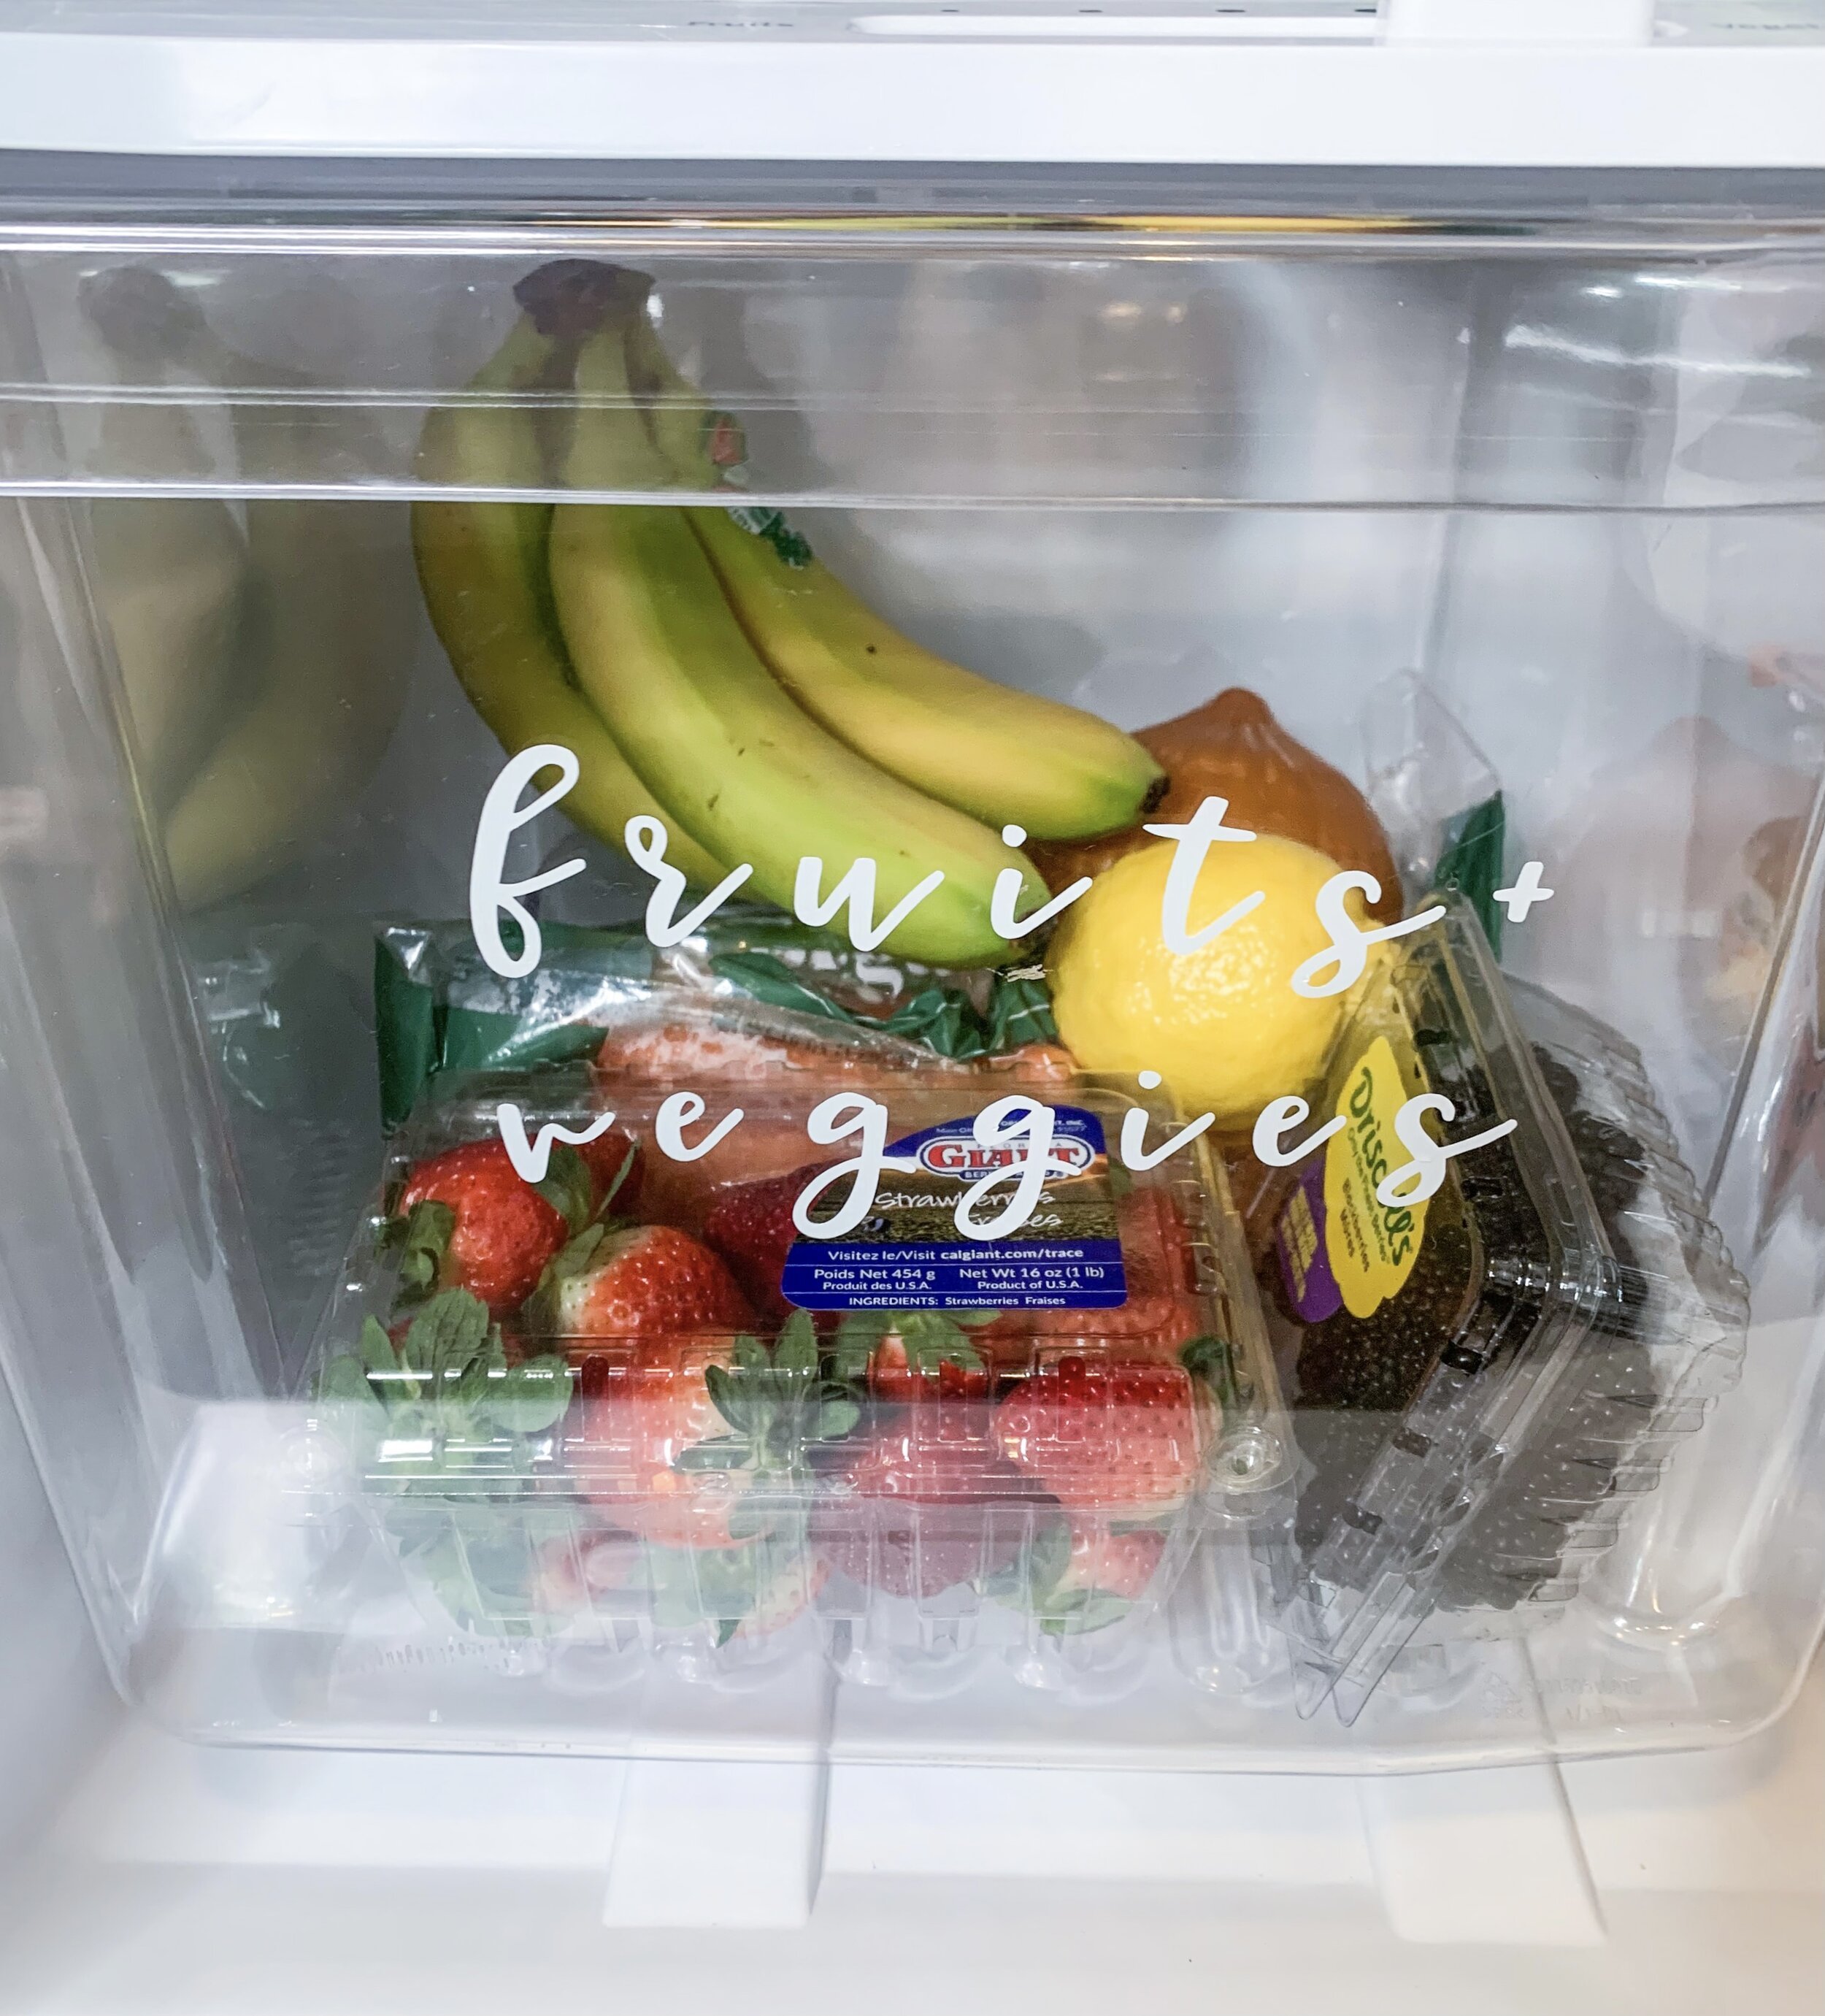
Moving onto the bottom crisper drawers, according to my fridge, one is supposed to be reserved for fruits and the other vegetables. But we just really don’t eat that many of either (especially fresh, we’re into the frozen ones) so I made the decision to combine the two into one drawer.
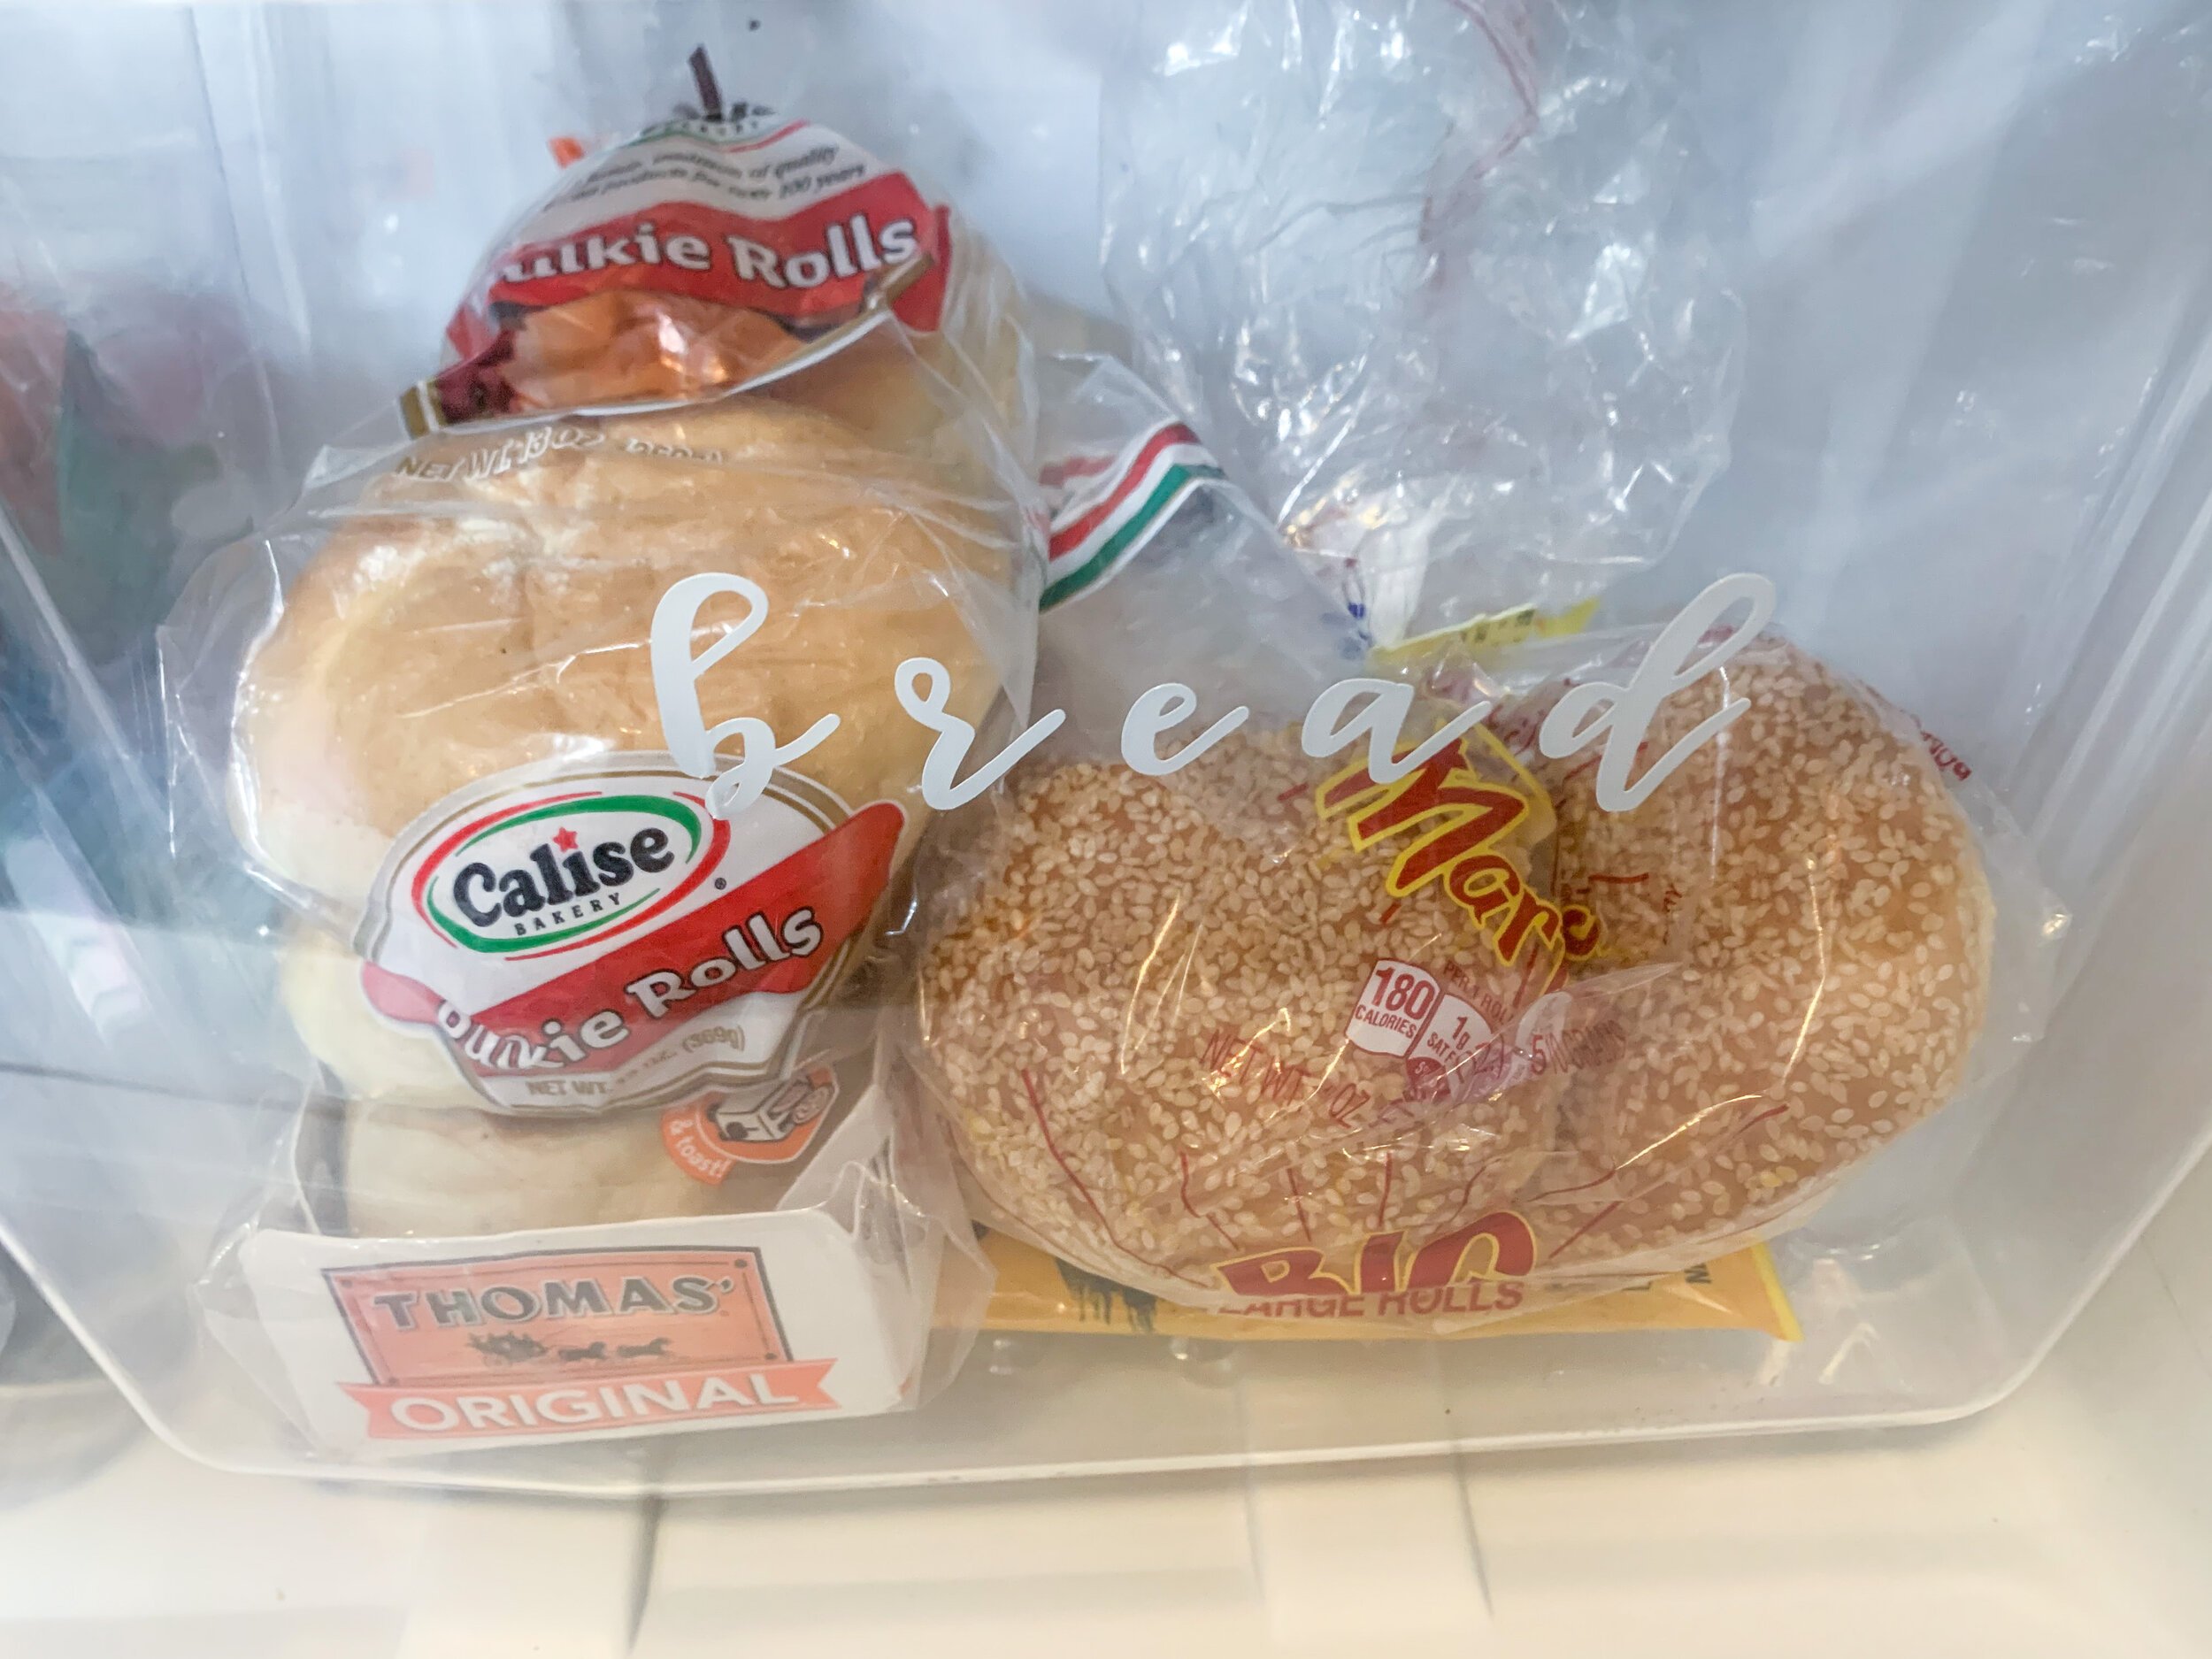
That left the other one empty to which I decided to use as the bread zone. Now I realize that not everyone puts their bread in the fridge (years of living by the ocean put me in this habit to prevent staleness) so this might not even be a zone for you! If you do, however, consider one of the drawers as it lets you be flexible with different types of bread - loaves, rolls, tortillas, english muffins, etc.
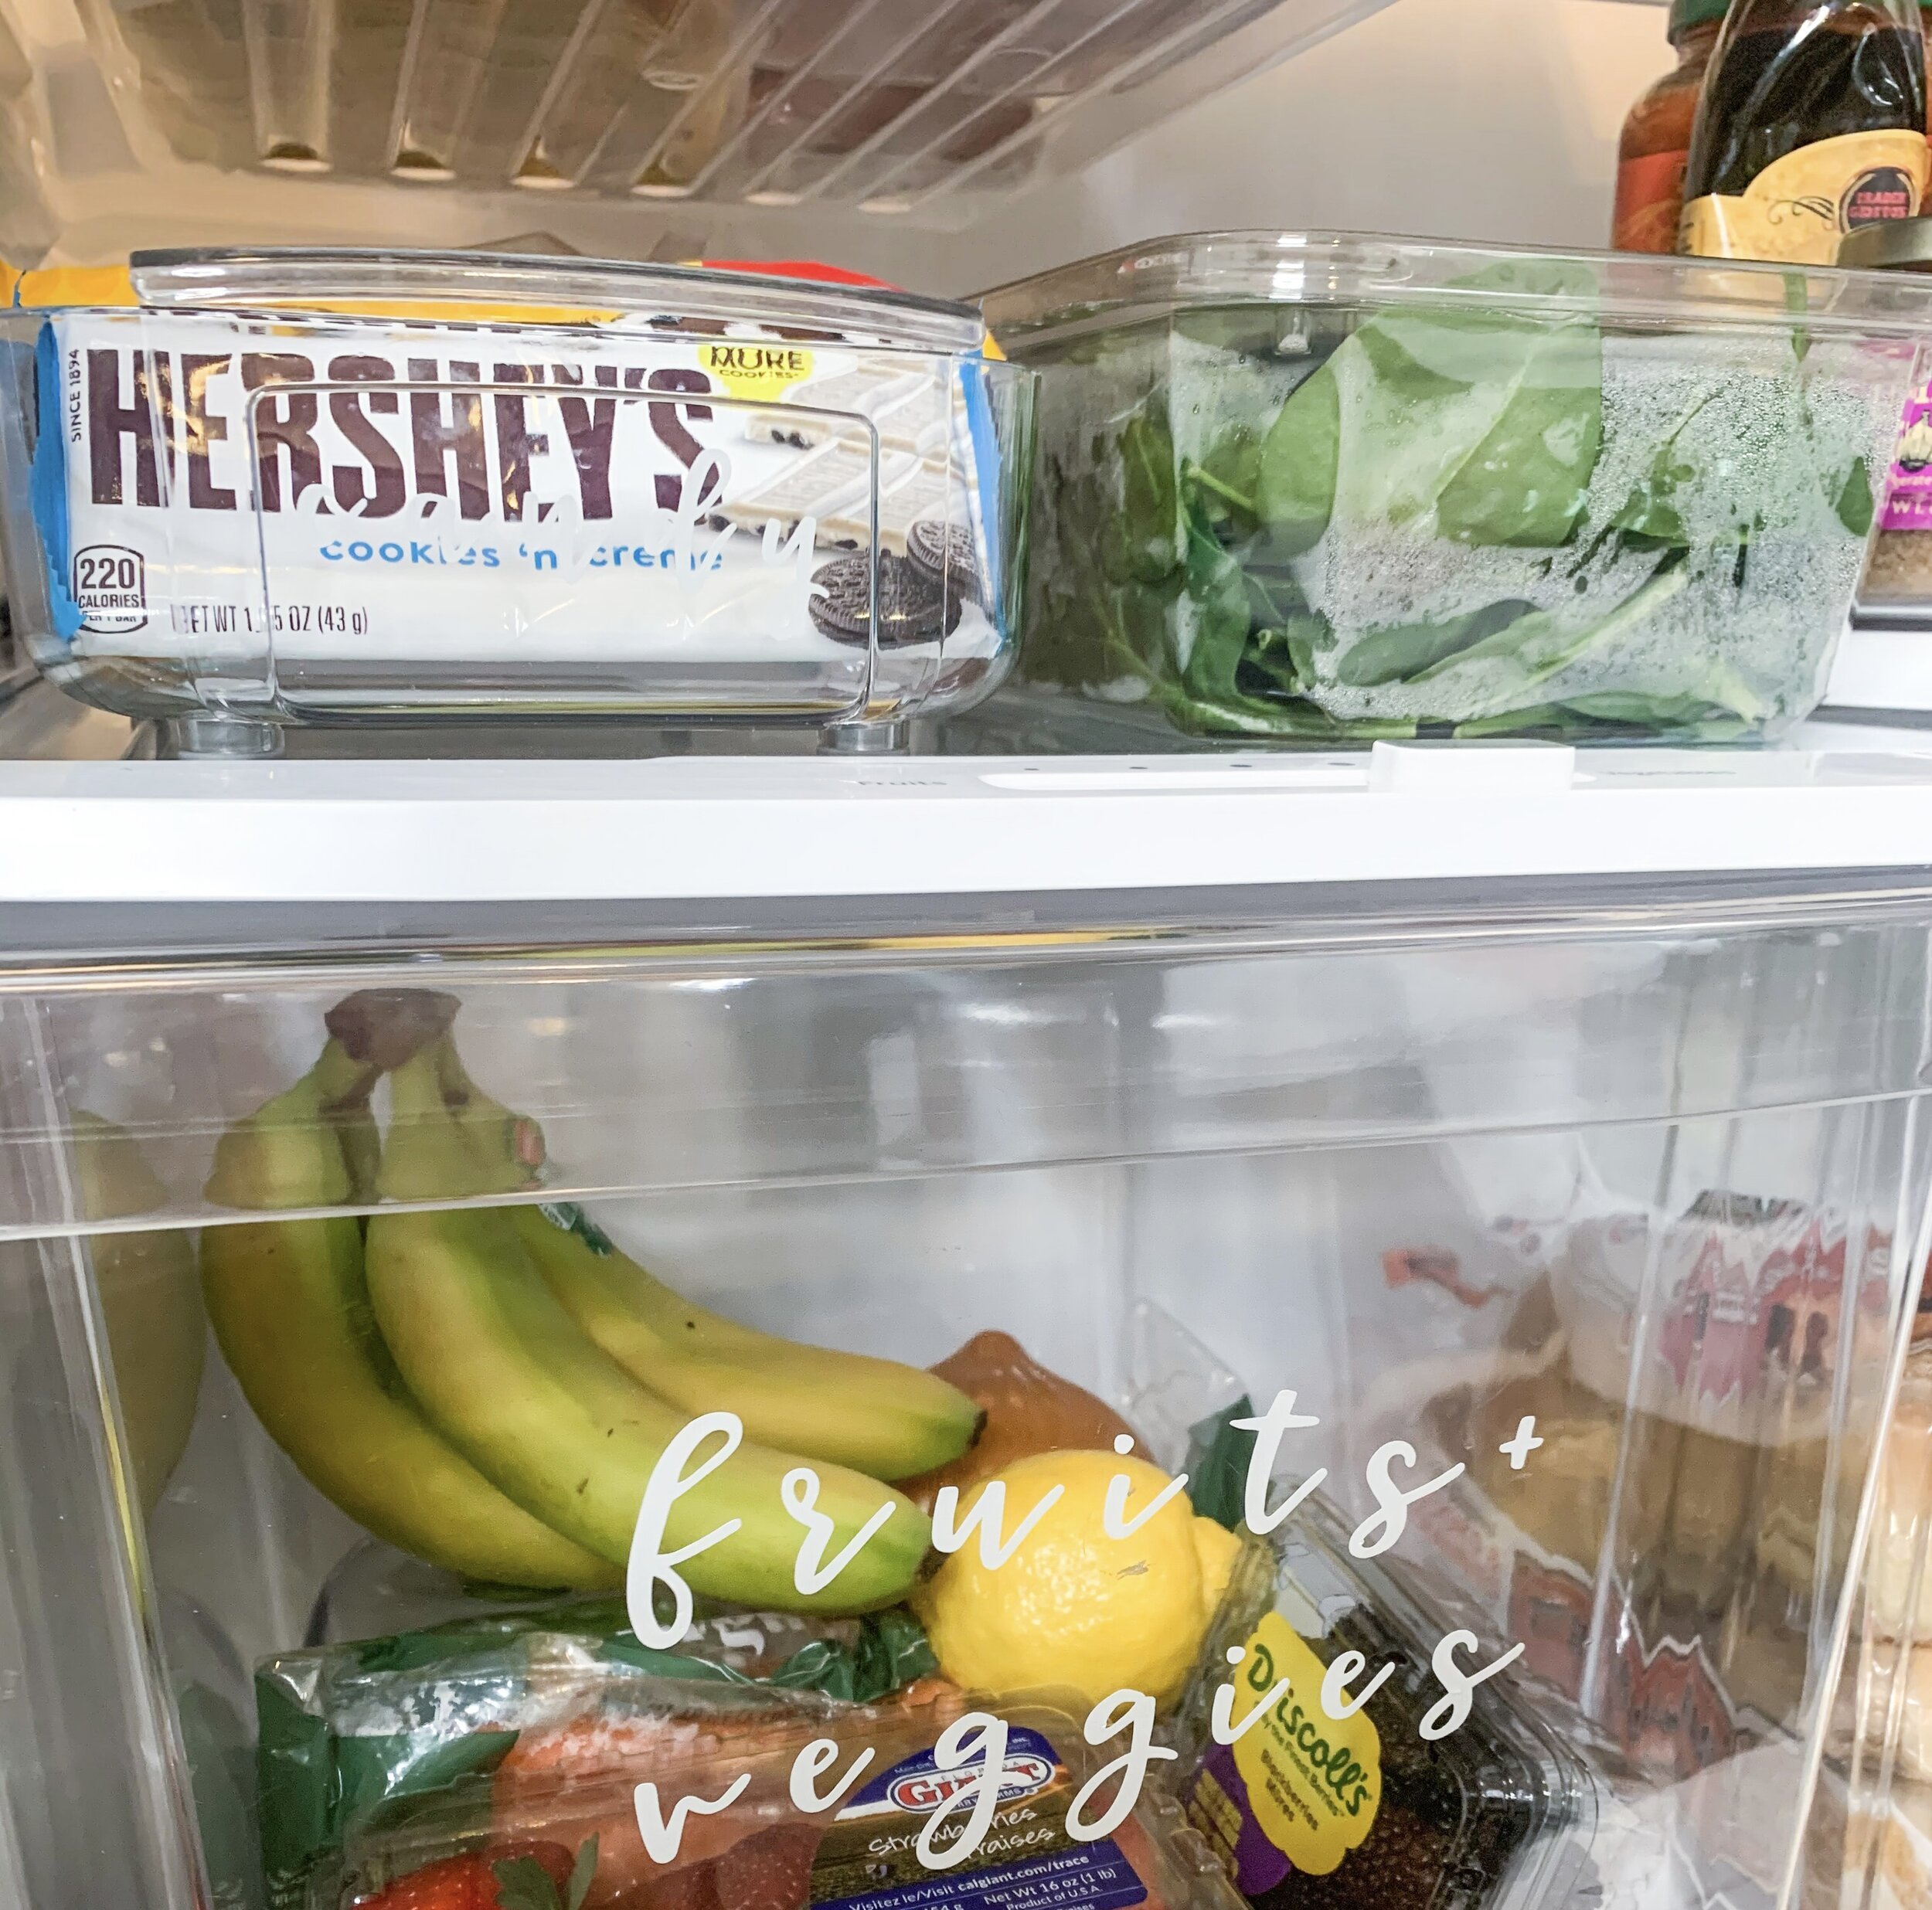
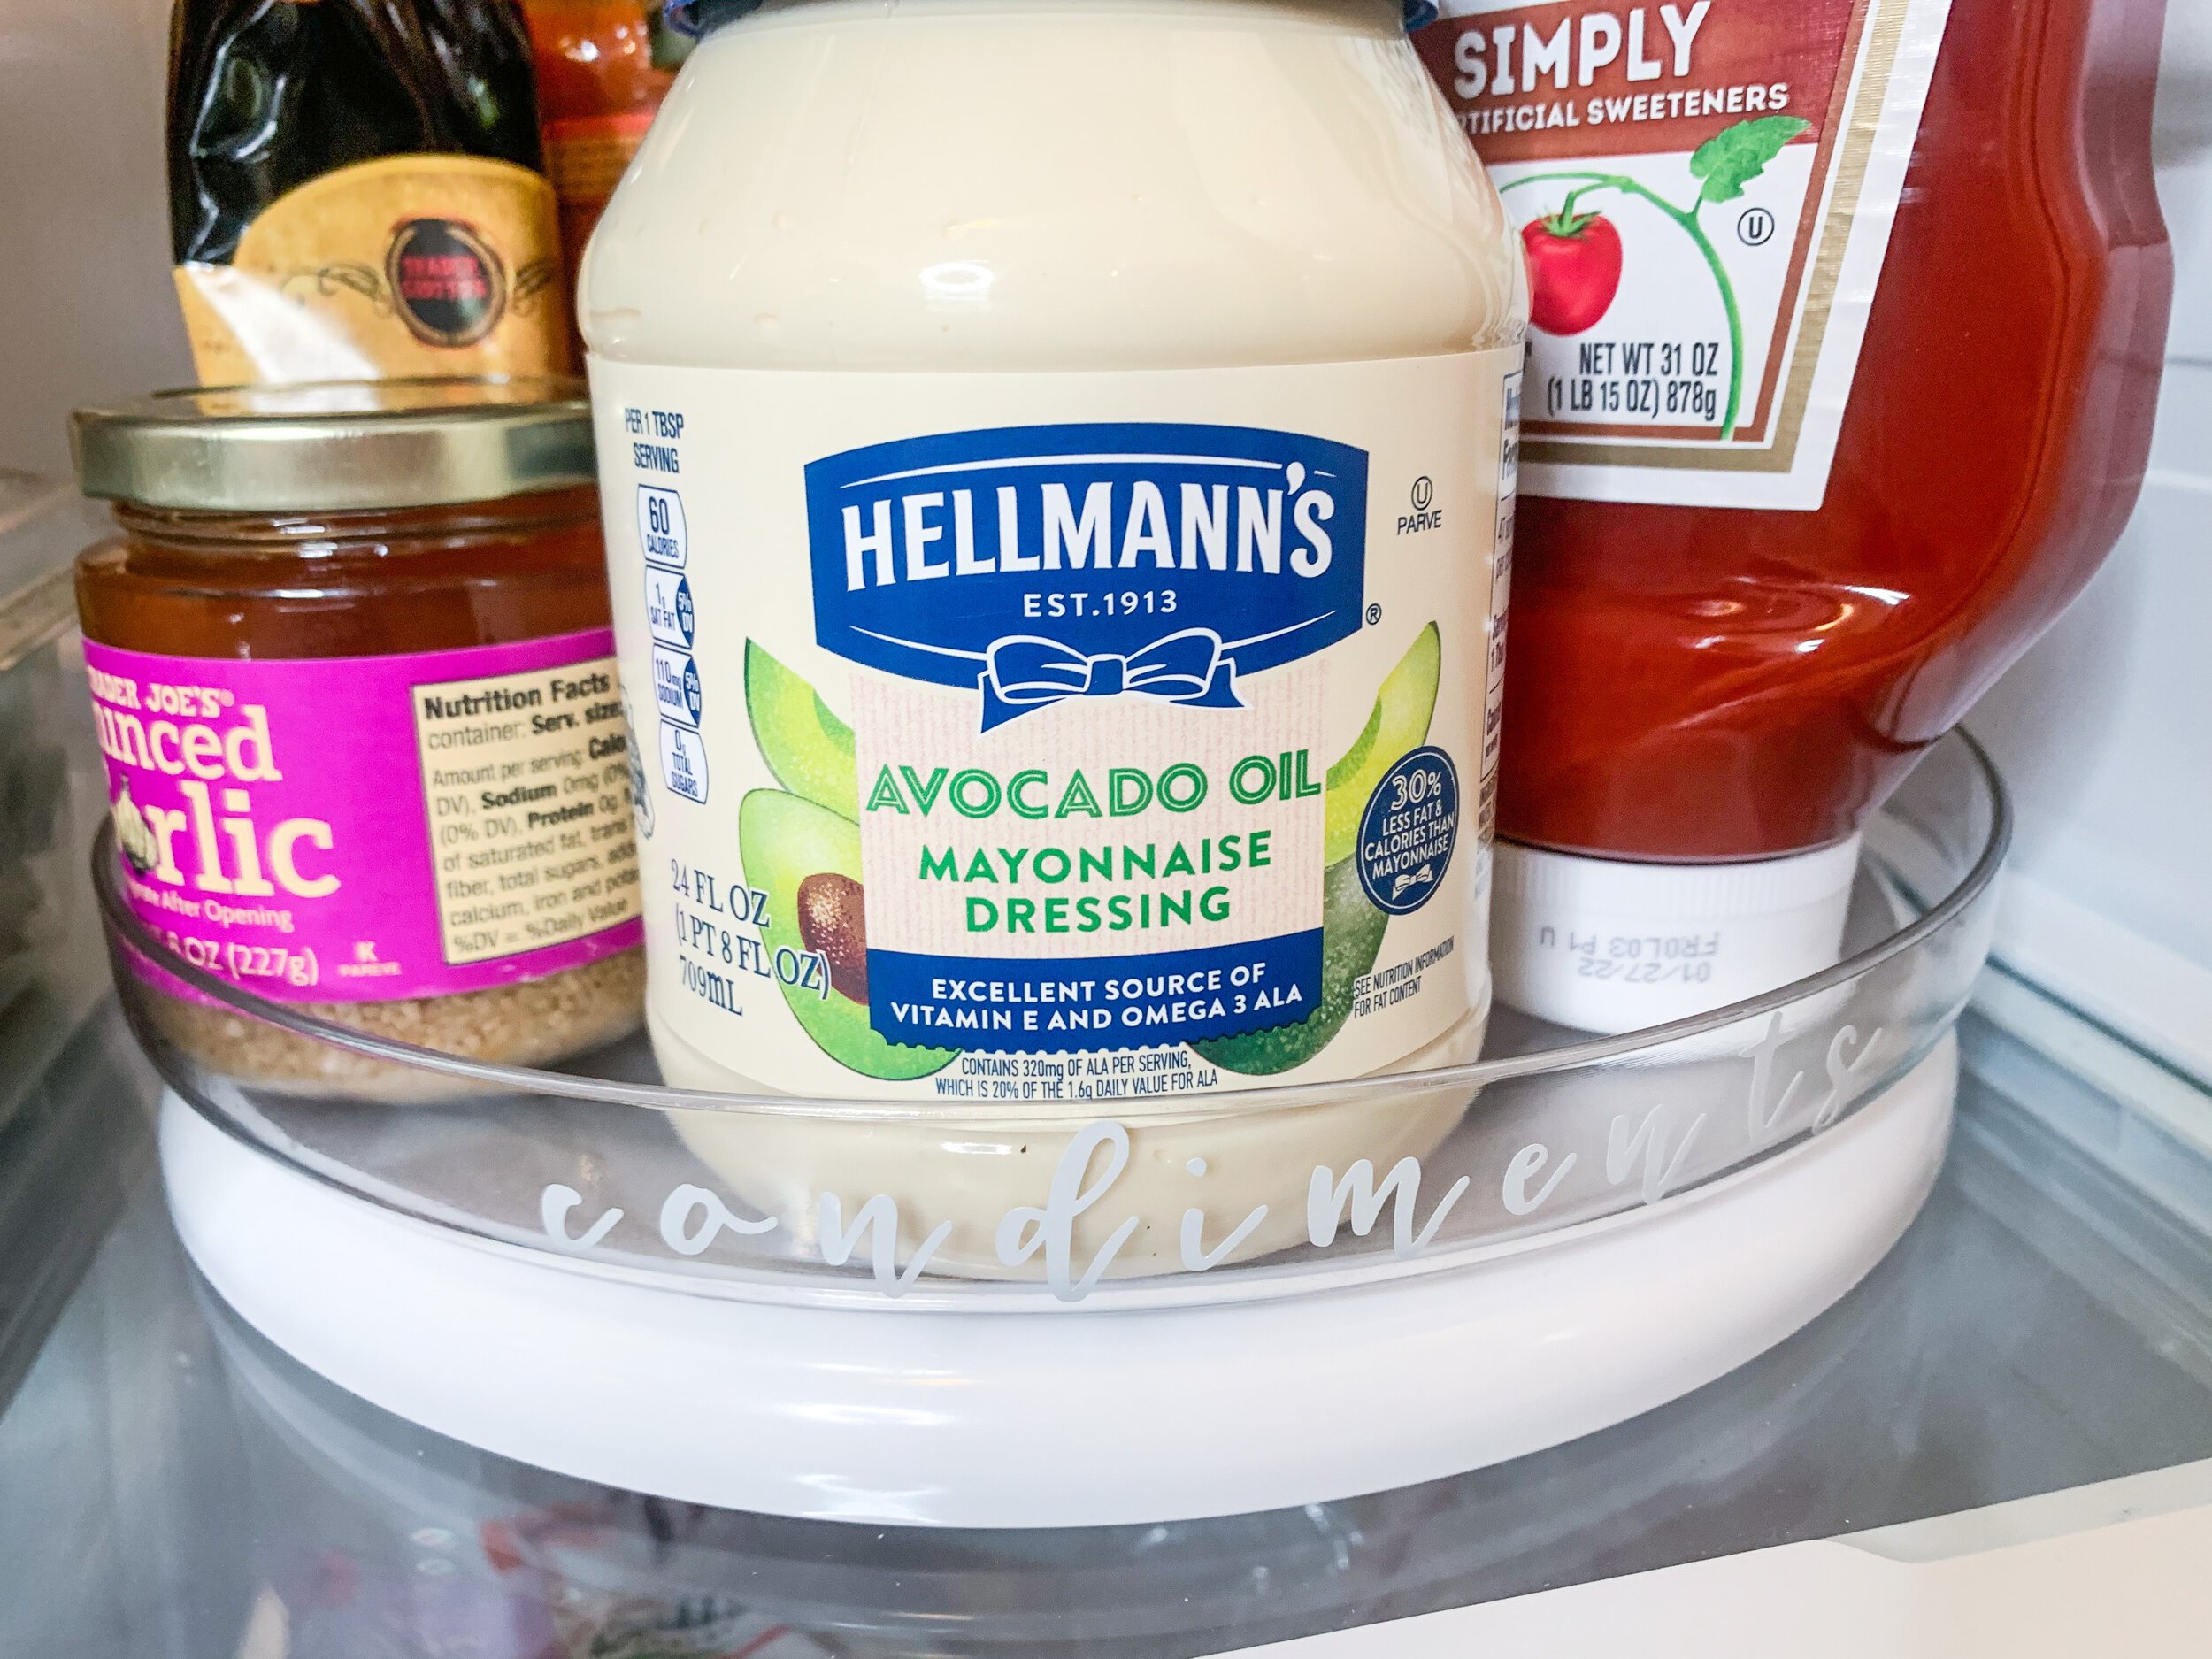
Moving up, I used this YouCopia roll out fridge caddy (in 6 inch but there is also a 4 inch option) to create a “candy” zone. I’m personally not a big sweets person but I like to always have a little chocolate in the fridge and so does he so a small zone is all we needed. If you notice, I placed it under the meat and cheese drawer as nothing in there will be tall so it was the perfect place for it.
I just want to notate the spinach chilling next to the candy. Maybe it’s psychological, but really it’s because I didn’t want to squish the rest of the produce. I buy this for smoothies so after a day or so, it will live in my freezer and that space will open up for leftovers/prepped food (more on that later).
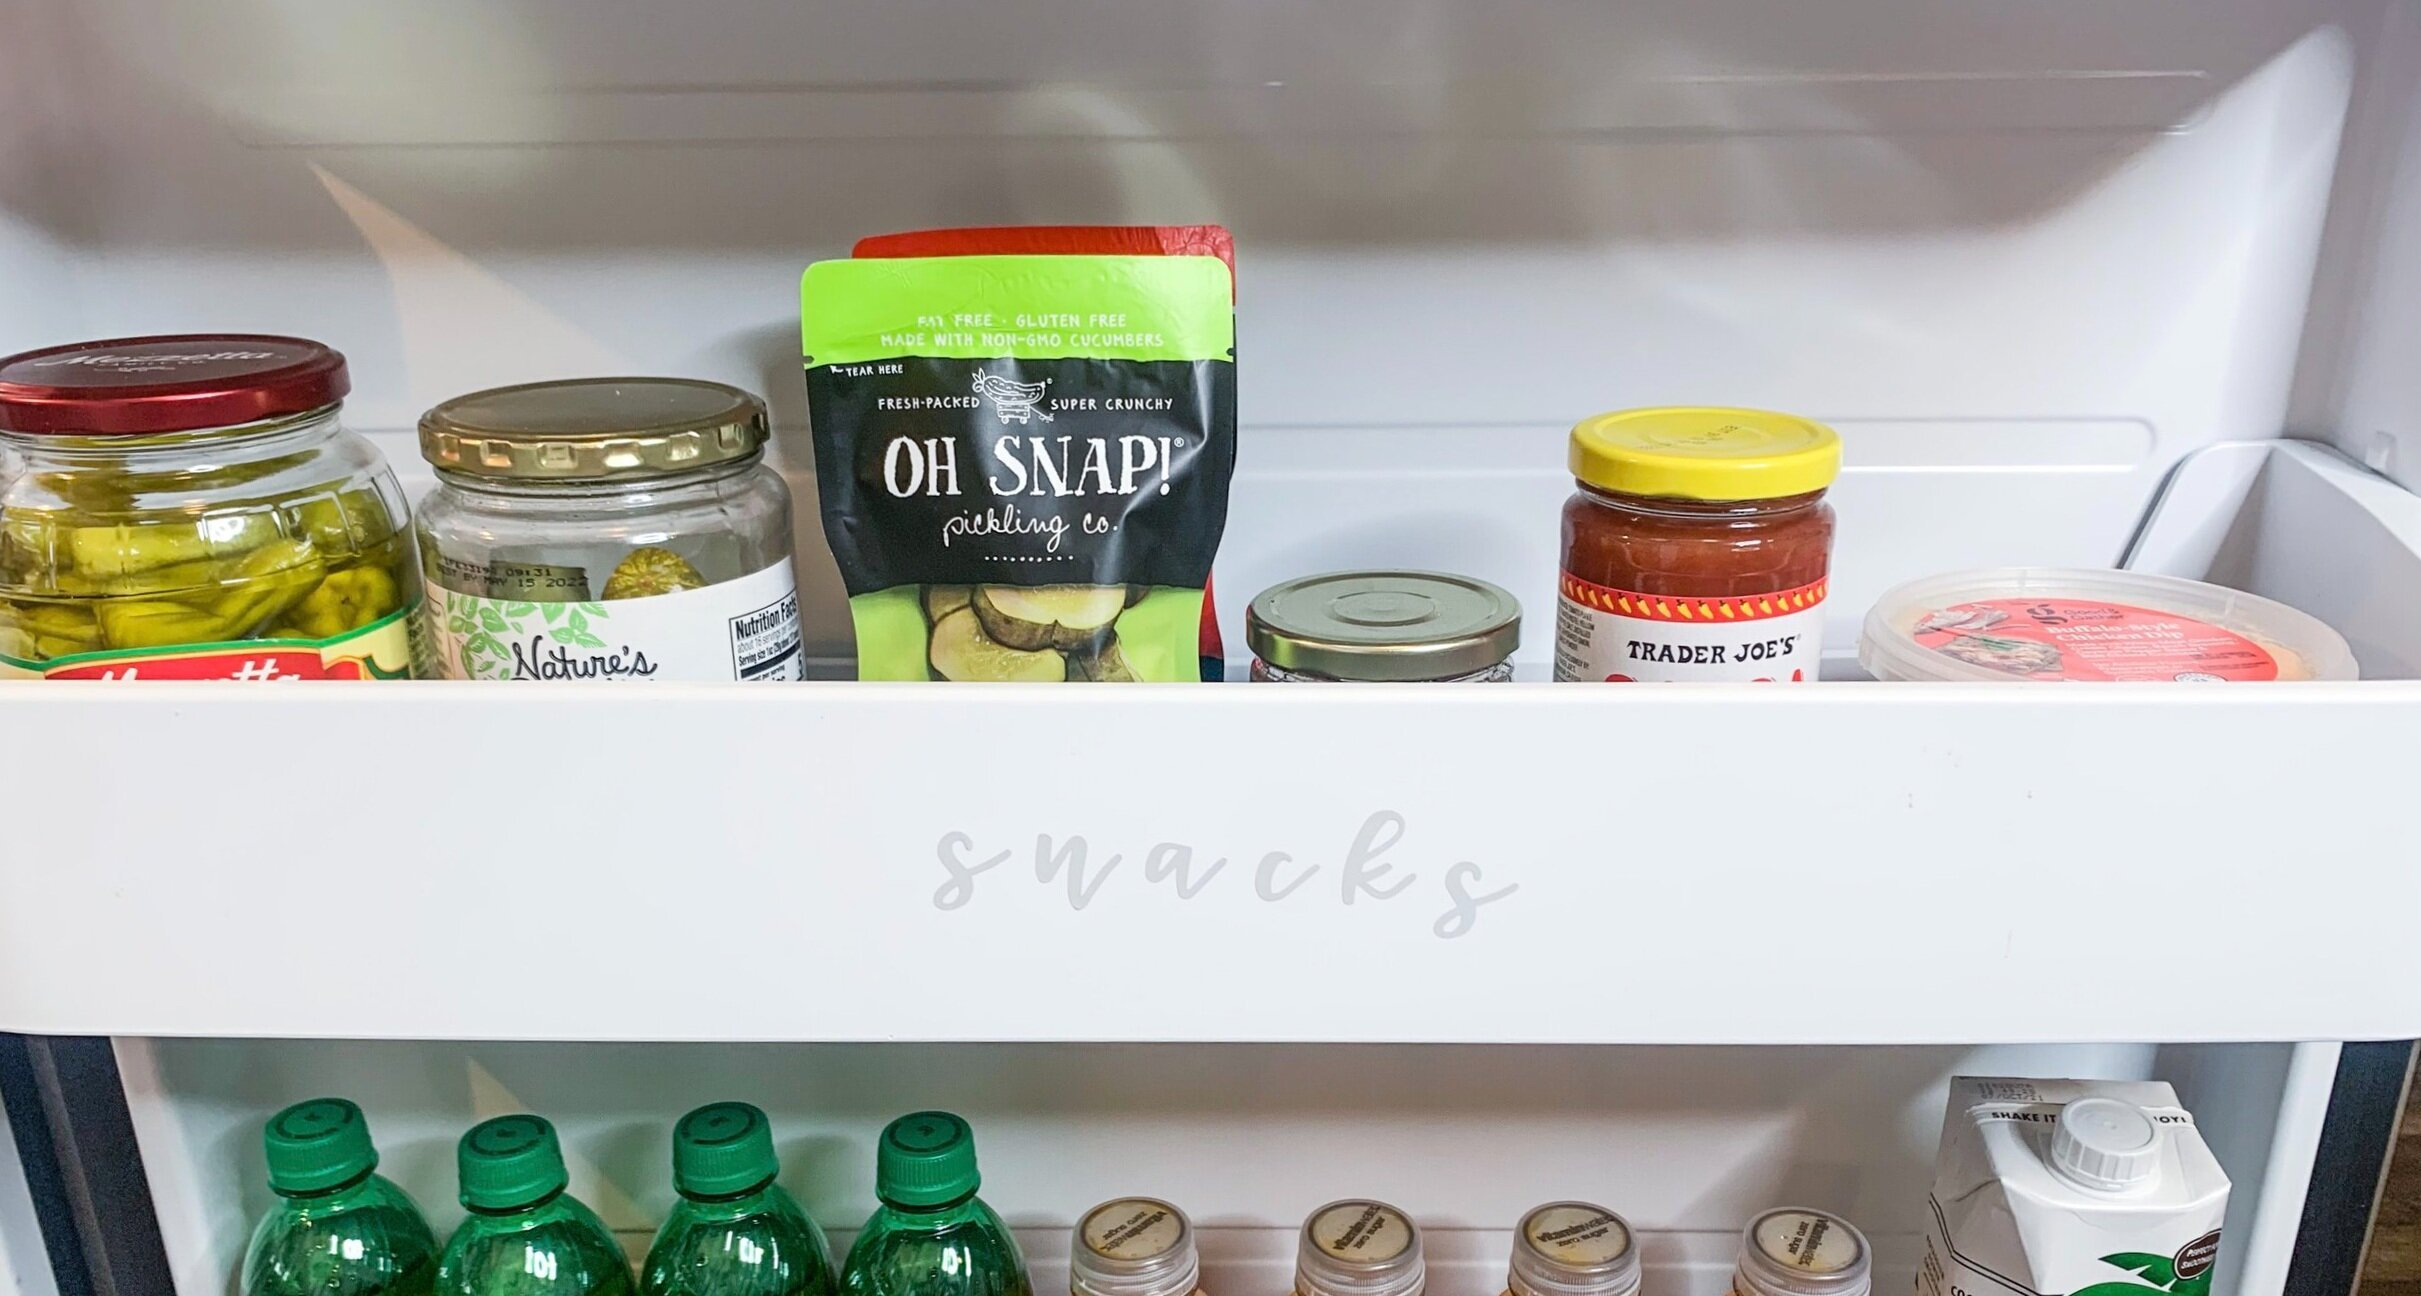
Moving back to the door, on the second shelf, I decided to label snacks. I actually struggled with this area more than any because originally I had things like pasta sauce there. I swapped that out for salsa and hot pepper jelly (which were originally on the condiment turntable) because I use those more for snacky snacks than anything else. Other odd shaped items, like hummus and pickle pouches, also went in the door along with jars of pickles and pepperoncinis because they get eaten as snacks too.
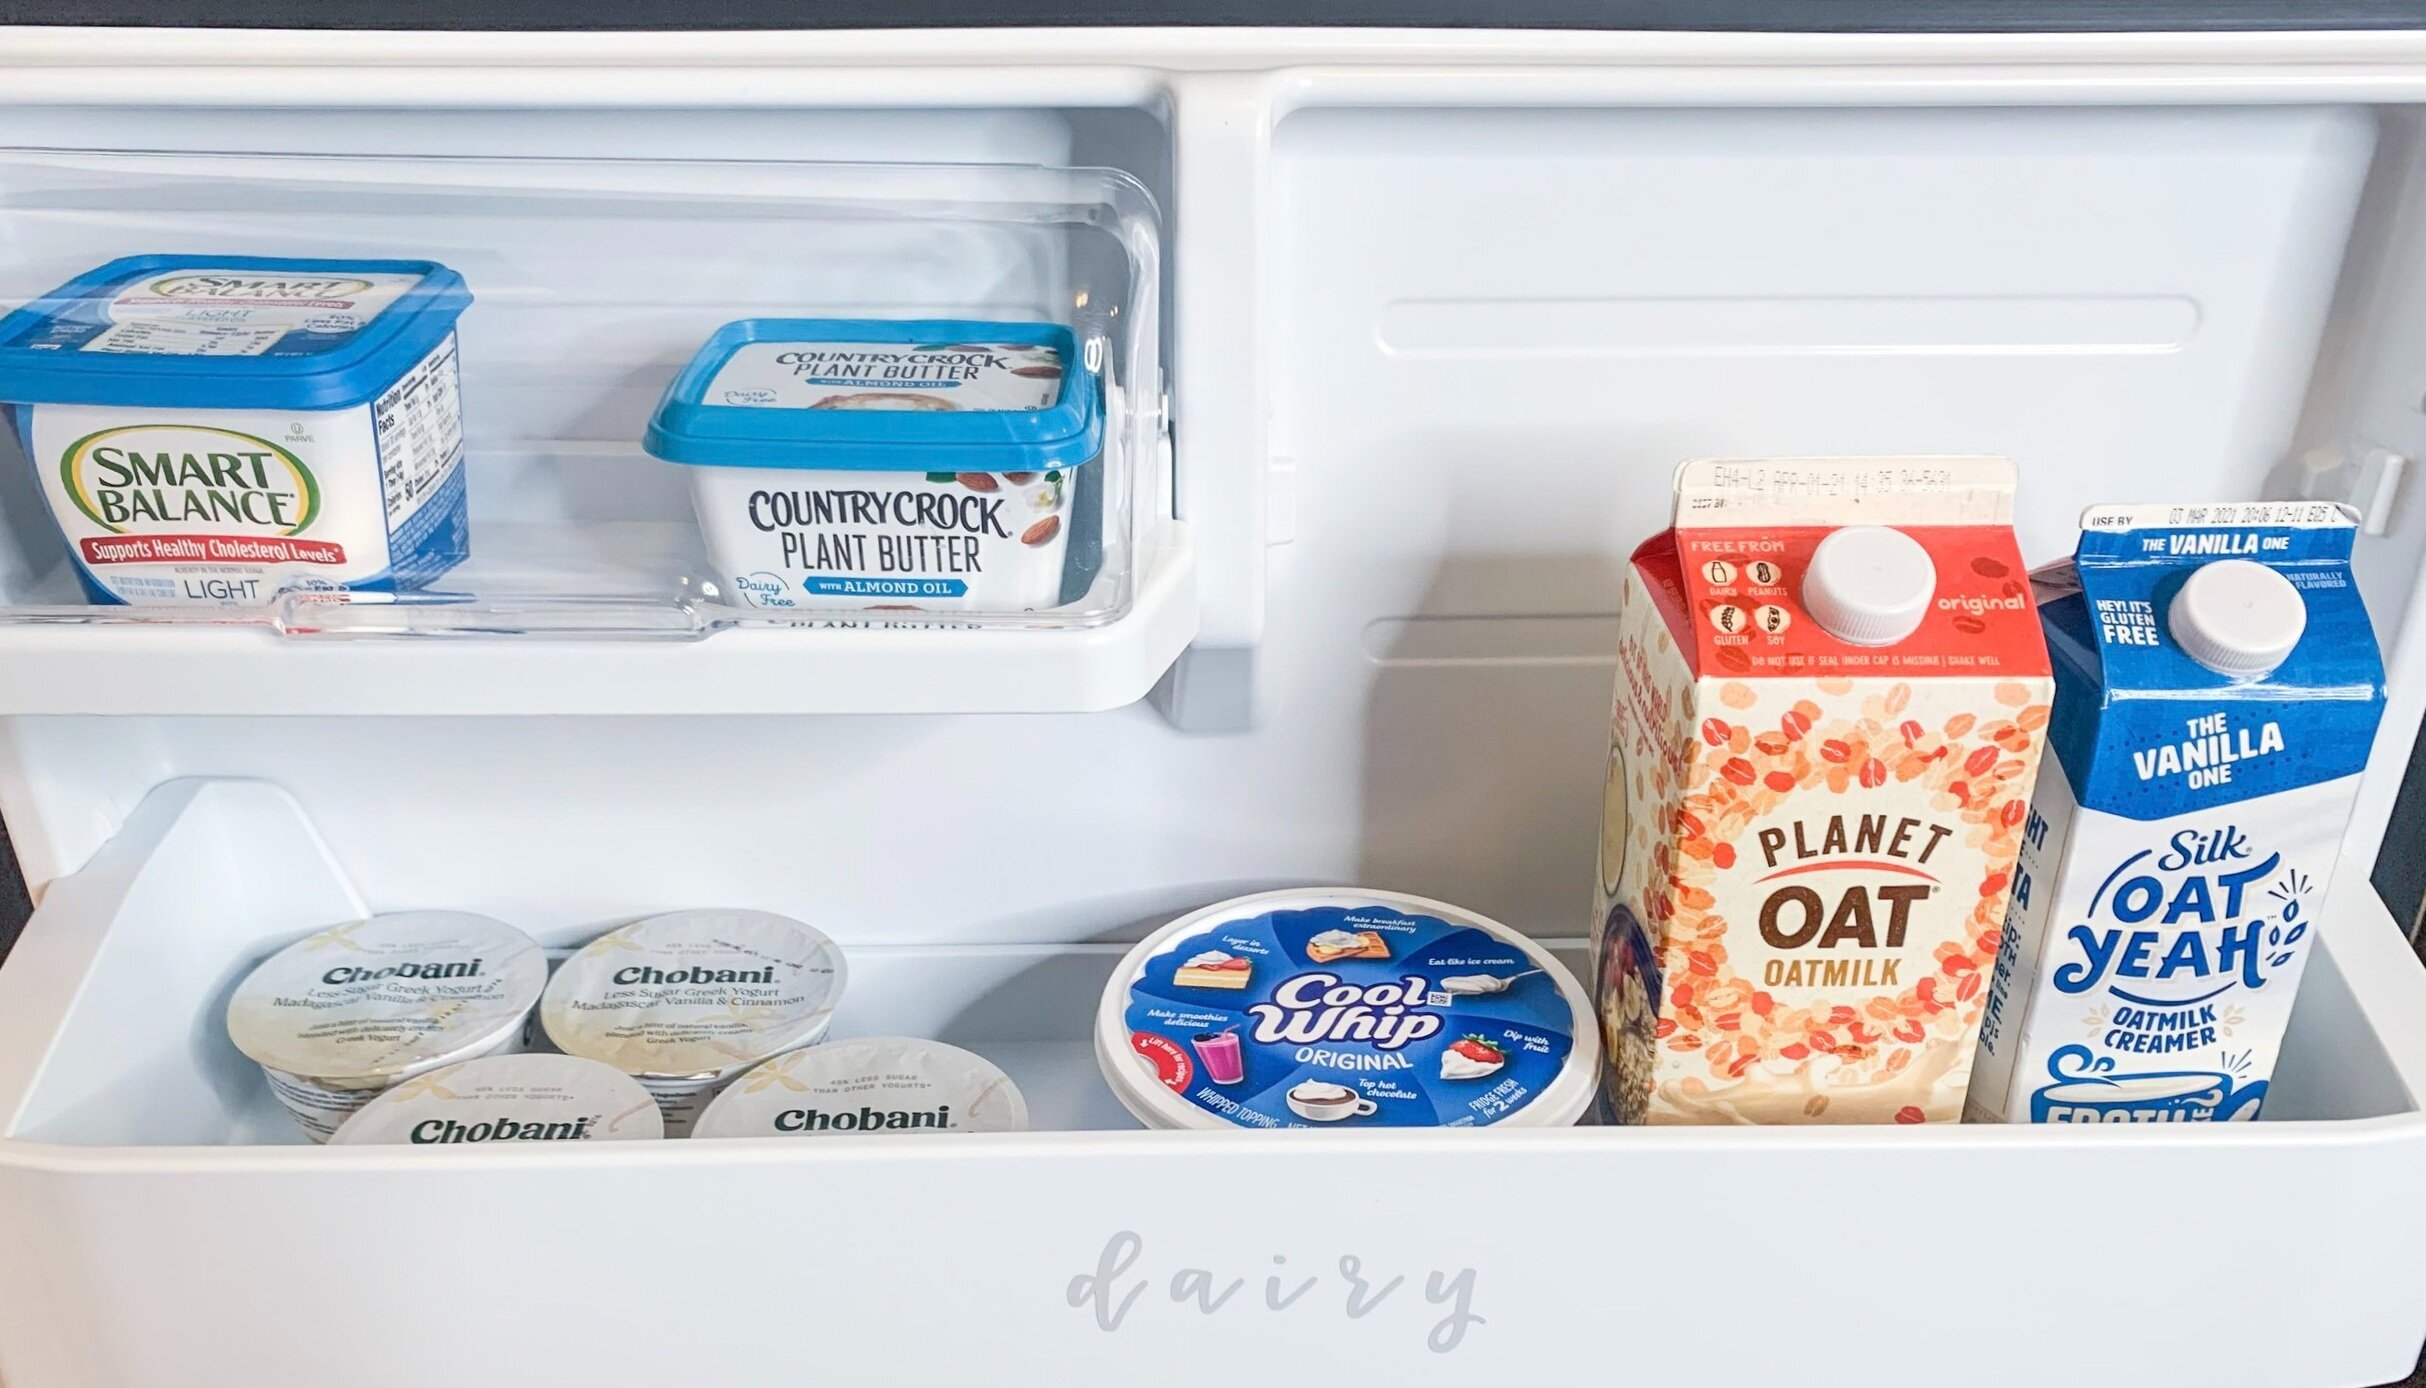
The dairy zone above was decided because the milk and coffee creamer were too high to really fit elsewhere inside the fridge and they’re also reached for often. Even though yogurts are considered snacks, they fit fine under the butter drawer and are right above the other snacks anyway. And Cool Whip is also stored there because, well, it’s dairy and also maybe a snack sometimes #nojudgement
The meat and cheese drawer is kinda self explanatory. There’s only two of us so the cold cut situation doesn’t get too far out of hand and we go through things like bacon pretty quickly.
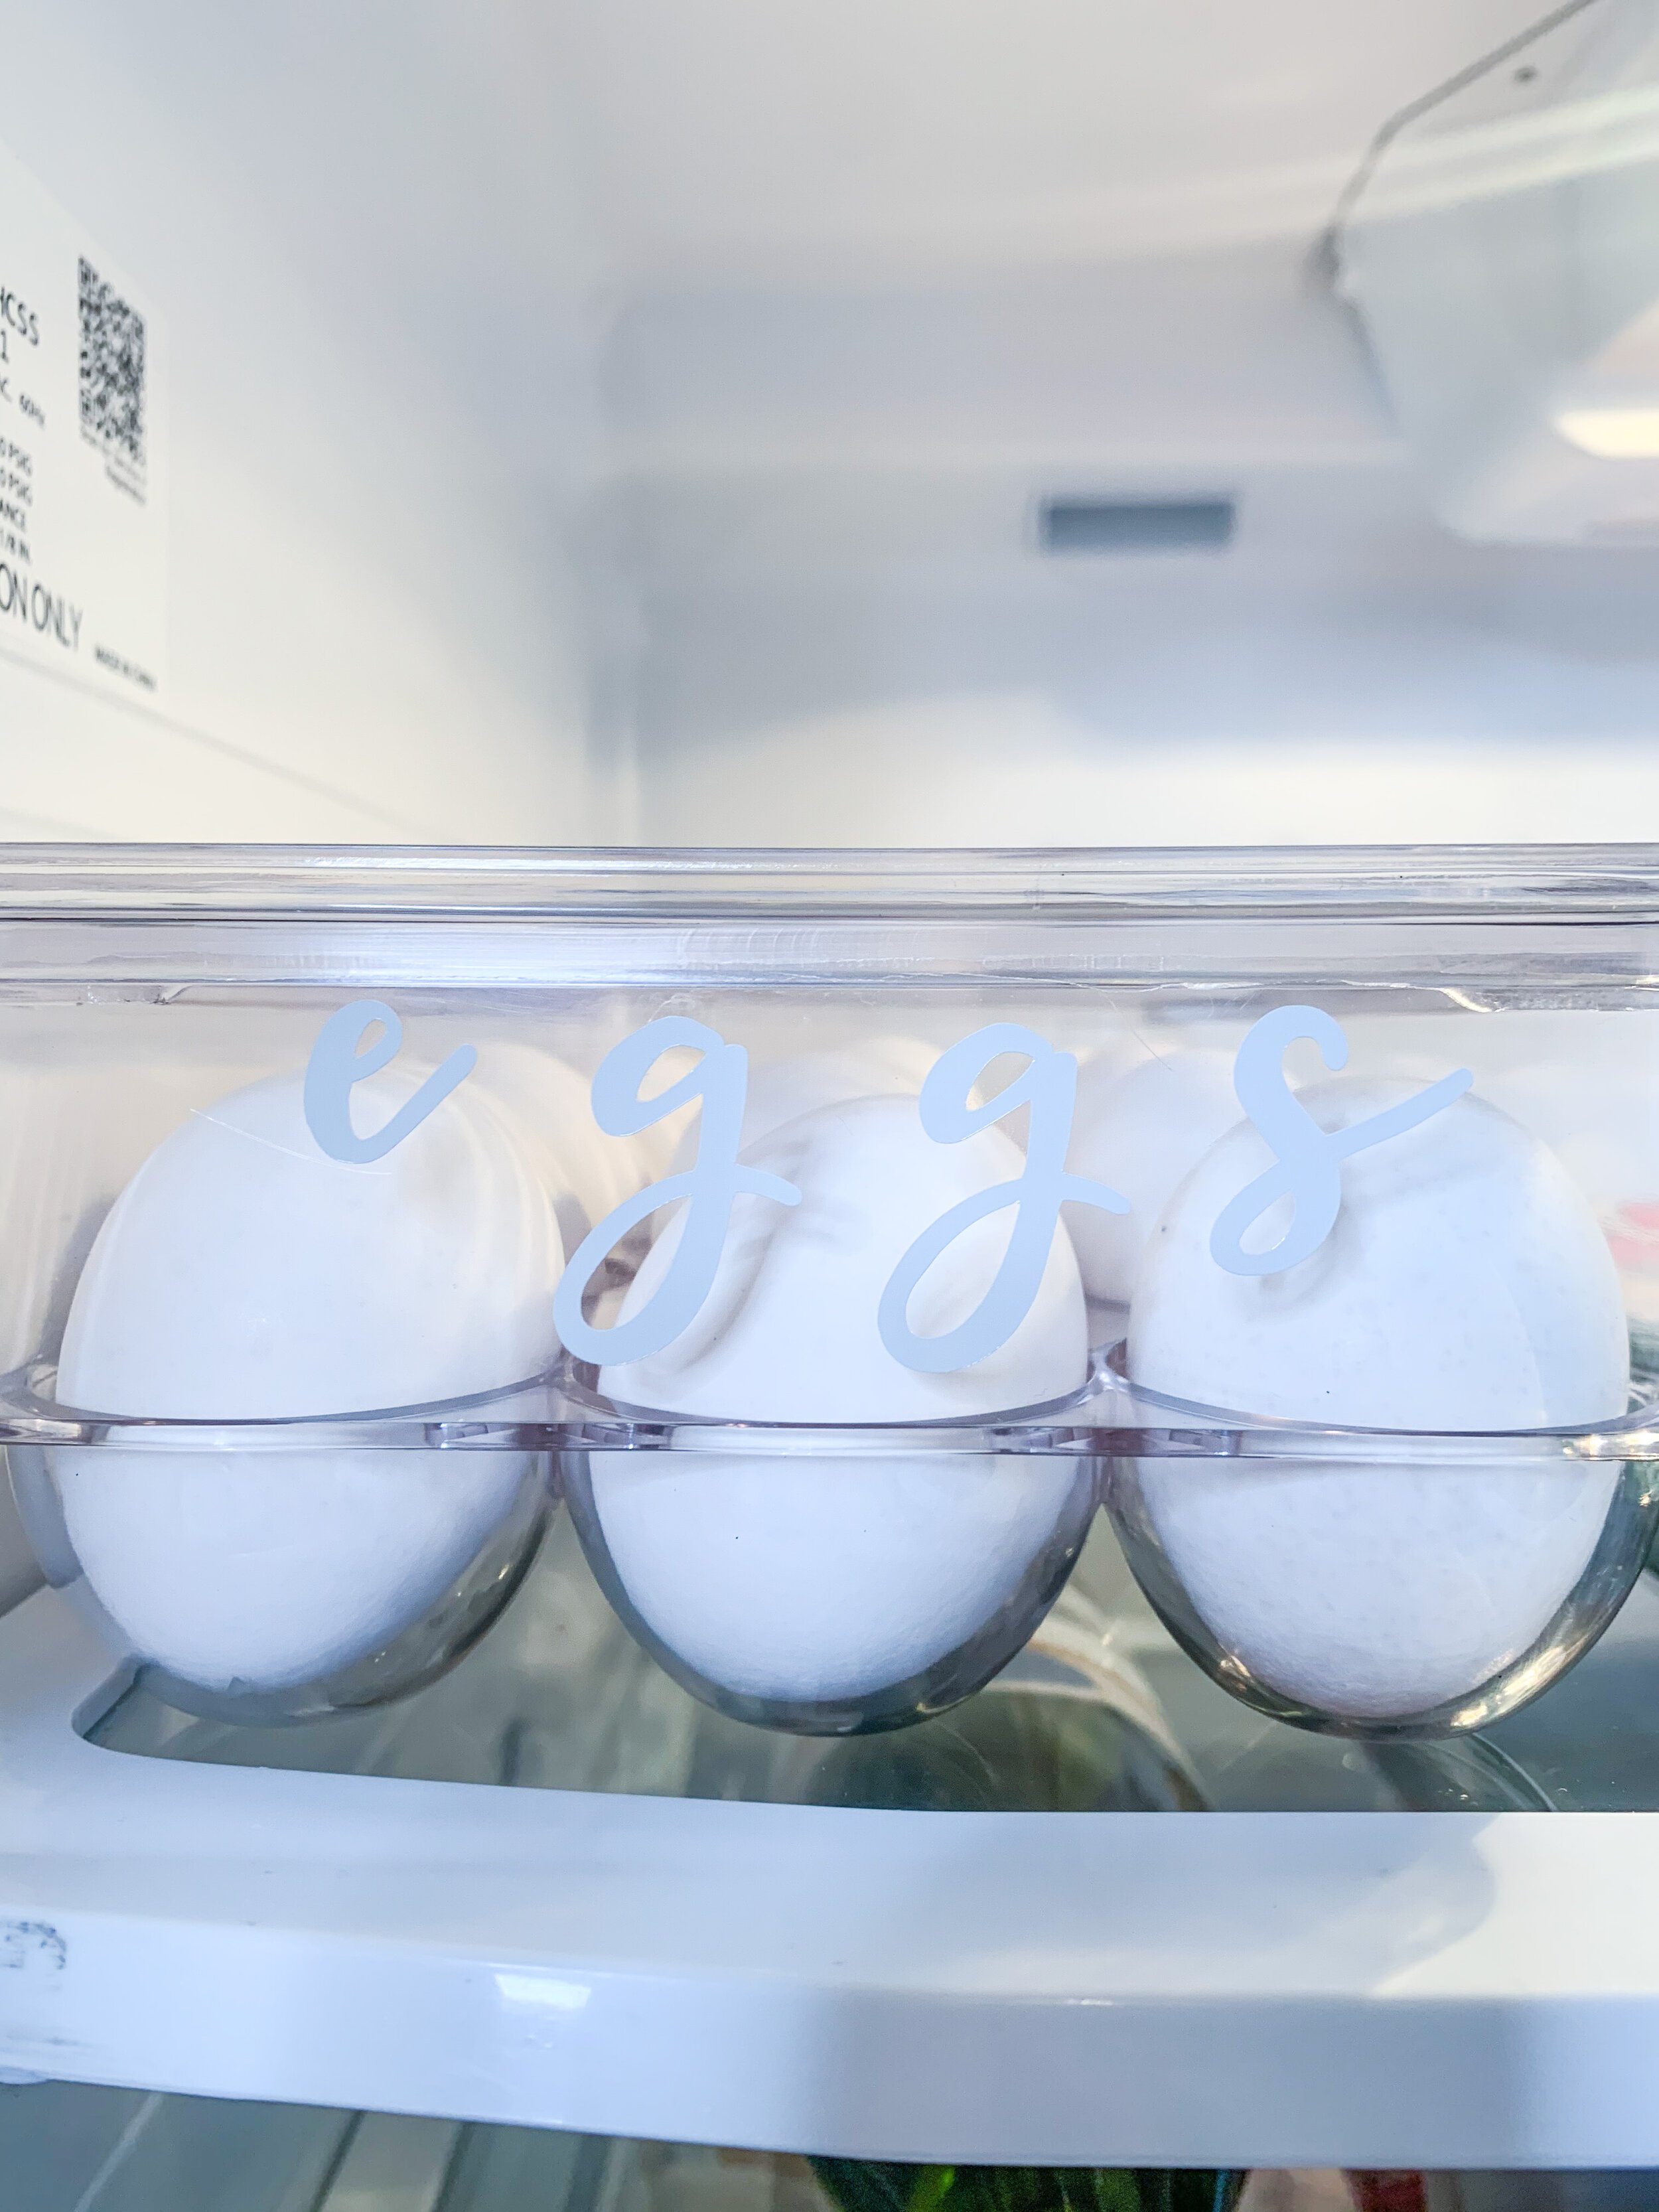
The fragile eggs were placed in this organizer that I found at a local HomeGoods. IDesign makes a very similar one that you can find here. Both hold 21 eggs which I was confused over at first but then realized if you usually buy 12-18 and want to restock before you’re done with the eggs, you have some wiggle room.
Speaking of wiggle room…you can’t see it all too well, but there is a large pizza crust smack in the middle of the top shelf. It didn’t fit in with the bread and we intend to use it very soon so that zone will be dedicated to things like this, much like the leftover zone. When organizing your fridge (similar to your closet!), be sure to leave yourself some space for things that are too large to fit in zones or are excess for a party or dinner that night or, as I mentioned, leftovers. Don’t cram it full of zones and then have nowhere to store the extra/temporary stuff.
Lastly, our Brita didn’t fit height wise on the top shelf (and I would have to rearrange the entire fridge to make it happen) but we were thinking of having a water system installed anyway. So, in the meantime, the Brita is living in the smaller side of the double sink and we’re using it to refill the pitcher that does fit on the shelf.
And there you have it! I hope that by me explaining the thought process behind how I organized my fridge, you get some ideas for your own. If nothing else, remember the most important rule: create zones. This will go a long way in helping the fridge stay as tidy as possible.
One more thing, I created these custom labels for my fridge using my Cricut Joy machine which, I’ll admit, requires some patience!
PS I have an Etsy shop now if you’re looking for gifts for that organized person in your life!
*Disclosure: I only recommend products I would use myself and all opinions expressed here are my own. This post may contain affiliate links that at no additional cost to you, I may earn a small commission.